Grok Imagine Image API: Generate Your First Image
Use the Grok Imagine Image API with curl and Python. Set quality and resolution, save the returned image, and check common integration mistakes before scaling.
 Ofox
Ofox 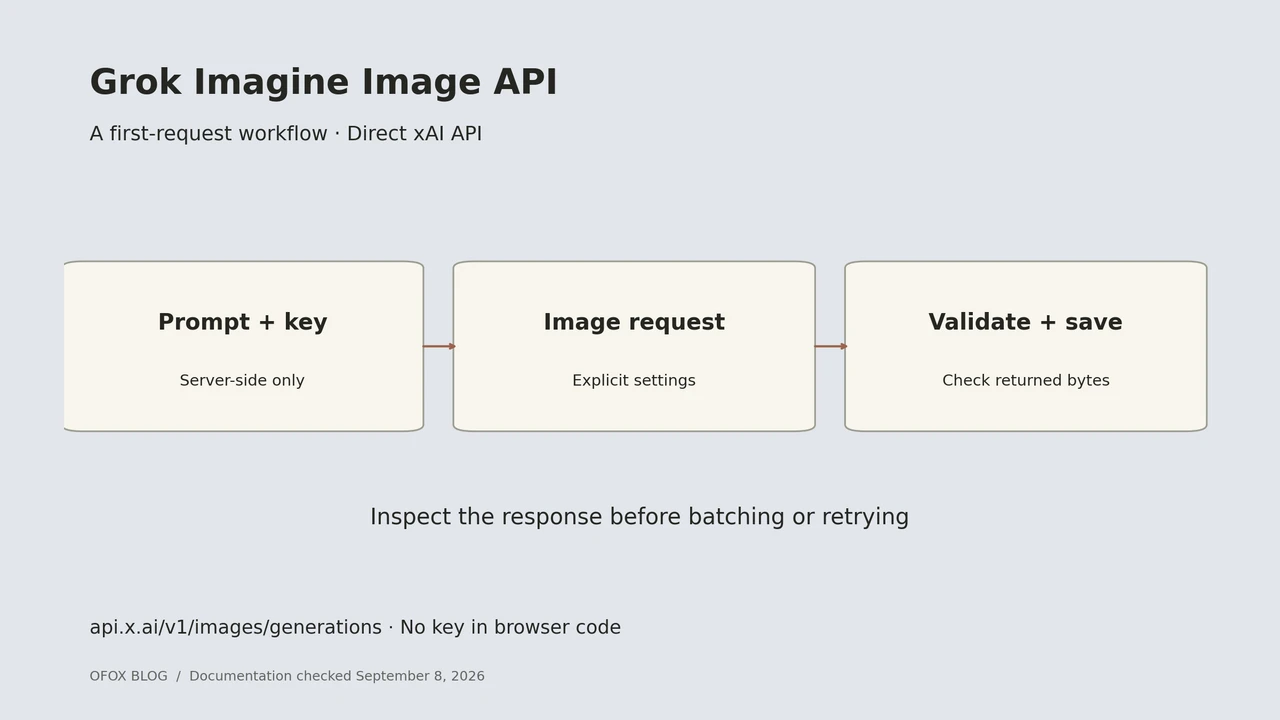
To use the Grok Imagine Image API, send a prompt and the model identifier to xAI’s image-generation endpoint, then save the returned image. Start with one output and explicit settings so you can inspect the request before adding batching or an editing workflow.
The examples below target the direct xAI API and grok-imagine-image-2.0. They follow the public interface checked on September 8, 2026. They are documentation-based examples, not a claim that a paid generation was run for this article. Source: xAI image generation guide.
You need: an API key with access to the selected service, a server-side runtime, and a way to store the resulting asset. An app subscription or a key issued by another supplier should not be assumed to authenticate a direct-xAI request.
Access note: this guide covers the direct xAI API. Grok Imagine is not currently listed in Ofox’s model catalog. An Ofox API key cannot be used for the direct-xAI examples here.
Contents: curl, Python, settings, checks, FAQ.
Send one image request with curl
Set XAI_API_KEY in your environment through your normal secret-management process. Run the request from a terminal or backend, not from public browser code.
curl --fail-with-body --silent --show-error \
  --max-time 180 \
  https://api.x.ai/v1/images/generations \
  -H "Authorization: Bearer $XAI_API_KEY" \
  -H "Content-Type: application/json" \
  -d '{
    "model": "grok-imagine-image-2.0",
    "prompt": "Studio photograph of a matte blue ceramic cup on a pale stone shelf, soft light from the left, no lettering",
    "n": 1,
    "aspect_ratio": "1:1",
    "resolution": "1k",
    "quality": "low",
    "response_format": "url"
  }' \
  -o grok-image-response.json
The prompt is an original example brief, not a measured best-performing prompt. The timeout is an application choice, not a provider latency guarantee. Inspect the saved JSON and the command’s exit status before treating the request as successful.
Preserving the response makes debugging easier than immediately piping an assumed URL to a downloader. If the request returns an error object, you can inspect that object instead of trying to fetch a missing address.
Generate and save an image with Python
The following example uses requests rather than an SDK wrapper. It asks for base64 output, checks that image data exists, and saves the bytes. Install requests in your project’s environment before running it.
import base64
import os
from pathlib import Path

import requests

payload = {
    "model": "grok-imagine-image-2.0",
    "prompt": (
        "Studio photograph of a matte blue ceramic cup on a pale "
        "stone shelf, soft light from the left, no lettering"
    ),
    "n": 1,
    "aspect_ratio": "1:1",
    "resolution": "1k",
    "quality": "low",
    "response_format": "b64_json",
}
response = requests.post(
    "https://api.x.ai/v1/images/generations",
    headers={"Authorization": f"Bearer {os.environ['XAI_API_KEY']}"},
    json=payload,
    timeout=(10, 180),
)
response.raise_for_status()
body = response.json()
images = body.get("data", [])
if not images or not images[0].get("b64_json"):
    raise RuntimeError("No base64 image returned; inspect response metadata")
image_bytes = base64.b64decode(images[0]["b64_json"], validate=True)
# Keep raw bytes until your image decoder identifies the returned format.
output = Path("grok-image-output.bin")
output.write_bytes(image_bytes)
print(f"Saved {len(image_bytes)} bytes to {output}")
The .bin extension is deliberate: it avoids claiming a format from an unchecked payload. In your application, pass the bytes through an image decoder, verify the format and dimensions, and then store them using the correct extension and media type.
The direct interface also supports URL output. Those returned image URLs are temporary, so persist the asset promptly if your application needs to keep it. Source: response formats.
Choose your settings before batching
Treat the output configuration as part of the creative brief. Specify the target shape, the budgeted quality, and the expected number of outputs before expanding a single-image experiment into a background job.
A practical record for each generation is:
| Field to record | Why it helps |
|---|---|
| Your own job ID | Connects the request to a user action |
| Model and provider | Identifies what actually produced the asset |
| Requested settings | Explains differences between batches |
| Prompt or prompt-template version | Lets you reproduce the brief |
| Asset storage location | Makes the result retrievable later |
| Accepted or rejected by reviewer | Separates delivery from usefulness |
Keep image generation and editing as separate operations in your design. The latter adds supplied images and needs its own request schema and budget. Do not append an arbitrary image field to a working generation request and assume every API provider will interpret it the same way. Source: image editing documentation.
Check the request before retrying
Start with the evidence you have. Did the client fail to connect, did the server return an HTTP error, or did a successful response contain unexpected content? Those are different debugging branches.
If authentication fails, inspect the destination host and the source of the key. If validation fails, reduce the request to its minimal required fields and compare the rejected parameter against the provider’s schema. If a network timeout occurs after submission, the client may not know whether generation completed; do not automatically repeat the paid operation without investigating.
For a production worker, keep the original response metadata with the job record and make repeated submissions deliberate. Avoid logging authorization headers. For moderation-related outcomes, inspect the documented response and adjust the request to meet the service’s rules; a retry loop is not a solution to an unsupported request.
For broader image-generation troubleshooting, see our image generation failures guide. Model-specific parameter names should still be taken from the service you are actually calling.
Add the API to an existing application
Put provider-specific payload construction behind a small adapter. Let the rest of your application describe the task in terms such as prompt, reference asset, and desired output shape. Then have the adapter validate and translate those fields into the chosen API’s schema.
That design makes a later provider comparison easier. You can preserve the product brief while changing the adapter, rather than scattering model-specific fields throughout the application. Our FLUX API workflow guide gives another model family to consider when defining those boundaries.
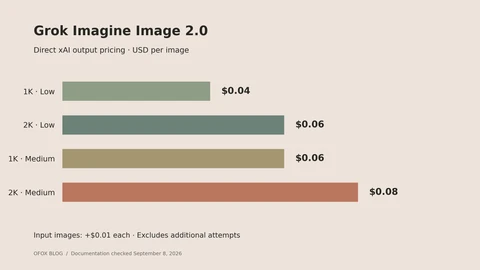
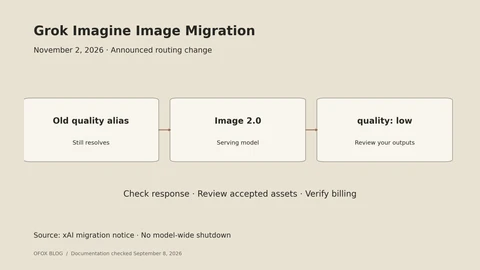
Before increasing volume, use our Image 2.0 pricing worksheet. If you are moving from an older model alias, read the quality-model migration guide.
Frequently Asked Questions
- Which Grok model should I put in this example?
- The example targets
grok-imagine-image-2.0. If you use another provider, select its documented identifier rather than assuming that the direct-xAI name is accepted unchanged. - Can I put the API key in a frontend request?
- Keep the key in your backend and expose an application endpoint with your own access controls. A key embedded in delivered browser code is available to the people receiving that code.
- Why did the example save a binary file?
- It preserves the returned bytes without guessing the encoding. Decode and inspect the image, then save it with the appropriate extension and content type for your application.
- Is the example a benchmark?
- No. It demonstrates a request and response-handling pattern based on documentation. Measure generation time, output quality, and billed cost separately before making production promises.