OpenCode Desktop vs CLI: Which Should You Use?
Compare OpenCode Desktop and CLI by workflow, provider setup and session handoff. Includes a small coding exercise and version-aware troubleshooting.
 Ofox

Choose OpenCode Desktop when you want a visual workspace for sessions and reviewing changes. Choose the CLI when your work starts in a terminal, a remote shell or a repeatable script. You can use both, but matching the project folder, server and model matters more than simply signing in twice.
This is a comparison of two interfaces to OpenCode, not a comparison with OpenAI’s Codex. For that decision, see OpenCode vs Codex CLI.
We checked the current documentation on November 17, 2026 and installed OpenCode CLI 2.3.0 in an isolated directory to verify its version and help output. We also ran the downloadable exercise’s Python tests locally. We did not run a paid model comparison or complete this exercise in Desktop; interface behavior below is documented behavior, not a claim that one interface produces better code. Ofox publishes this guide and provides API access.
Choose by the work you need to finish
| Your next task | Start with | Why | What to check |
|---|---|---|---|
| Explore a local repository and inspect several changes | Desktop | A visual session and diff workflow fits review-led work | Open the intended folder; inspect changed files before accepting them |
| Work over SSH on a development machine | CLI | You can start from the existing remote shell | Credentials, files and tools must exist on that machine |
| Repeat a prompt from a script or CI job | CLI | opencode run avoids opening an interactive interface | Model, permissions, output handling and failure status |
| Prefer keyboard navigation but want an interactive conversation | CLI TUI | The CLI is also an interactive application, not only a scripting command | Terminal rendering and the selected project |
| Change interfaces during one local task | Either, with a deliberate handoff | Current V2 supports a shared local server | Both clients must actually use the same server and project |
| Fix an authentication or provider error | Diagnose the connection first | A different interface does not repair an invalid key or unsupported request | Exact provider, model, endpoint and error |
The OpenCode product page presents Desktop as a workspace with sessions, tabs and diffs, and Terminal as an interface usable from a shell or remote server. Those are useful workflow distinctions. They are not evidence of different underlying model intelligence.
For example, a developer already reading test failures over SSH gains little by moving the task to a local GUI whose filesystem is different. Someone reviewing several local edits may prefer seeing the conversation and changes in a visual workspace. Neither choice removes the need to run the project’s tests.
Check the version before following a setup guide
“Desktop versus CLI” and “OpenCode 1 versus OpenCode 2” are separate comparisons. A version mismatch can look like an interface limitation.
In your terminal, run:
opencode --version
opencode --help
opencode run --help
Our isolated installation returned opencode v2.3.0. Its help lists run, session, service, models, auth and debug. In particular, opencode models in this version has no provider-name positional argument. Do not assume a command copied from an older tutorial is accepted by the current binary.
For a new V2 installation on macOS or Linux with npm, the current installation documentation lists:
npm install -g @opencode/cli
opencode --version
Existing V1 users should first follow the official migration guide. Both generations use the opencode command; blindly installing a second package can replace or conflict with the existing command. Windows users should use the standalone CLI download listed by OpenCode rather than assuming the package-manager instructions apply. Desktop downloads are also available for macOS, Windows and Linux.
V2 retains supported V1 configuration, so adopting V2 does not require rewriting every file. However, plugins and server integrations have breaking changes. Native V2 provider entries use providers, package and settings; older entries use provider, npm and options. Keep each nested provider entry in one format instead of assembling a hybrid from search snippets. Preserve a backup before converting a working configuration.
Connect the provider, then select the model
There are three separate checkpoints: the provider is connected, the model is visible, and a request actually succeeds. Passing the first does not prove the other two.
For Ofox, start with the OpenCode integration instructions, which include both interface paths. Obtain a key using the API Key setup guide and keep it out of committed project files, screenshots and copied diagnostic logs.
Desktop path
The documented Ofox workflow is:
- Open Settings → Providers, then Show more providers.
- Search for Ofox, connect it and enter the key.
- Open Settings → Models, search for Ofox and enable the intended model.
- Create a session in the correct project and select that model in the session picker.
If the interface differs, check the installed release and its current provider controls before assuming the account is broken. The screenshot below records the English Ofox documentation page, not a new Desktop inference run.
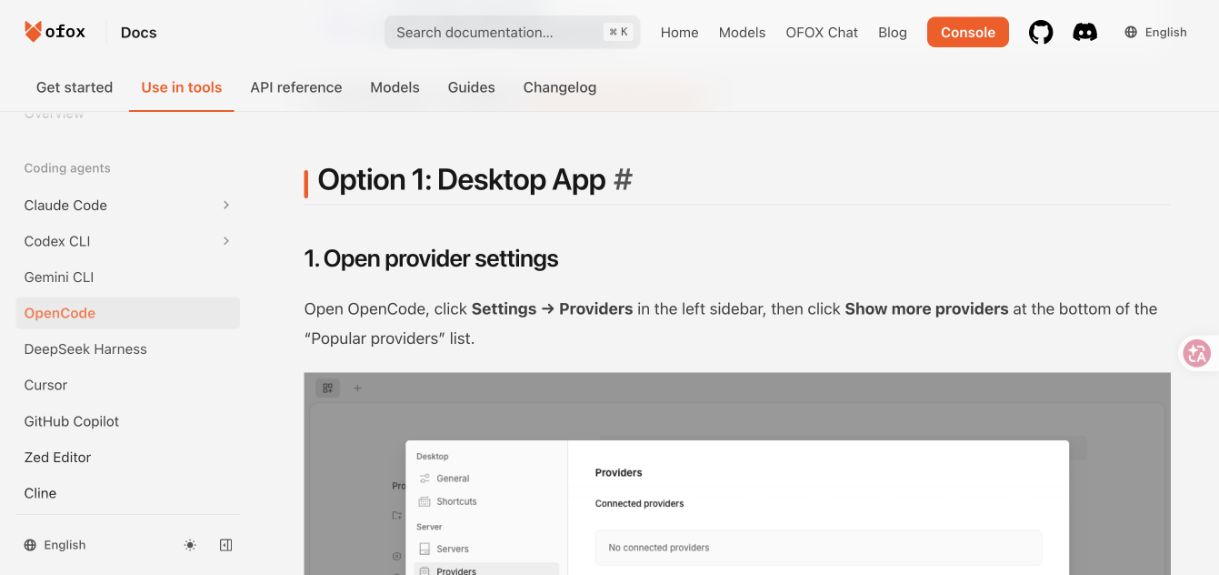
Documentation screenshot captured November 17, 2026. The embedded interface is a documentation example; it does not establish the version installed on your computer.
CLI path
Open the project directory, start opencode, use /connect to choose the provider, then /models to choose the model. These slash commands belong inside the interactive interface, not at your ordinary shell prompt.
For scripts, inspect the model list with opencode models, then use the exact returned identifier:
opencode run --model 'PROVIDER/MODEL' "Explain the files in this project. Do not edit them."Replace PROVIDER/MODEL; it is a placeholder, not a real model. This command sends a model request and can incur provider charges. We verified its flags through local help, not by running this request.
Use the built-in Ofox provider when it matches your requirement. A custom provider is a separate route for a specific protocol or endpoint; it is not a prerequisite for using the desktop app. The built-in versus custom provider section explains that distinction. If you need a custom route, use the current OpenCode provider reference with the exact endpoint and supported protocol from Ofox’s documentation. Our custom-provider configuration guide explains the provider/model registration relationship; its dated version examples must be checked against your installed release.
What is shared when you switch interfaces?
The current CLI documentation describes a shared background server for the local user. It owns sessions, configuration, permissions, integrations and tool execution. The CLI can instead use a private server with --standalone or connect to a specified server using --server.
That makes “I am on the same laptop” an insufficient handoff check. A private server, a different account, a remote host or a different project path can give you a different working context.
| Item | Handoff check | Why it matters |
|---|---|---|
| Files | Confirm the same absolute project directory and current file contents | Two folders with the same name can contain different work |
| Server | Confirm both clients target the intended service | A private or remote service is not automatically your local shared service |
| Session | Select the intended session, not merely the newest one | Recent history may belong to a different task |
| Model | Compare the exact provider/model selection | A familiar display name does not prove identical routing |
| Permissions | Review what the task may read, edit and execute | Changing interfaces is not permission to broaden access |
| Tools and environment | Check the tools on the machine where execution happens | A local Python installation is not available on a remote host by implication |
To inspect service state without restarting active work:
opencode service status
opencode session list
Run the session command from the project you intend to continue. CLI 2.3.0’s local help describes this as listing top-level sessions in the current project. We verified the command definitions, not a cross-interface session transfer.
For configuration disagreements, inspect the relevant project and user configuration locations in the configuration reference. Managed settings can take precedence. Do not disable administrative policies to make two interfaces appear identical.
Try the same small task in separate working copies
Download the comparison exercise. It contains a deliberately incomplete Python function, four tests, a prompt and an editor-written reference solution. No API key or dependency installation is required to run the tests.
The task is to accept filenames ending in .csv, case-insensitively, while rejecting suffixes such as .csv.tmp. This is a narrow coding exercise, not a benchmark of software engineering ability.
- Extract the archive twice into separate folders, such as
desktop-checkandcli-check. - In each folder, run
python3 -m unittest -v. On systems where Python 3 is invoked withpython, use that command instead. - The starter should produce two failing tests out of four. Record that baseline before involving an agent.
- Open
desktop-checkin Desktop. Start the CLI fromcli-check. Use the same provider/model and equivalent permission choices. - Give both this prompt:
Read app.py and test_app.py. Update only accepts_csv in app.py so filenames
ending in .csv are accepted case-insensitively. Reject .csv.tmp and names
with no .csv suffix. Do not modify the tests or install dependencies.
Run python3 -m unittest -v and report the result. If Python is unavailable,
say so rather than claiming the tests passed. Explain the exact code change.
After each run, inspect app.py and confirm test_app.py is unchanged. Re-run the tests yourself: all four should pass. A message saying “fixed” is not the acceptance result. The reference solution is available for checking the intended rule; it is not output generated by either OpenCode interface.
We locally confirmed the starter’s two failures and the reference solution’s four passing tests. We have not collected Desktop-versus-CLI timing, cost or model success rates. If you run the exercise, keep those observations separate from the deterministic test result. A tiny task can reveal whether the workflow suits you; it cannot establish that one interface is universally faster or more accurate.
For a handoff test, stop active work first, then switch interfaces and verify the six items in the preceding table before continuing. Do not have both agents edit the same working copy concurrently during a comparison: their changes would contaminate the result.
Troubleshoot the failing layer
| Symptom | Check first | Next action |
|---|---|---|
opencode is not found | Installation and shell PATH | Verify the selected release’s install method; reopen the shell if its PATH changed |
| A copied command rejects an argument | opencode --version and that command’s --help | Use syntax for the installed generation rather than replacing credentials |
| Provider connected, model missing | Model visibility, provider ID and model ID | Check Desktop’s model enablement and the CLI model list; validate custom registration if used |
| Desktop sees a session but CLI does not | Project path, account and server | Run the session list from the right project and check service state |
| A request returns 401 | Credential source and destination endpoint | Follow Ofox authentication and request-error guidance; do not paste secrets into bug reports |
| A request returns 429 | Rate limits and the returned retry information | Use the 429 retry troubleshooting guide; switching interfaces does not remove the limit |
| Chat works but agent tools fail | Model capability, protocol and tool result format | Use OpenAI-compatible API checks to separate plain chat from tool-call compatibility |
If a version upgrade is involved, record the old and new versions and the first failing operation. Change one variable at a time. Reinstalling the app, replacing the key and rewriting provider configuration together makes it harder to learn which change mattered.
Start with Desktop for visual local review or the CLI for terminal and scripted work. Keep both only when the handoff is useful. The practical success condition is the correct files, model and permissions producing a result you can independently verify—not the interface looking more powerful.