Cherry Studio Configuration
Cherry Studio is a cross-platform AI desktop client (supports Windows, macOS, Linux) with multi-model conversations, knowledge base, and workflow support — one of the most feature-rich open-source AI clients available.
By configuring OfoxAI as your provider, you can use GPT, Claude, Gemini, DeepSeek, and 100+ other models in Cherry Studio with just one API Key.
Protocol Overview
Cherry Studio supports connecting to OfoxAI via four protocols:
OpenAI Chat — Based on /v1/chat/completions, for GPT series models such as openai/gpt-4.1, openai/gpt-5.3-chat.
OpenAI Response — Based on /v1/responses, for GPT series models such as openai/gpt-4.1, openai/gpt-5.4-mini.
Claude — Based on /anthropic/v1/messages, for Claude series models such as anthropic/claude-sonnet-4.6, anthropic/claude-opus-4.6.
Gemini — Based on /gemini/v1beta/models, for Gemini series models such as google/gemini-3.1-pro-preview, google/gemini-3.1-flash-lite-preview.
Prerequisites
- An OfoxAI account with an API Key (Get one here )
- Cherry Studio installed (Download )
Configuration Steps
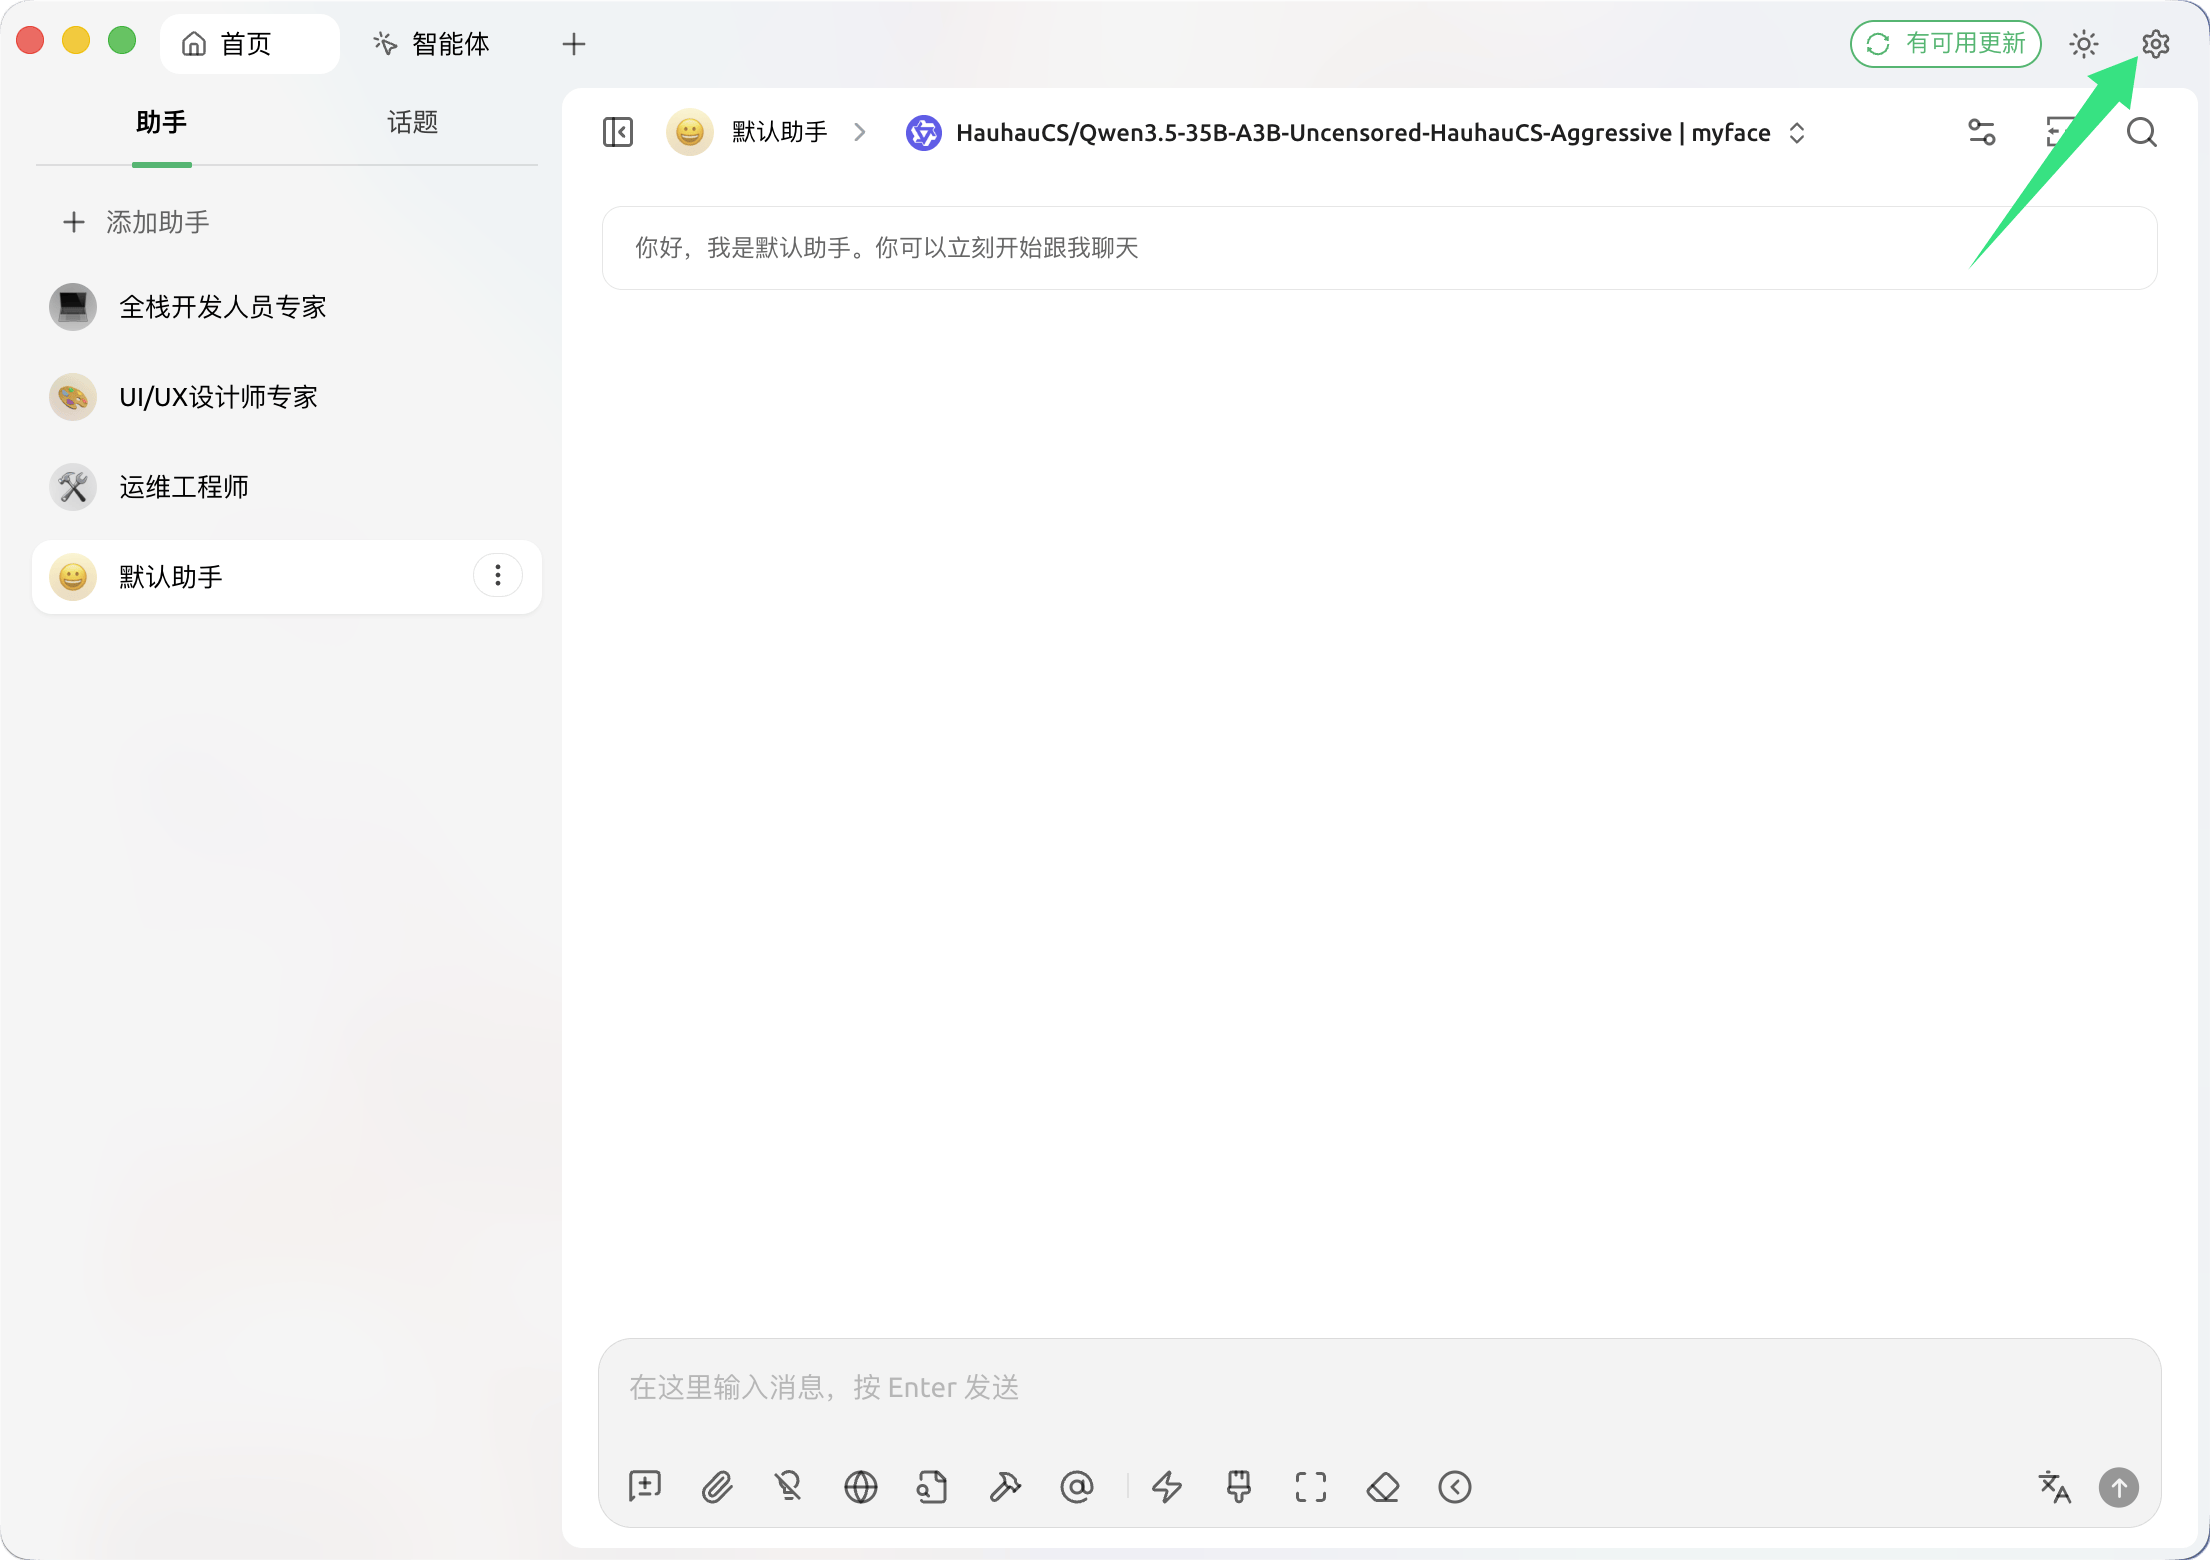
Step 1: Open Settings
Launch Cherry Studio and click the Settings icon in the top-right corner.
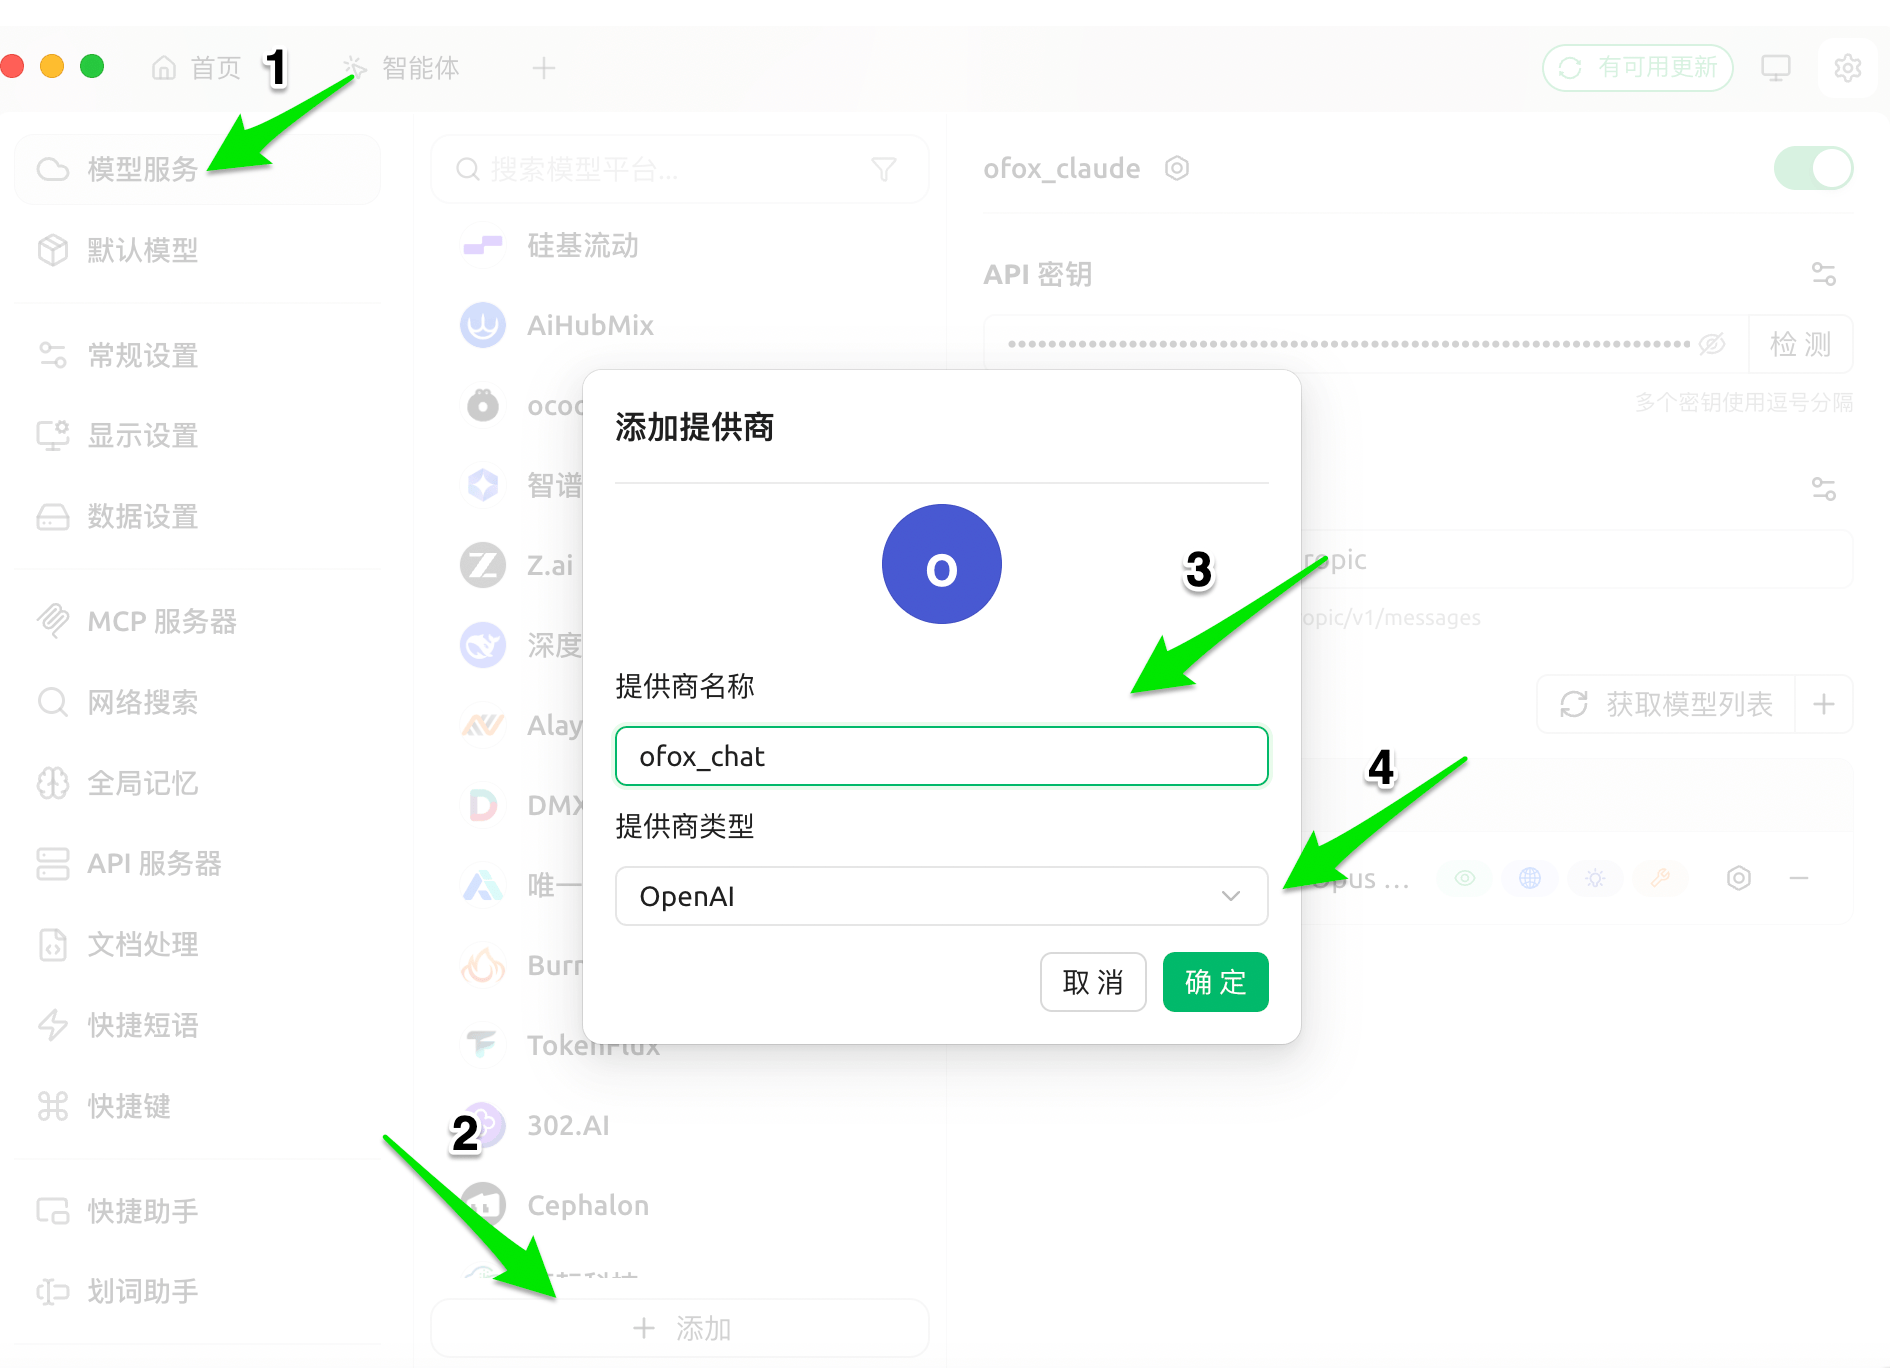
Step 2: Add a Model Provider
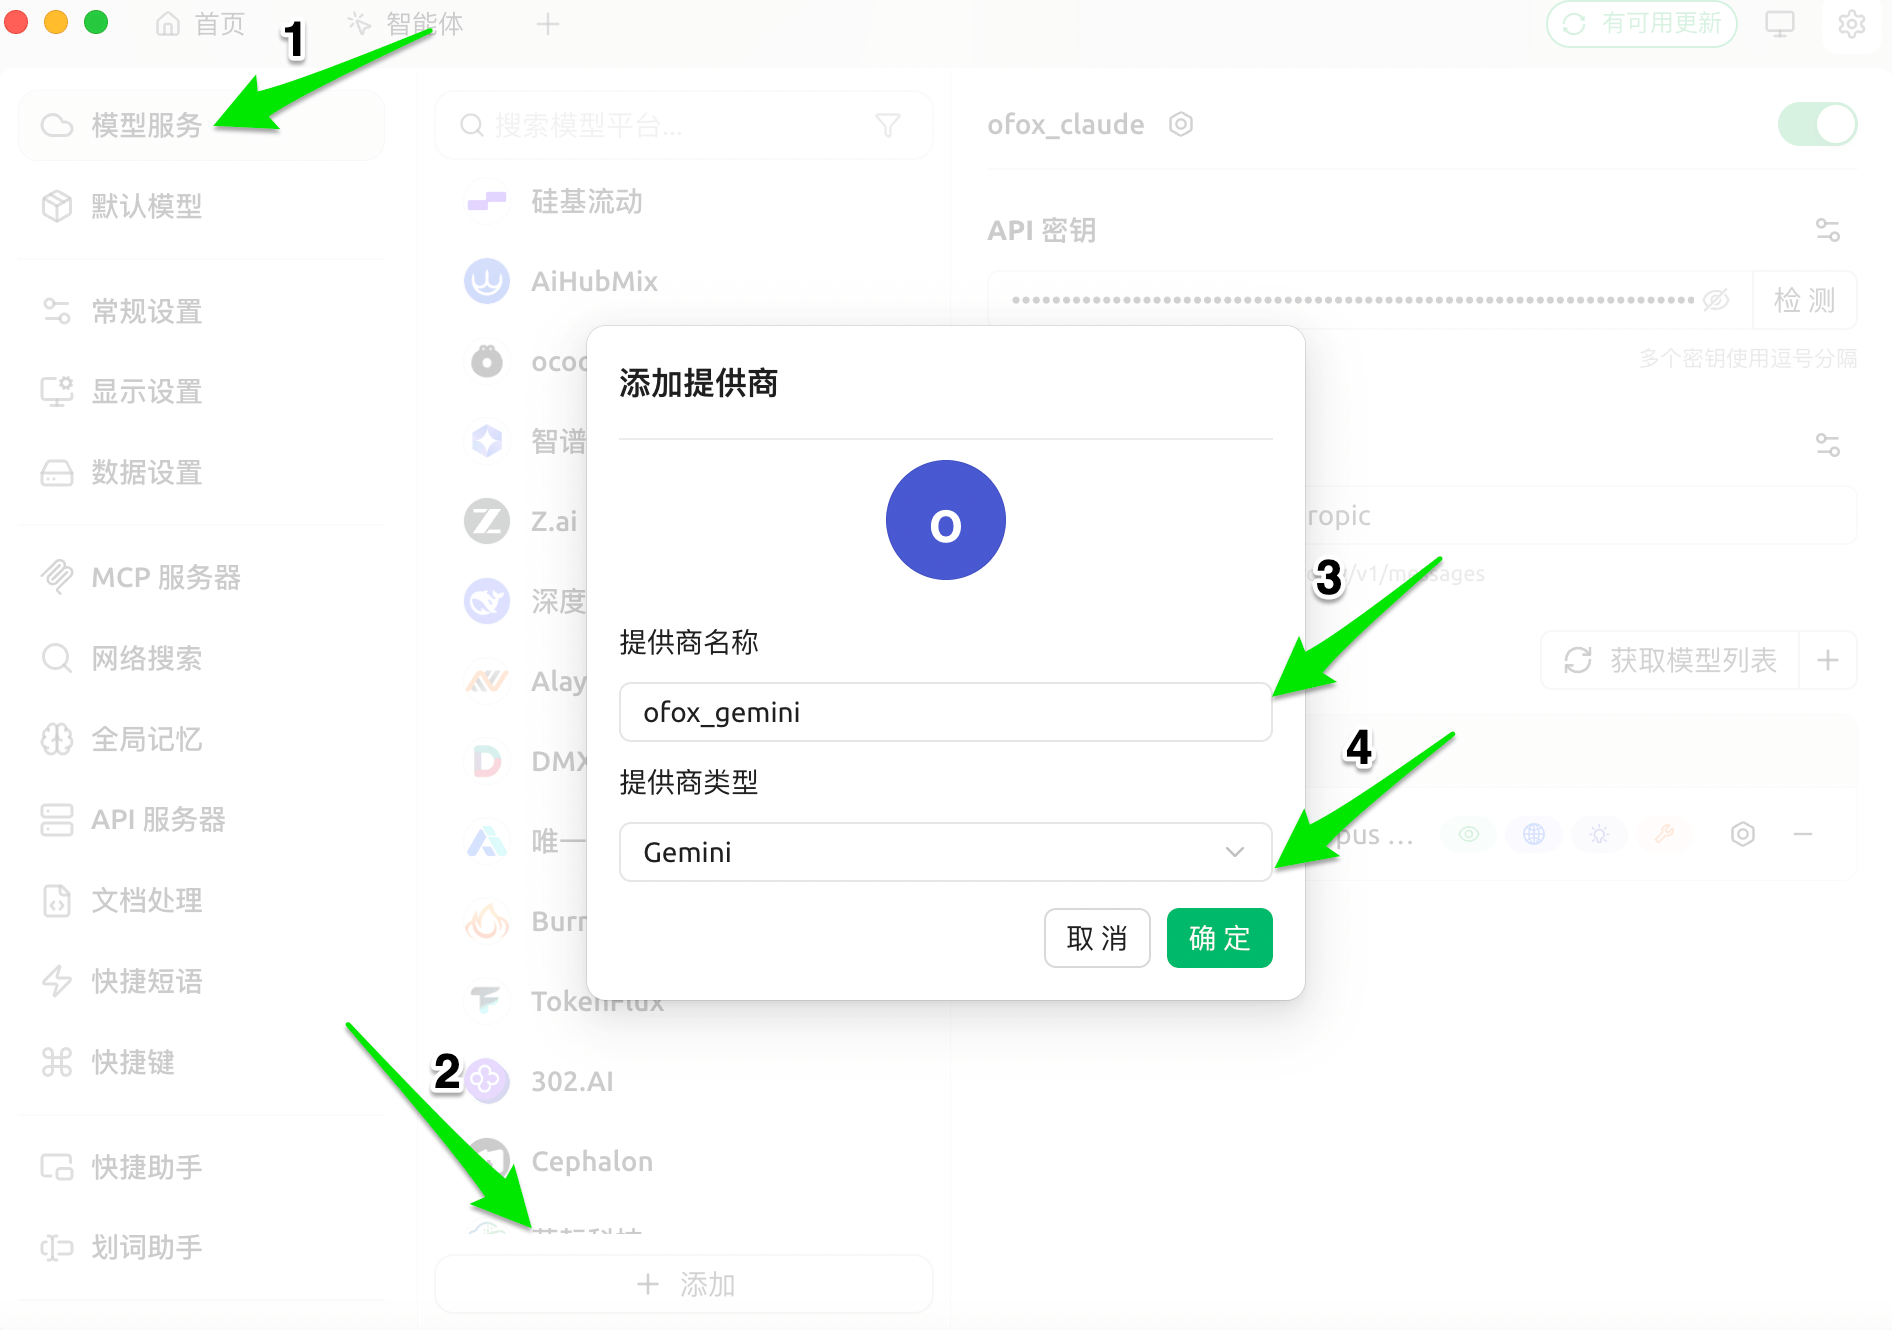
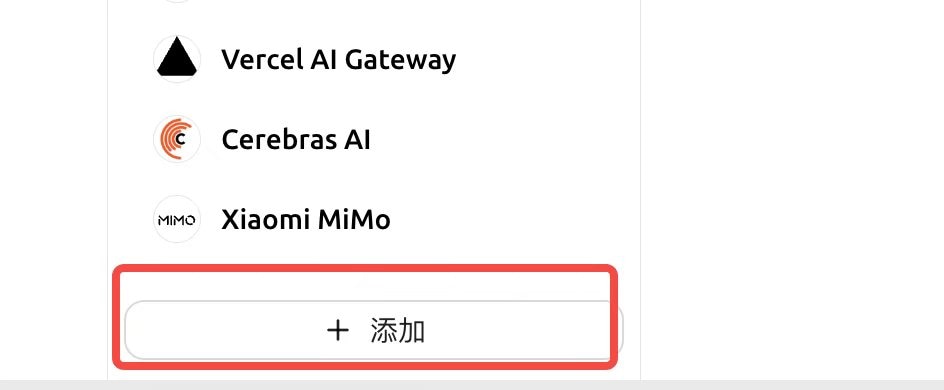
Go to Model Services in the left sidebar, scroll to the bottom, and click + Add. In the dialog, enter a provider name and select the corresponding provider type.
OpenAI Chat
Select OpenAI as the provider type and click OK.
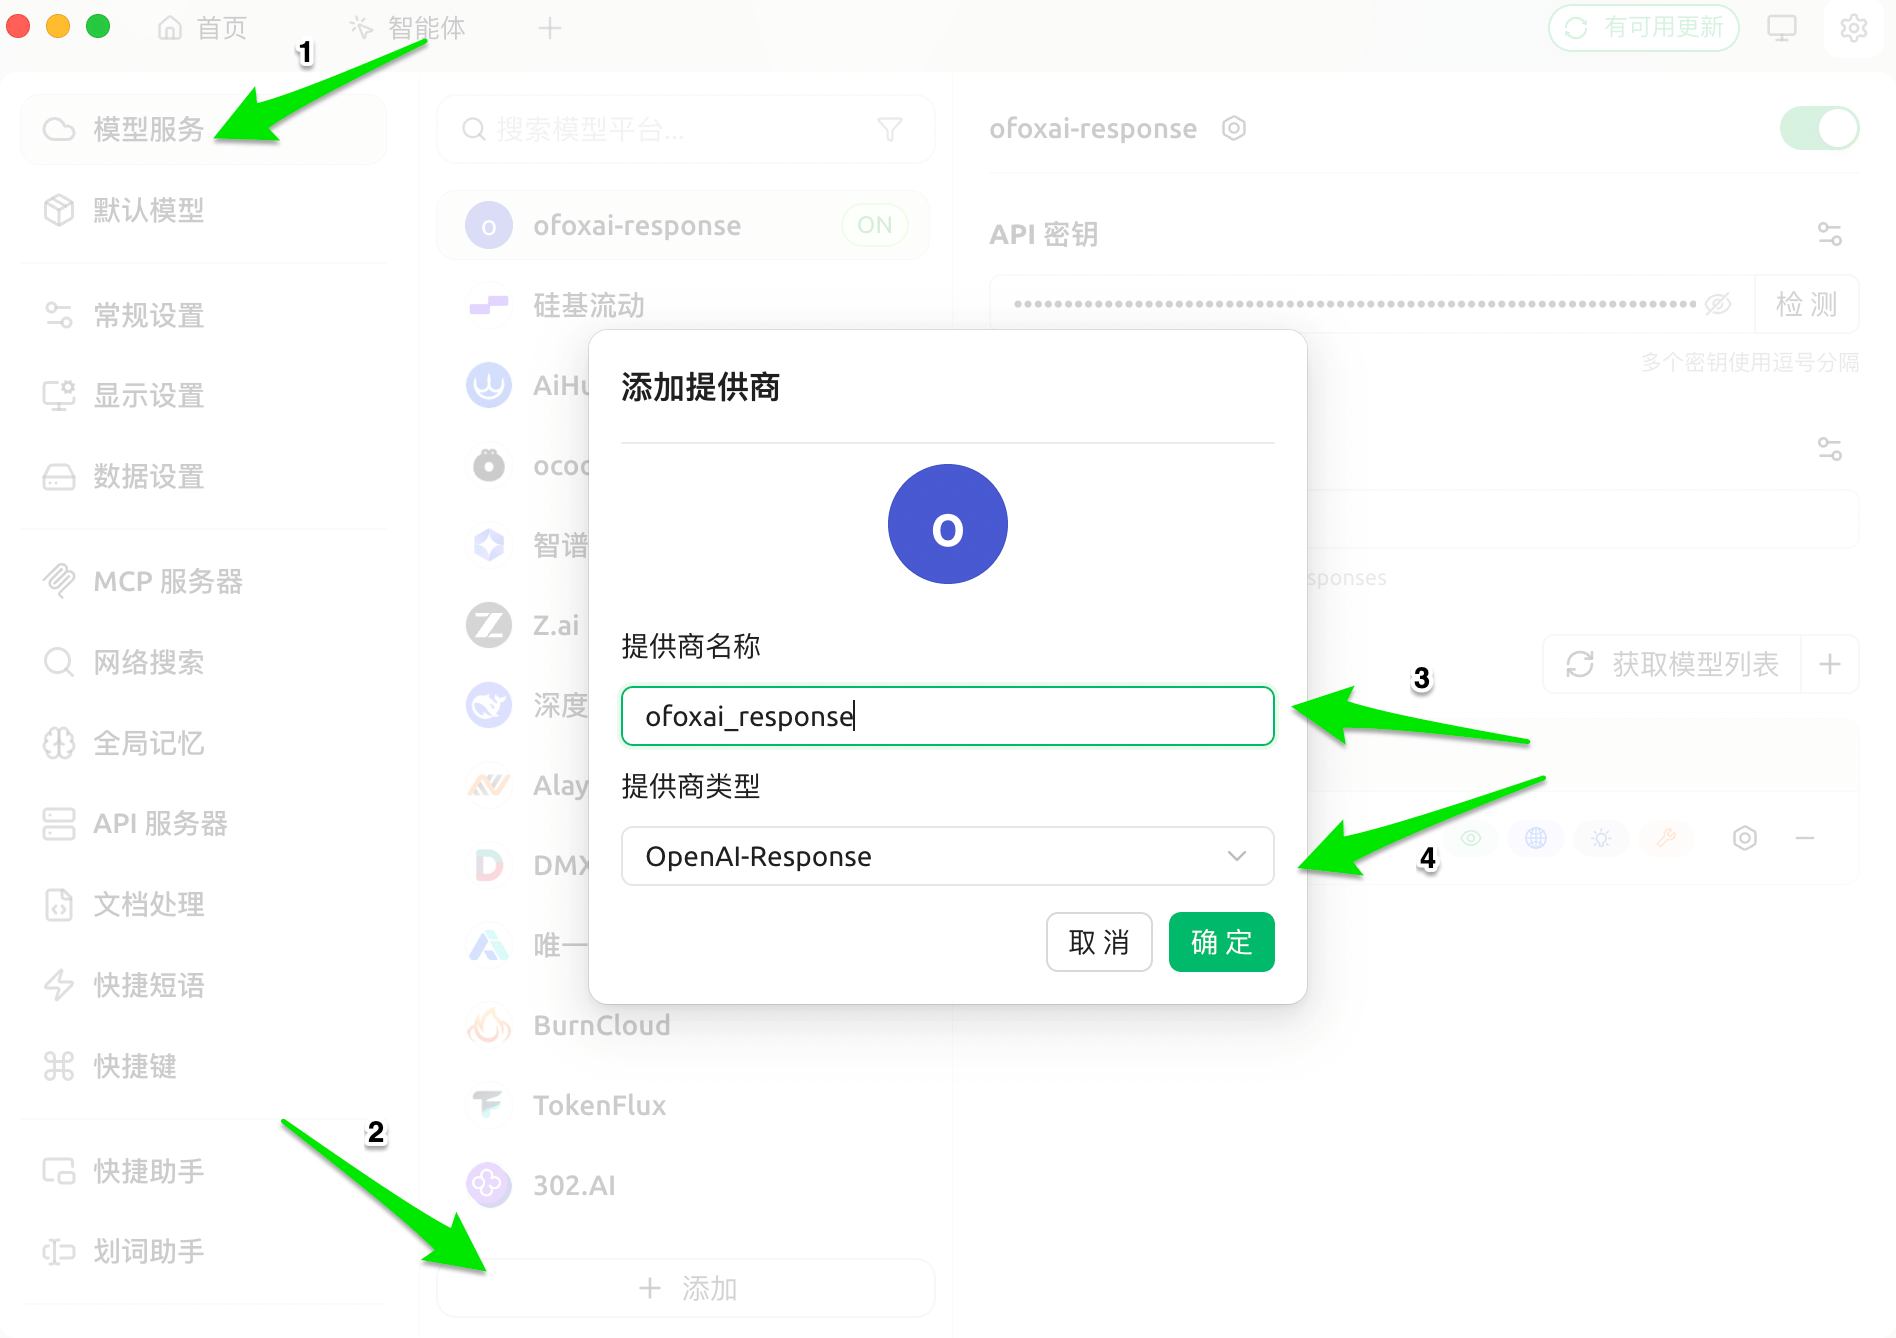
OpenAI Response
Select OpenAI as the provider type (enable Response mode on the config page later) and click OK.
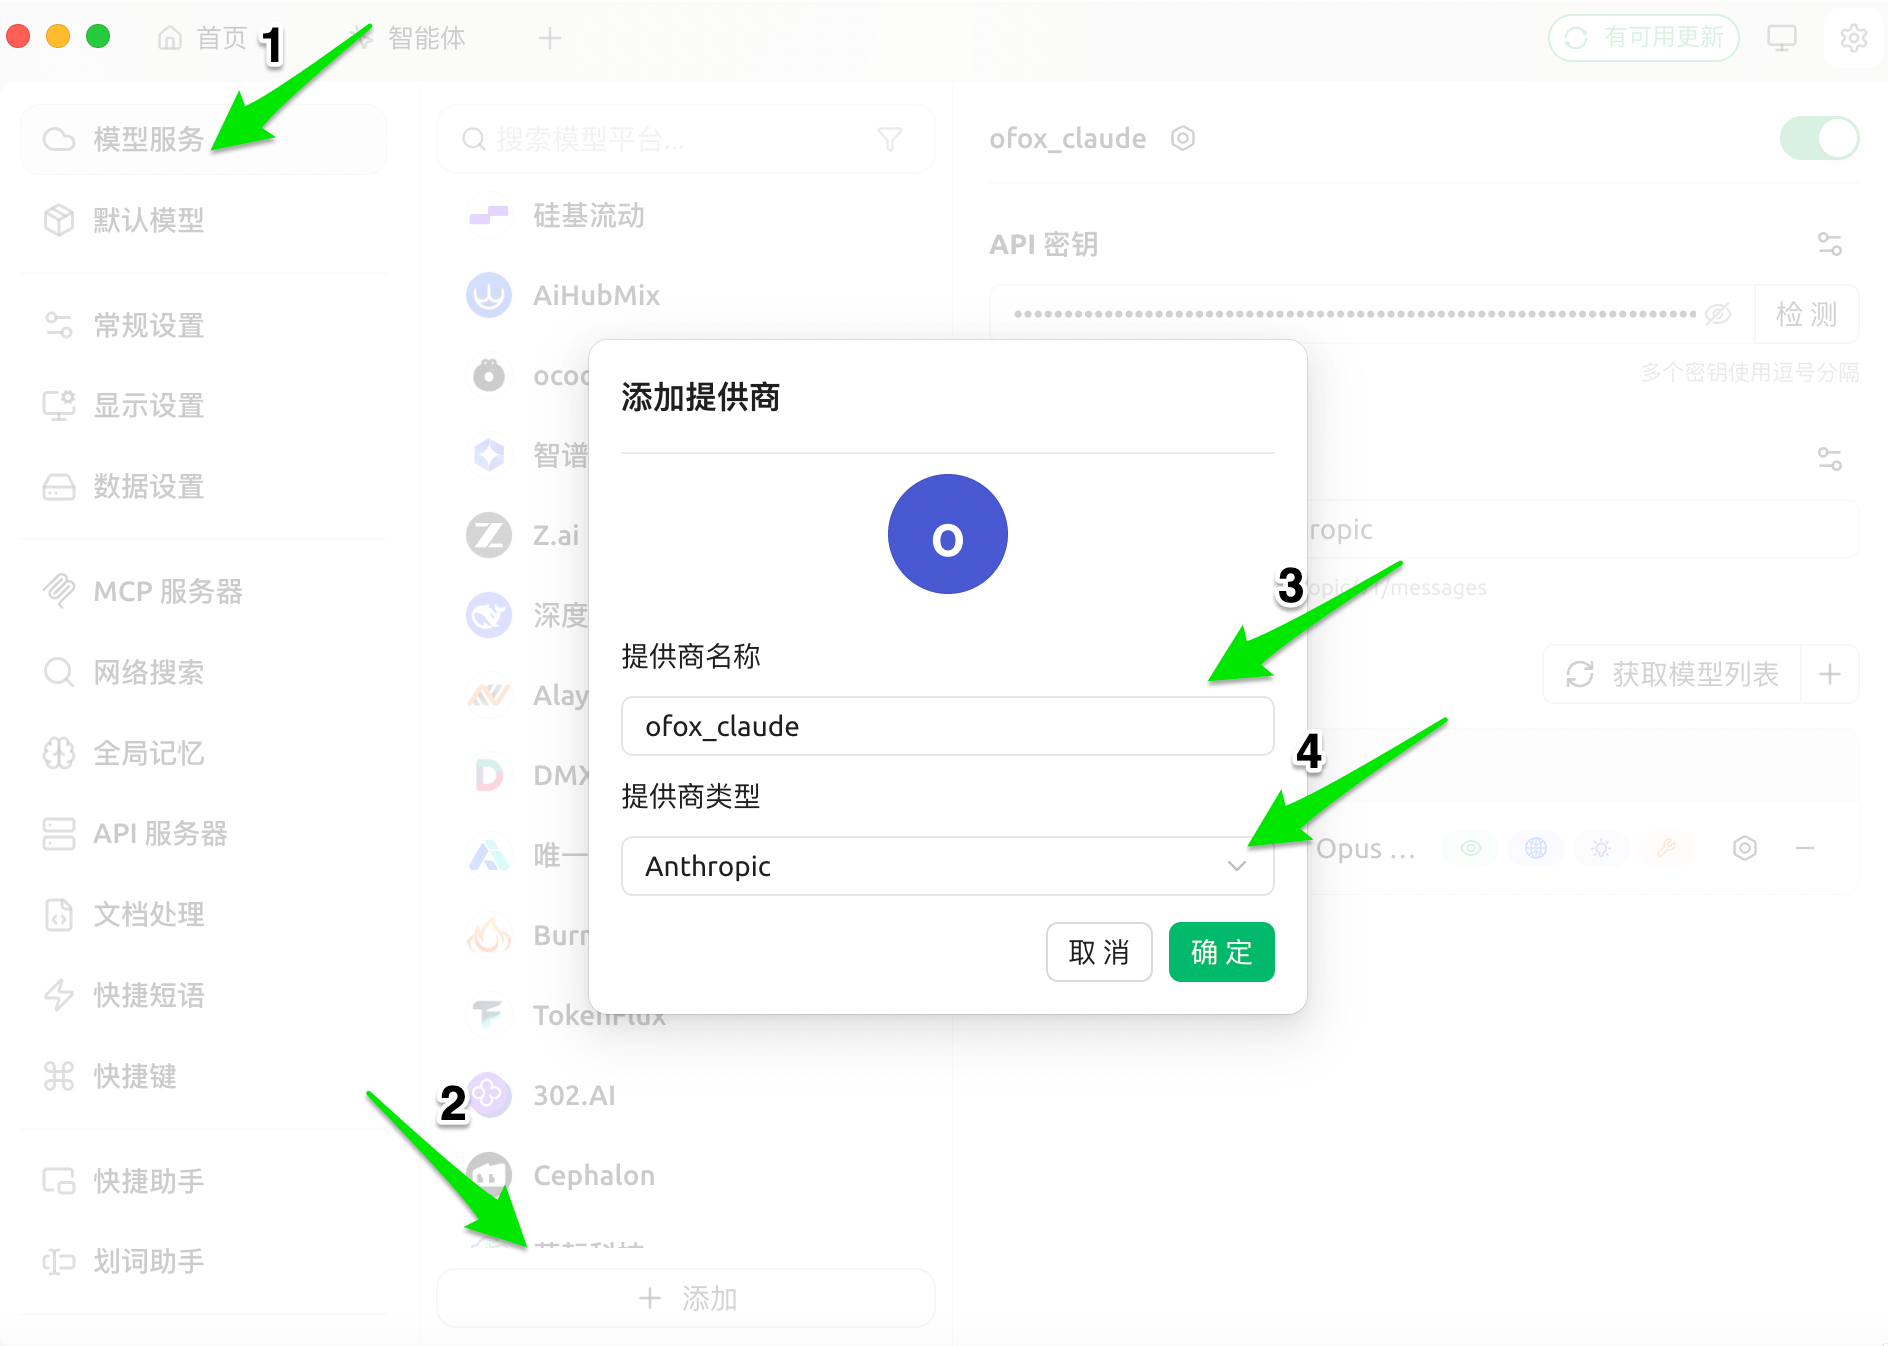
Claude
Select Anthropic as the provider type and click OK.
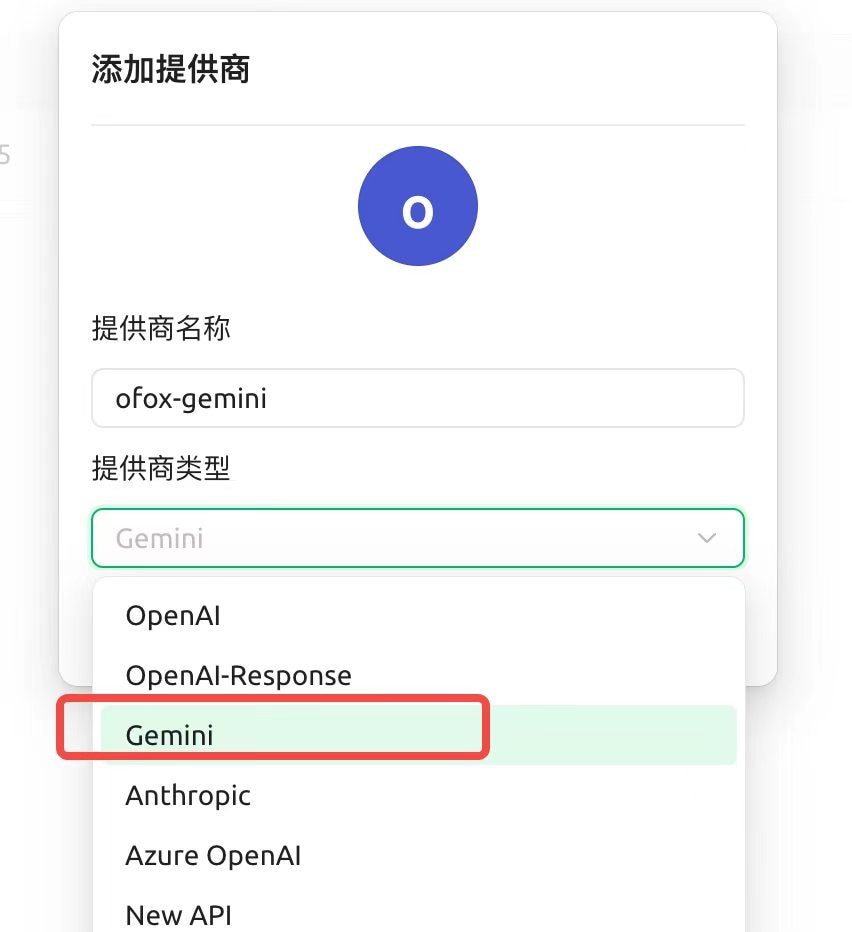
Gemini
Select Gemini as the provider type and click OK.
Step 3: Enter API Configuration
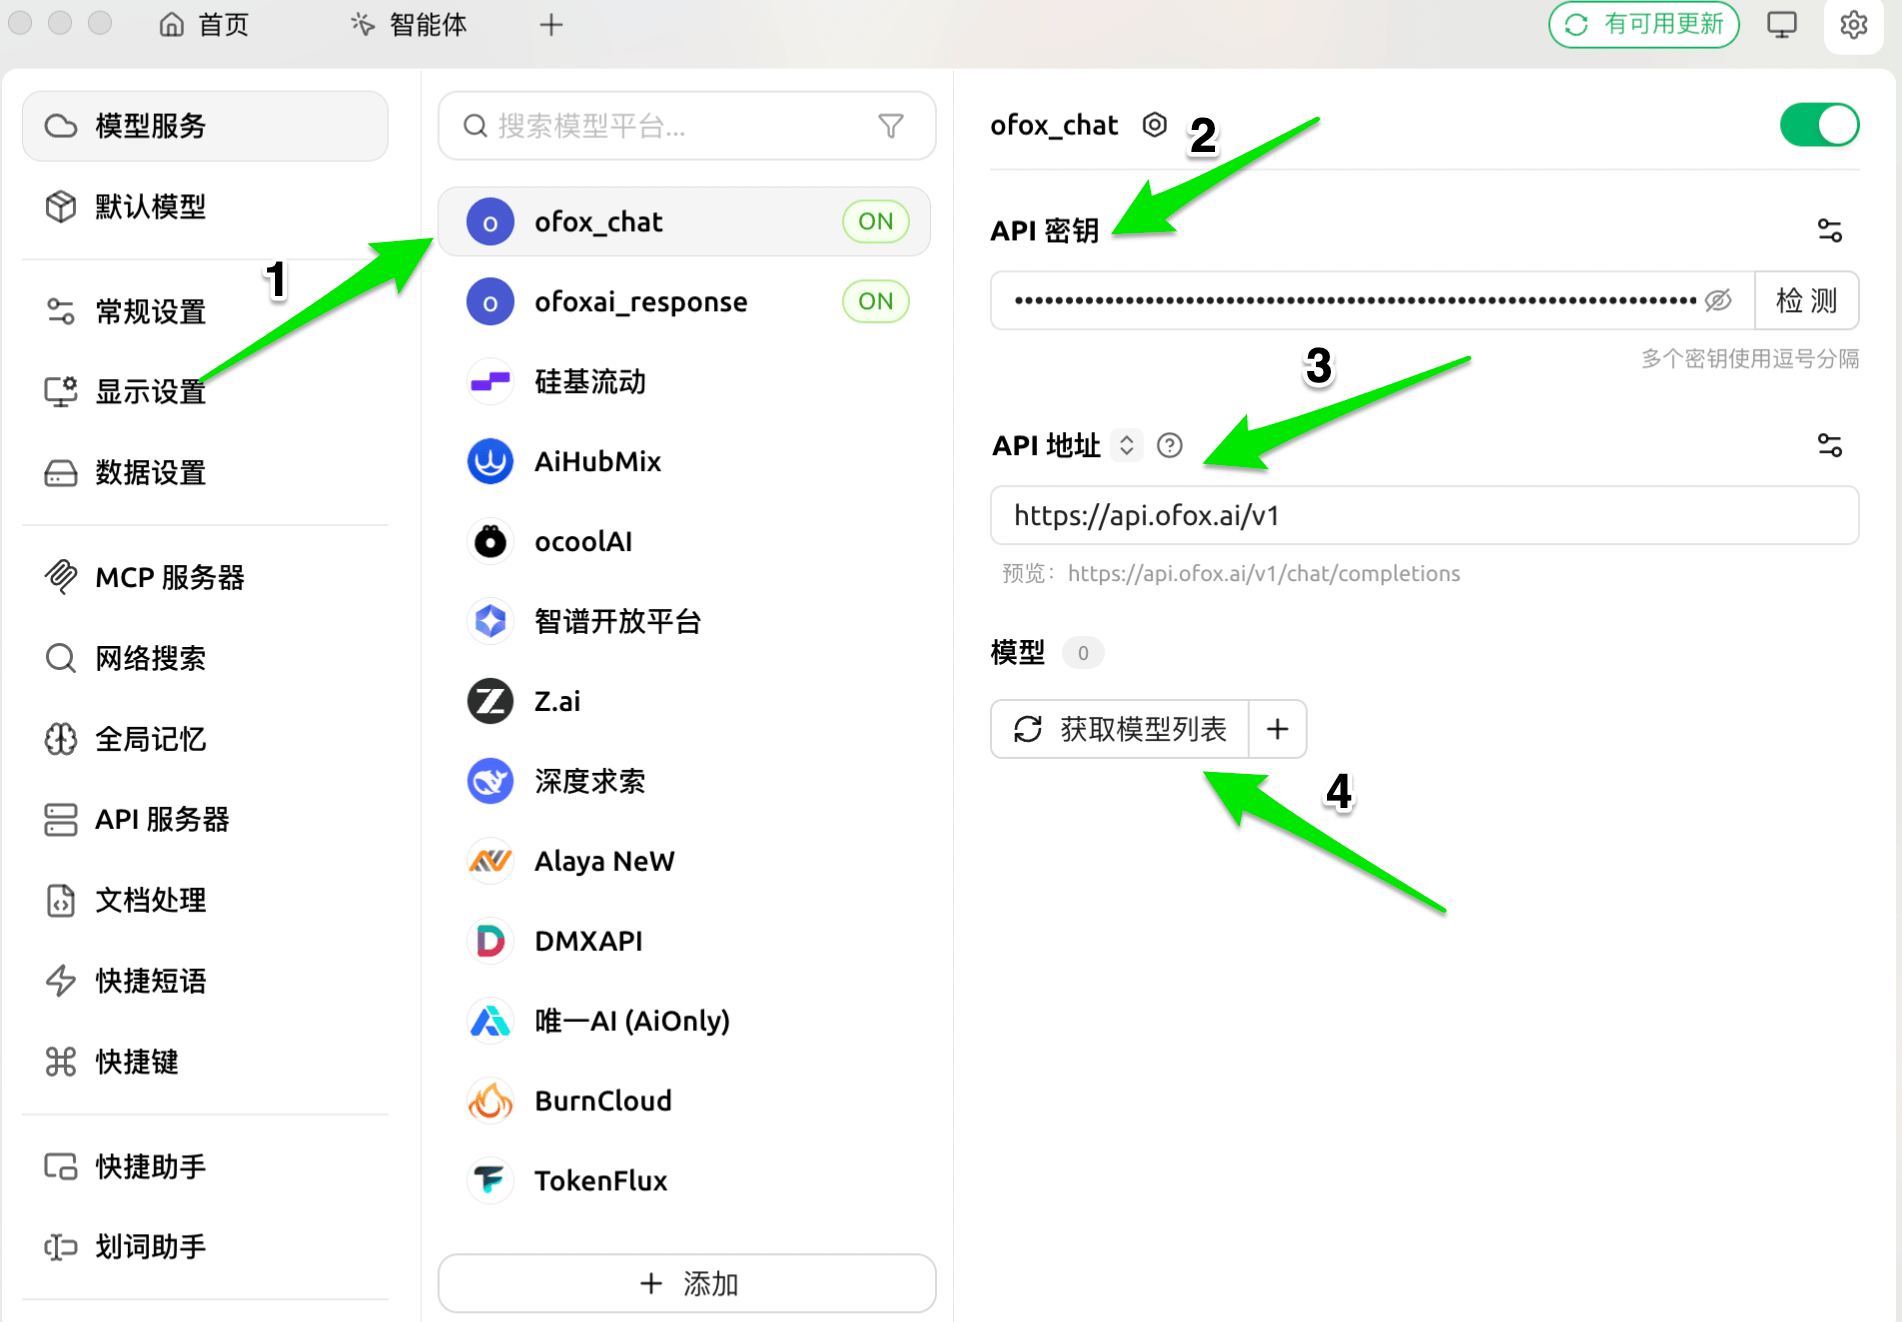
Fill in the API key and API address on the provider’s configuration page.
OpenAI Chat
| Field | Value |
|---|---|
| API Key | Your OfoxAI API Key |
| API Address | https://api.ofox.ai/v1 |
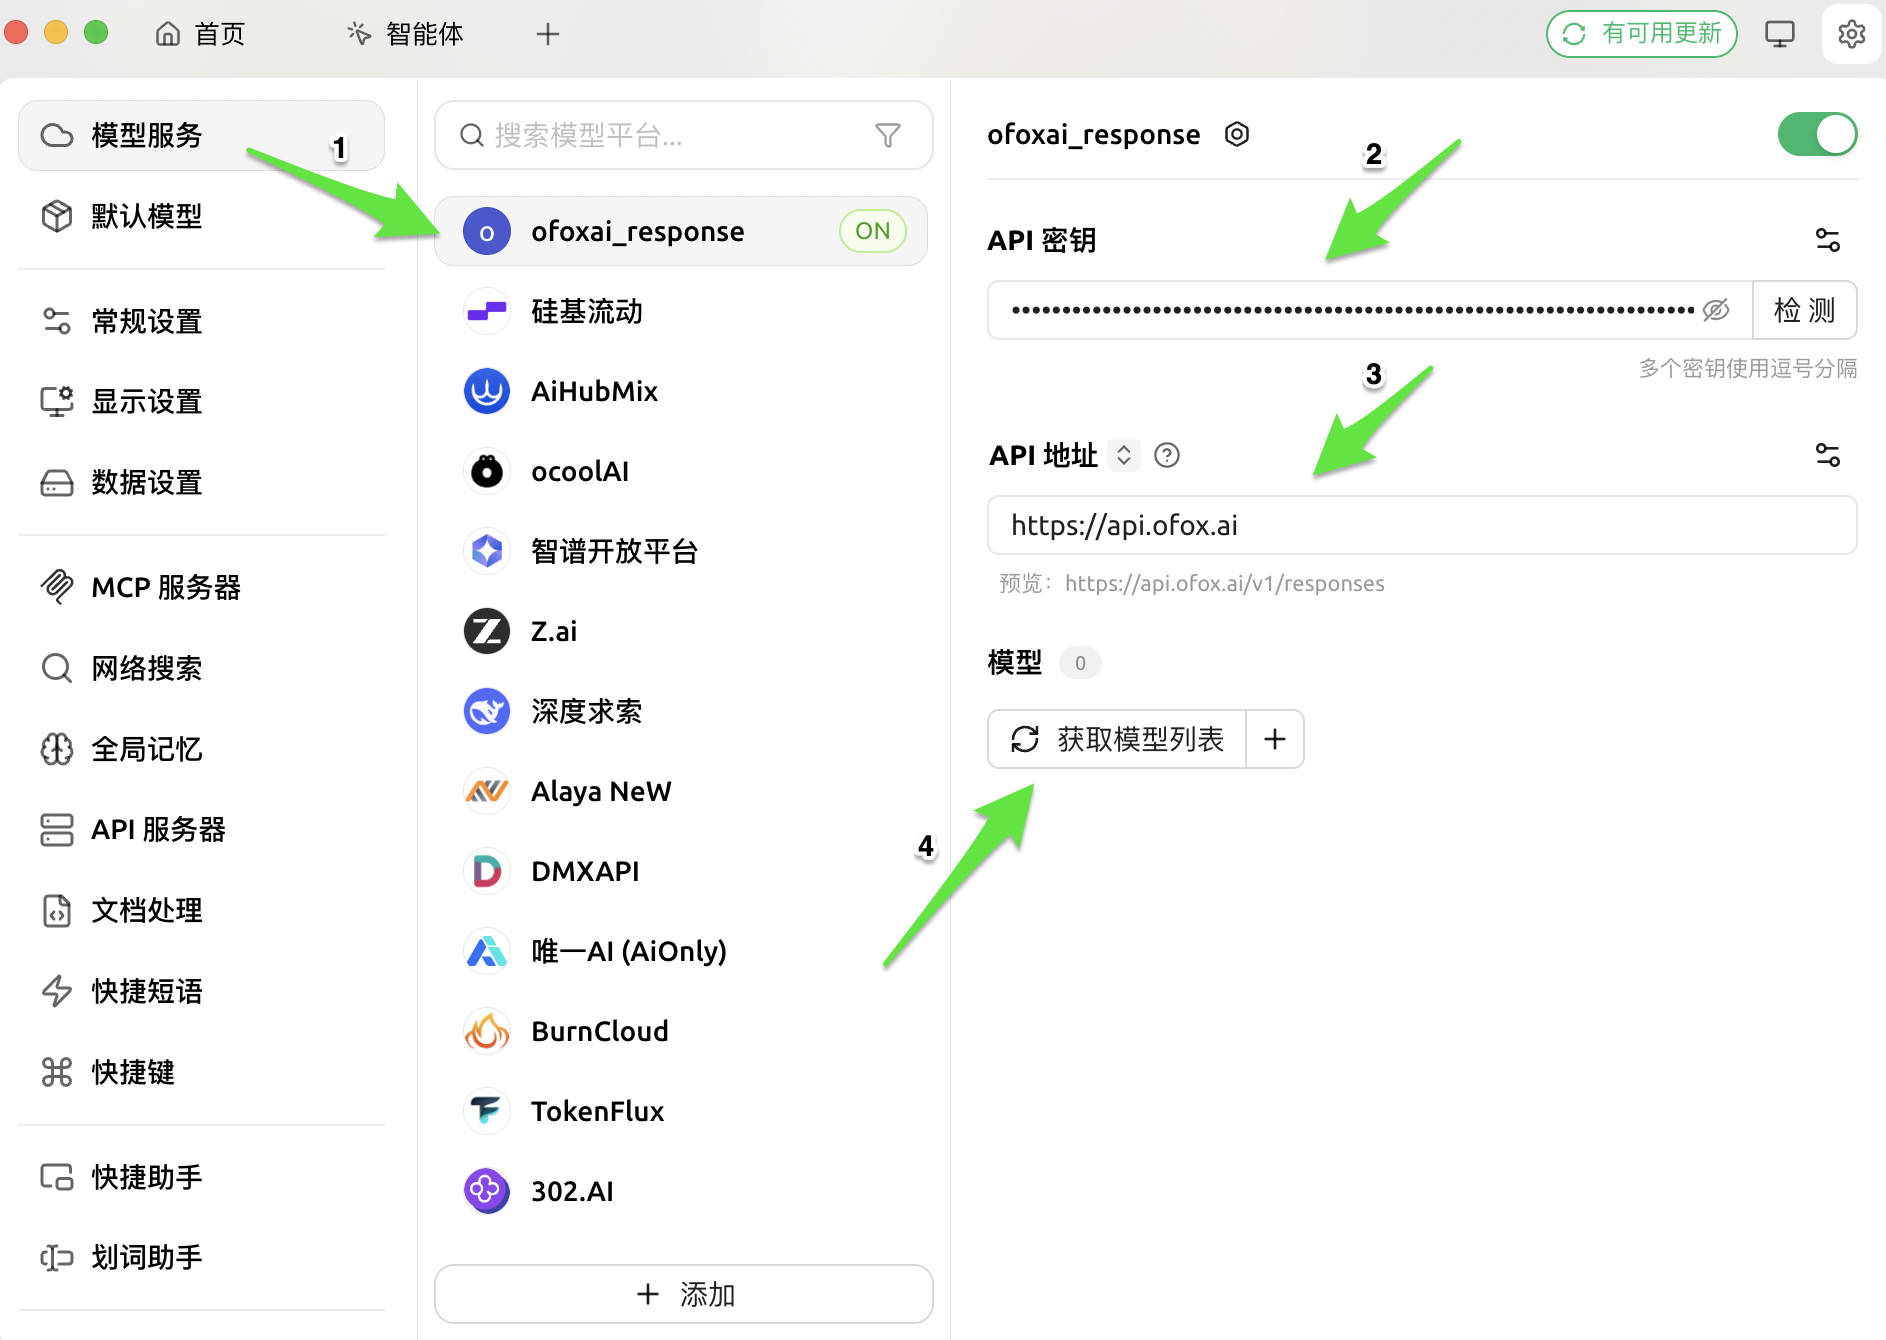
OpenAI Response
| Field | Value |
|---|---|
| API Key | Your OfoxAI API Key |
| API Address | https://api.ofox.ai/v1 |
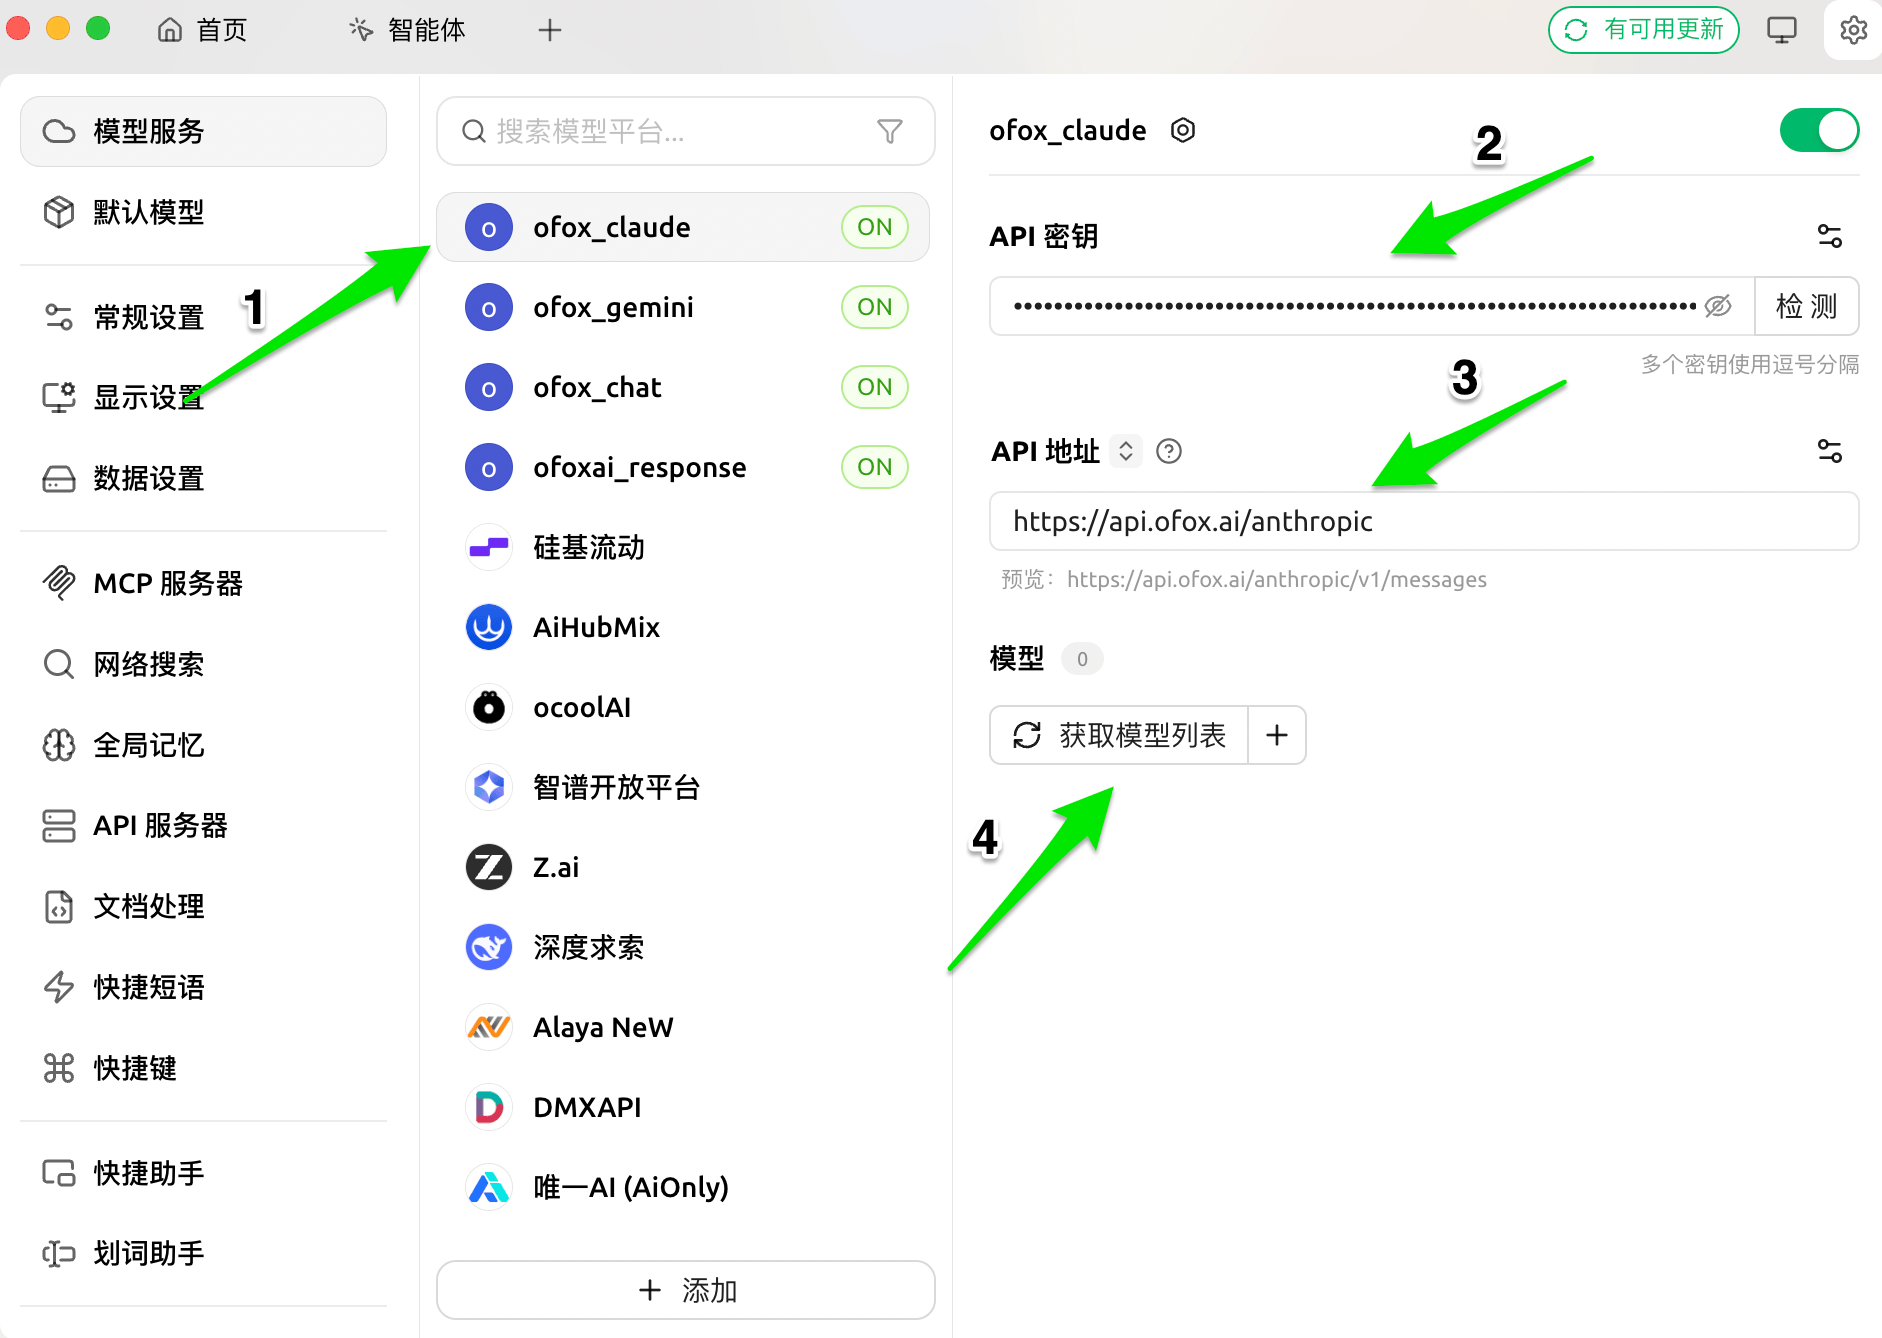
Claude
| Field | Value |
|---|---|
| API Key | Your OfoxAI API Key |
| API Address | https://api.ofox.ai/anthropic |
Gemini
| Field | Value |
|---|---|
| API Key | Your OfoxAI API Key |
| API Address | https://api.ofox.ai/gemini |
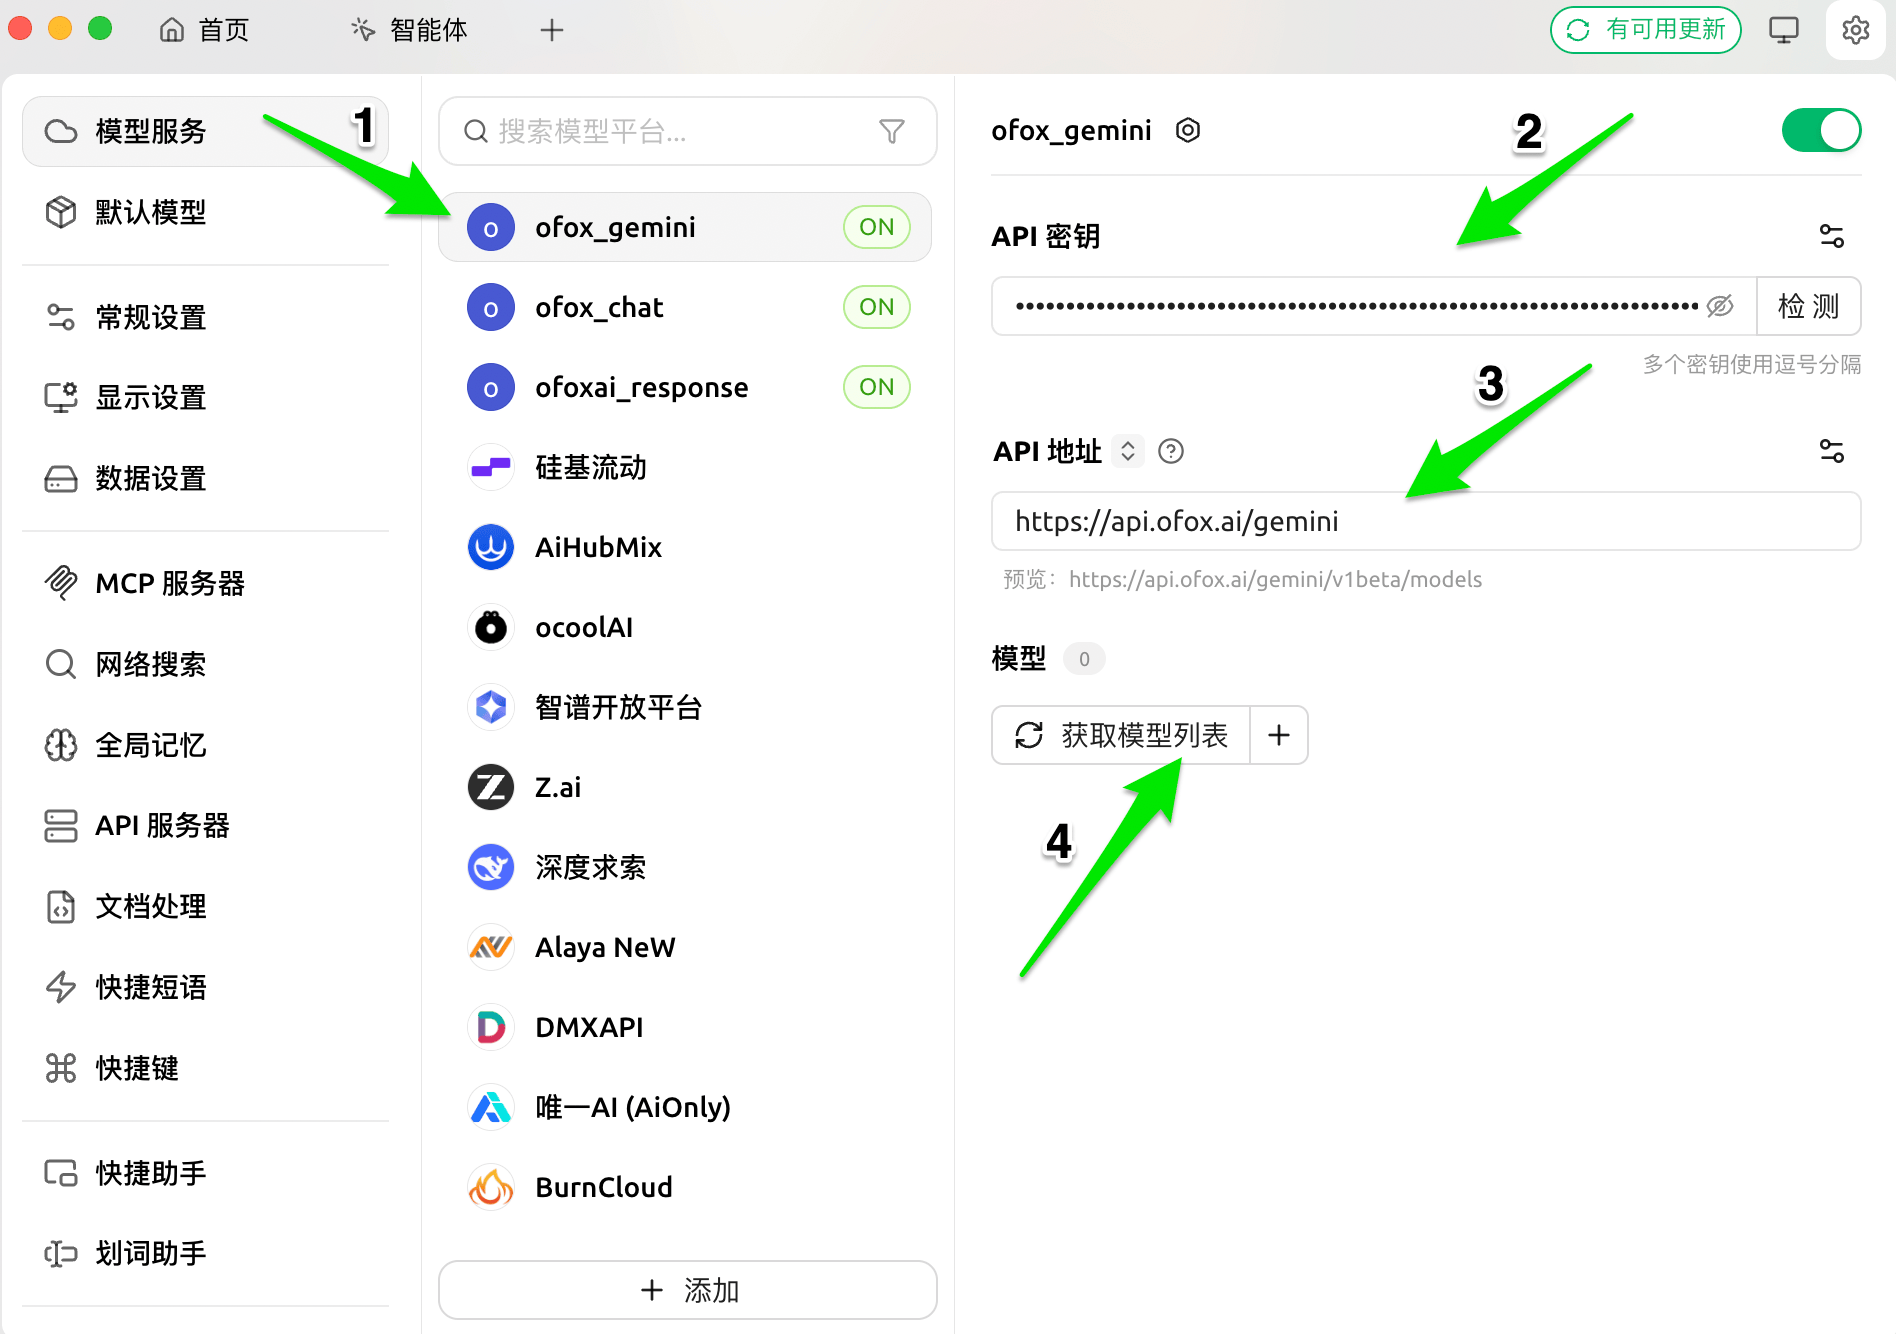
Make sure the toggle in the top-right corner of the page is ON, otherwise the provider will not appear in the model selector.
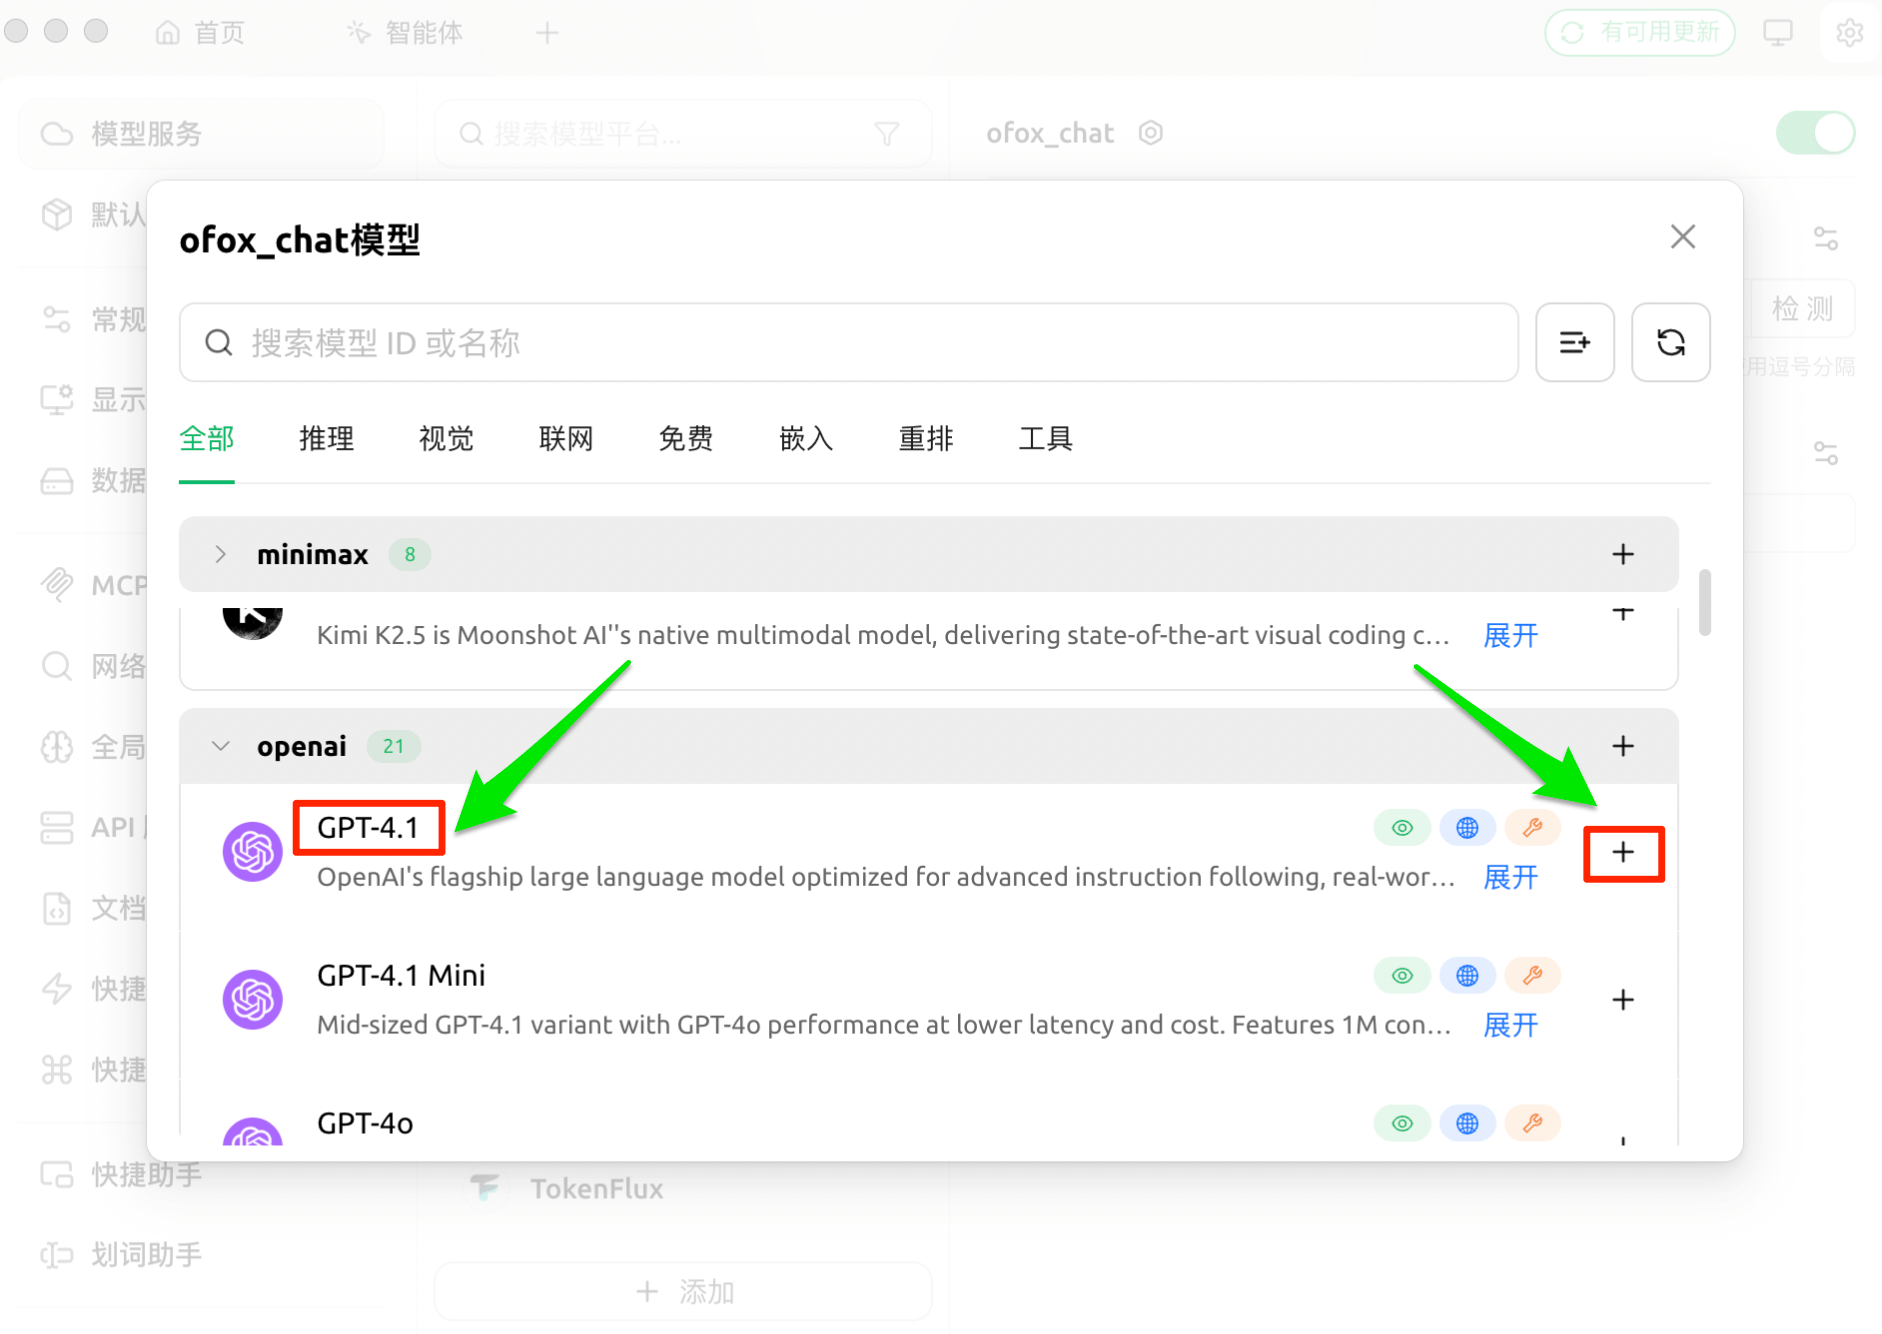
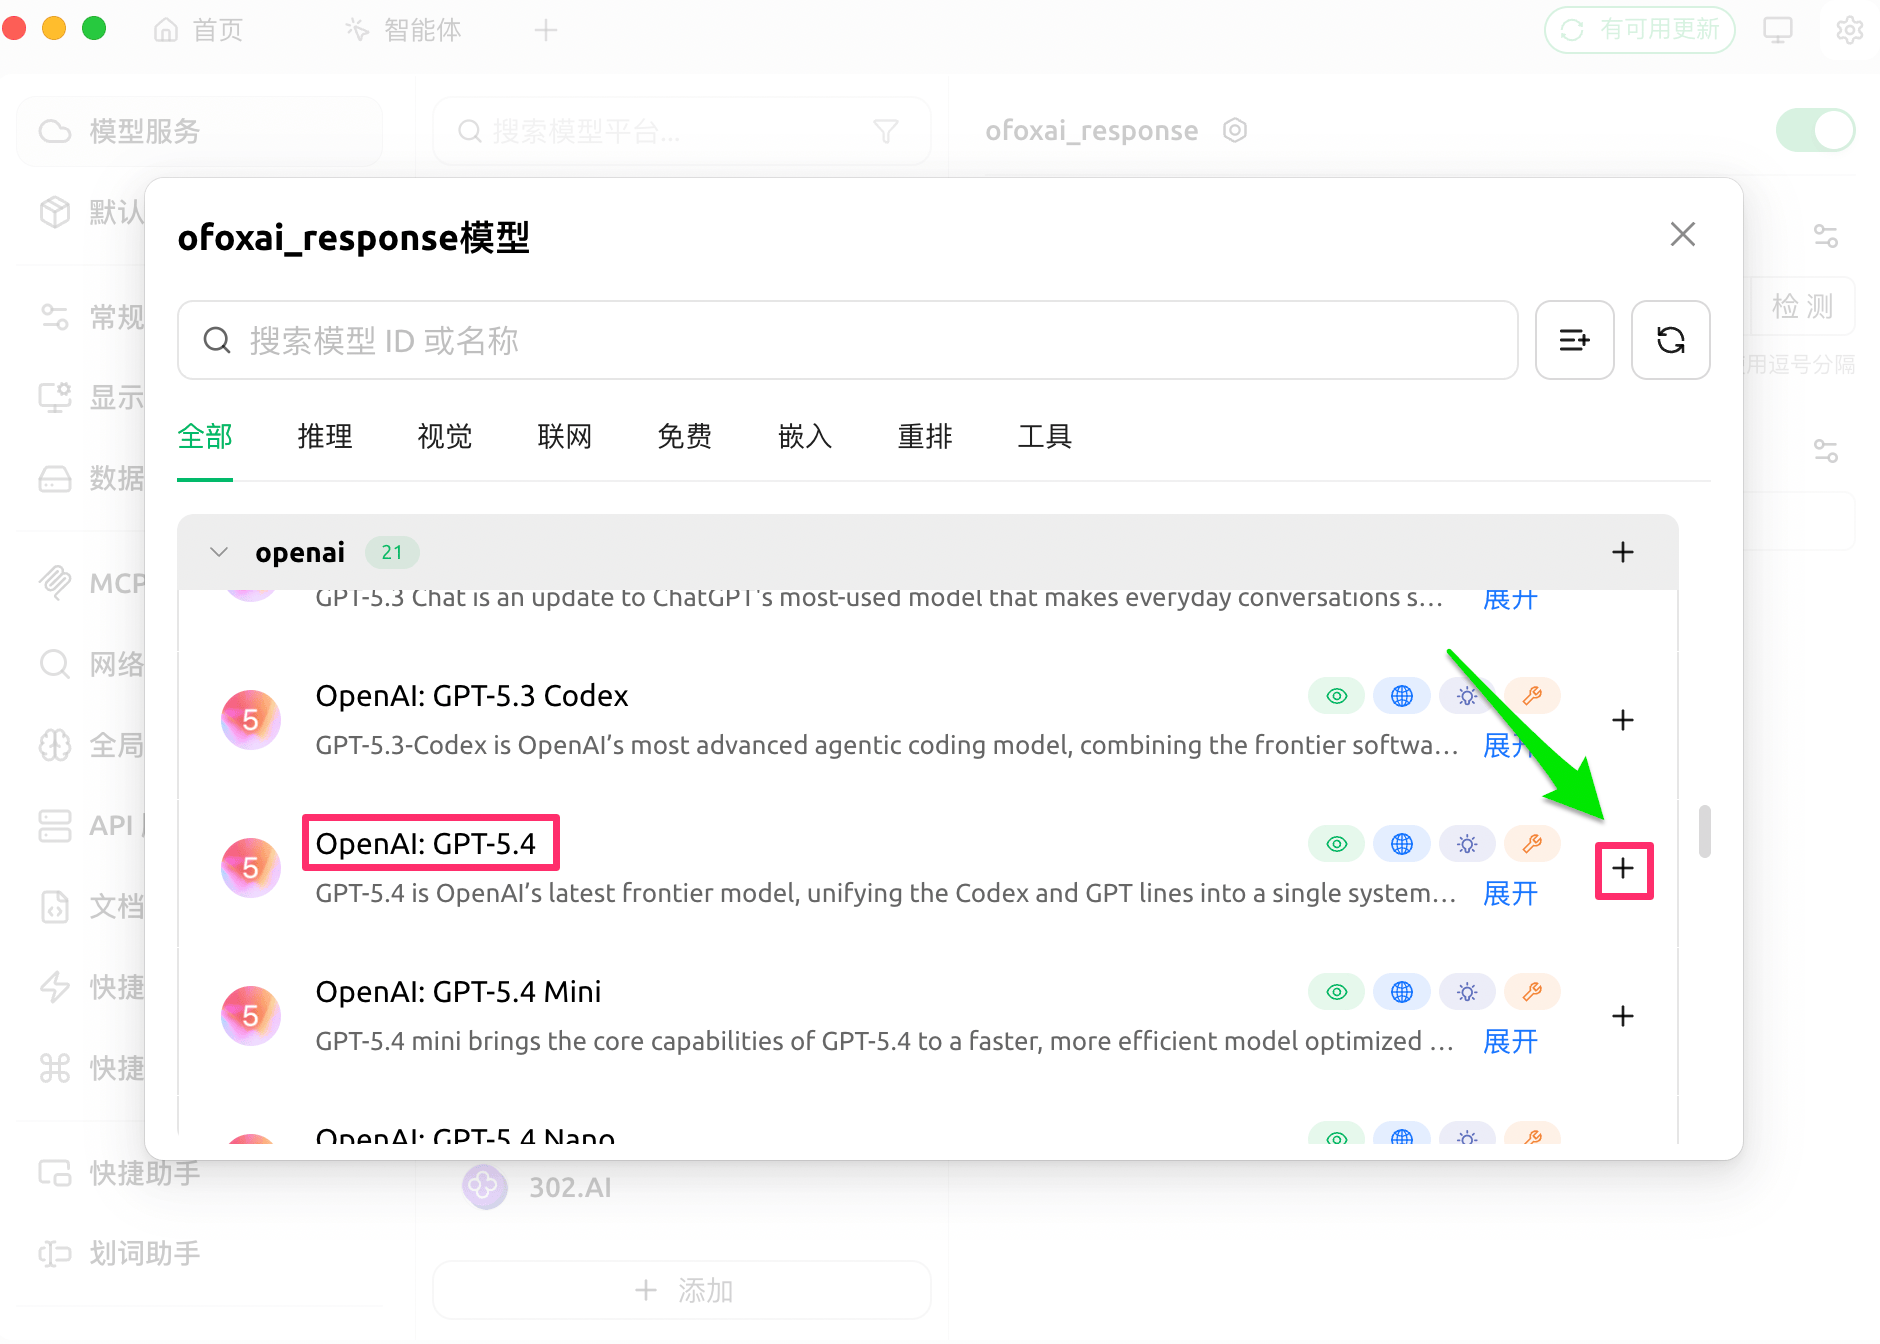
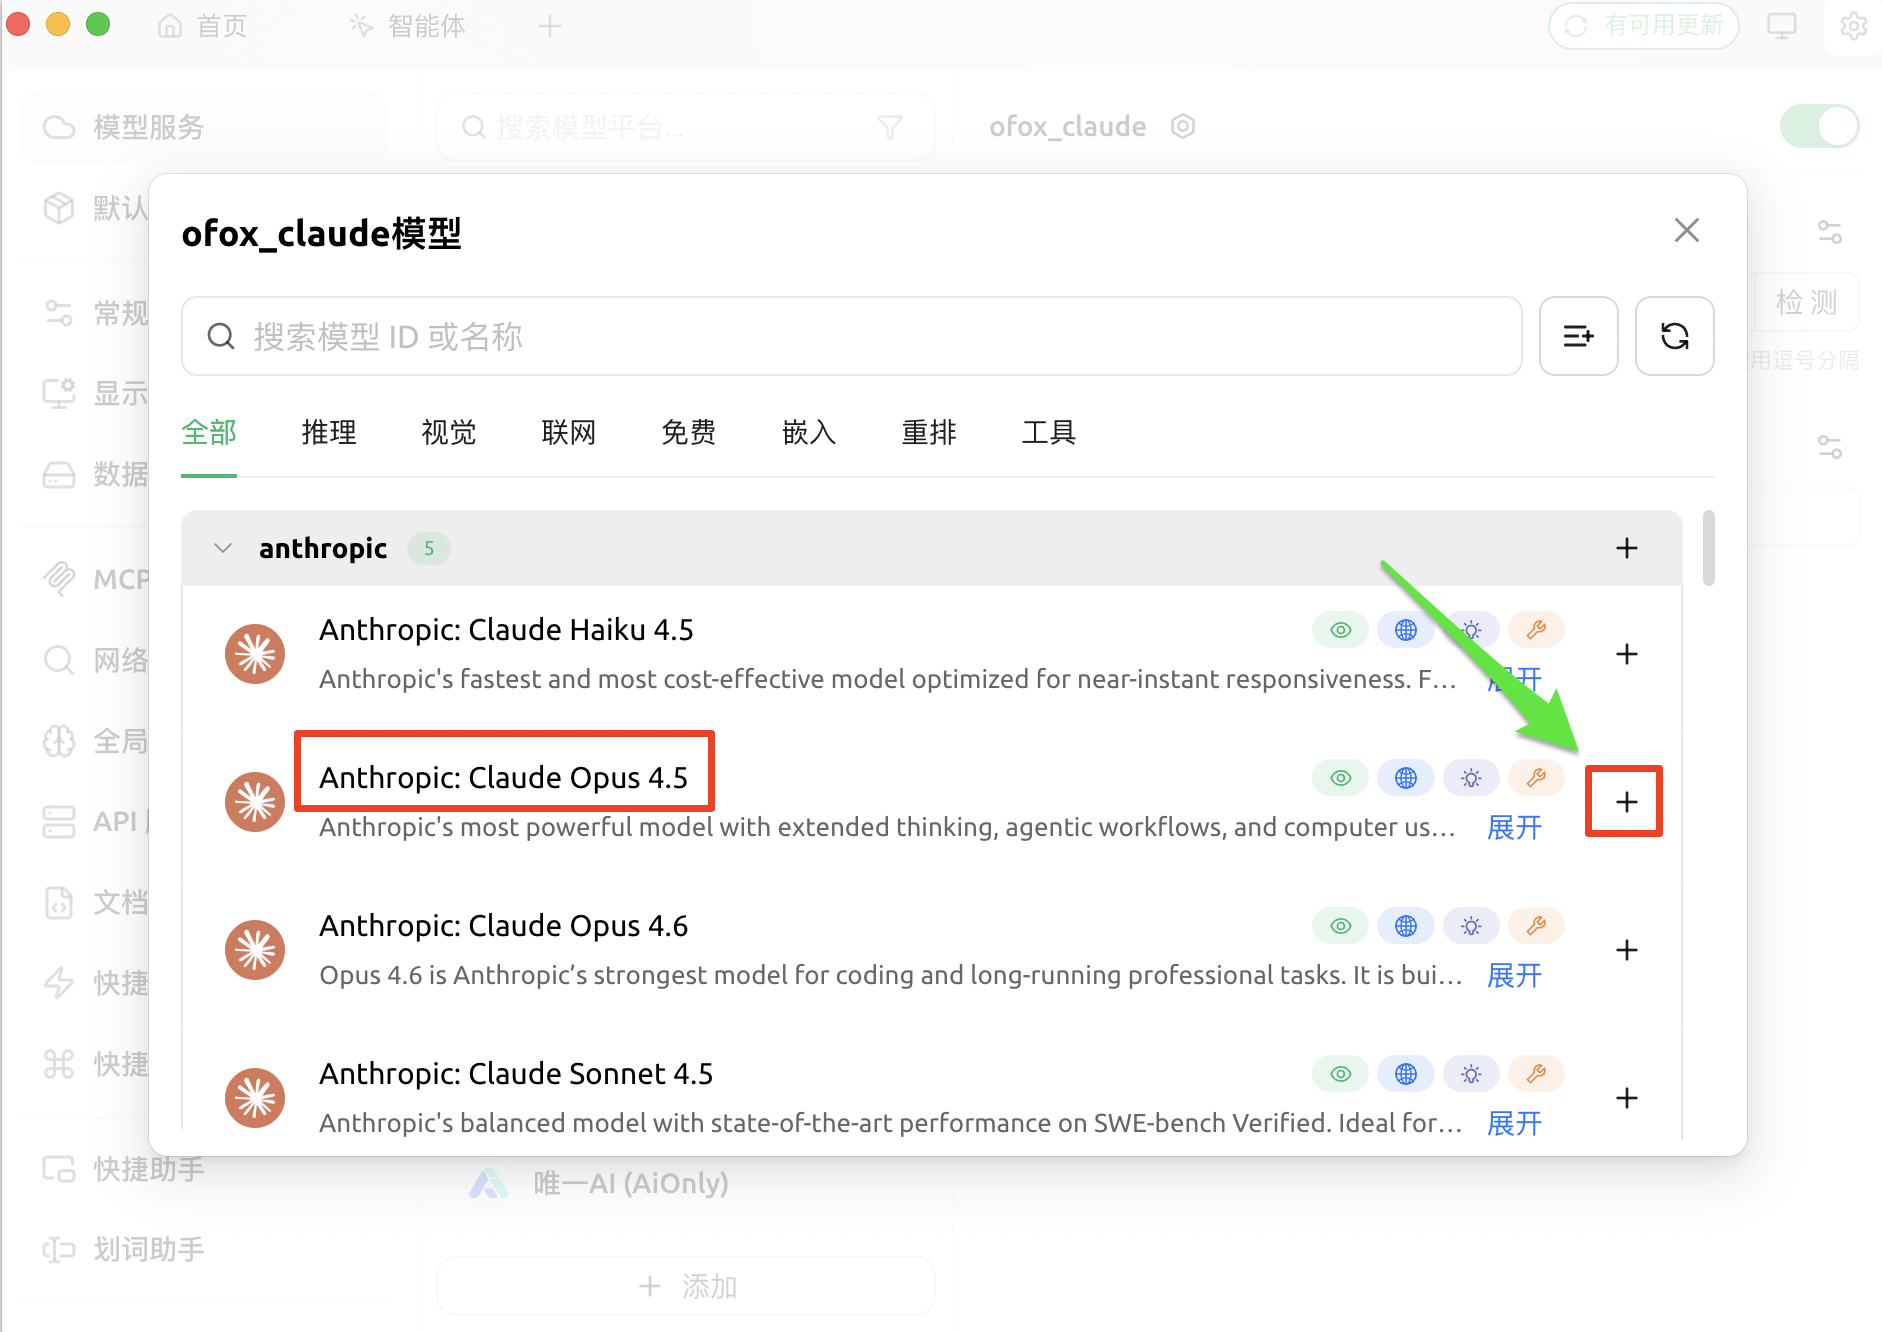
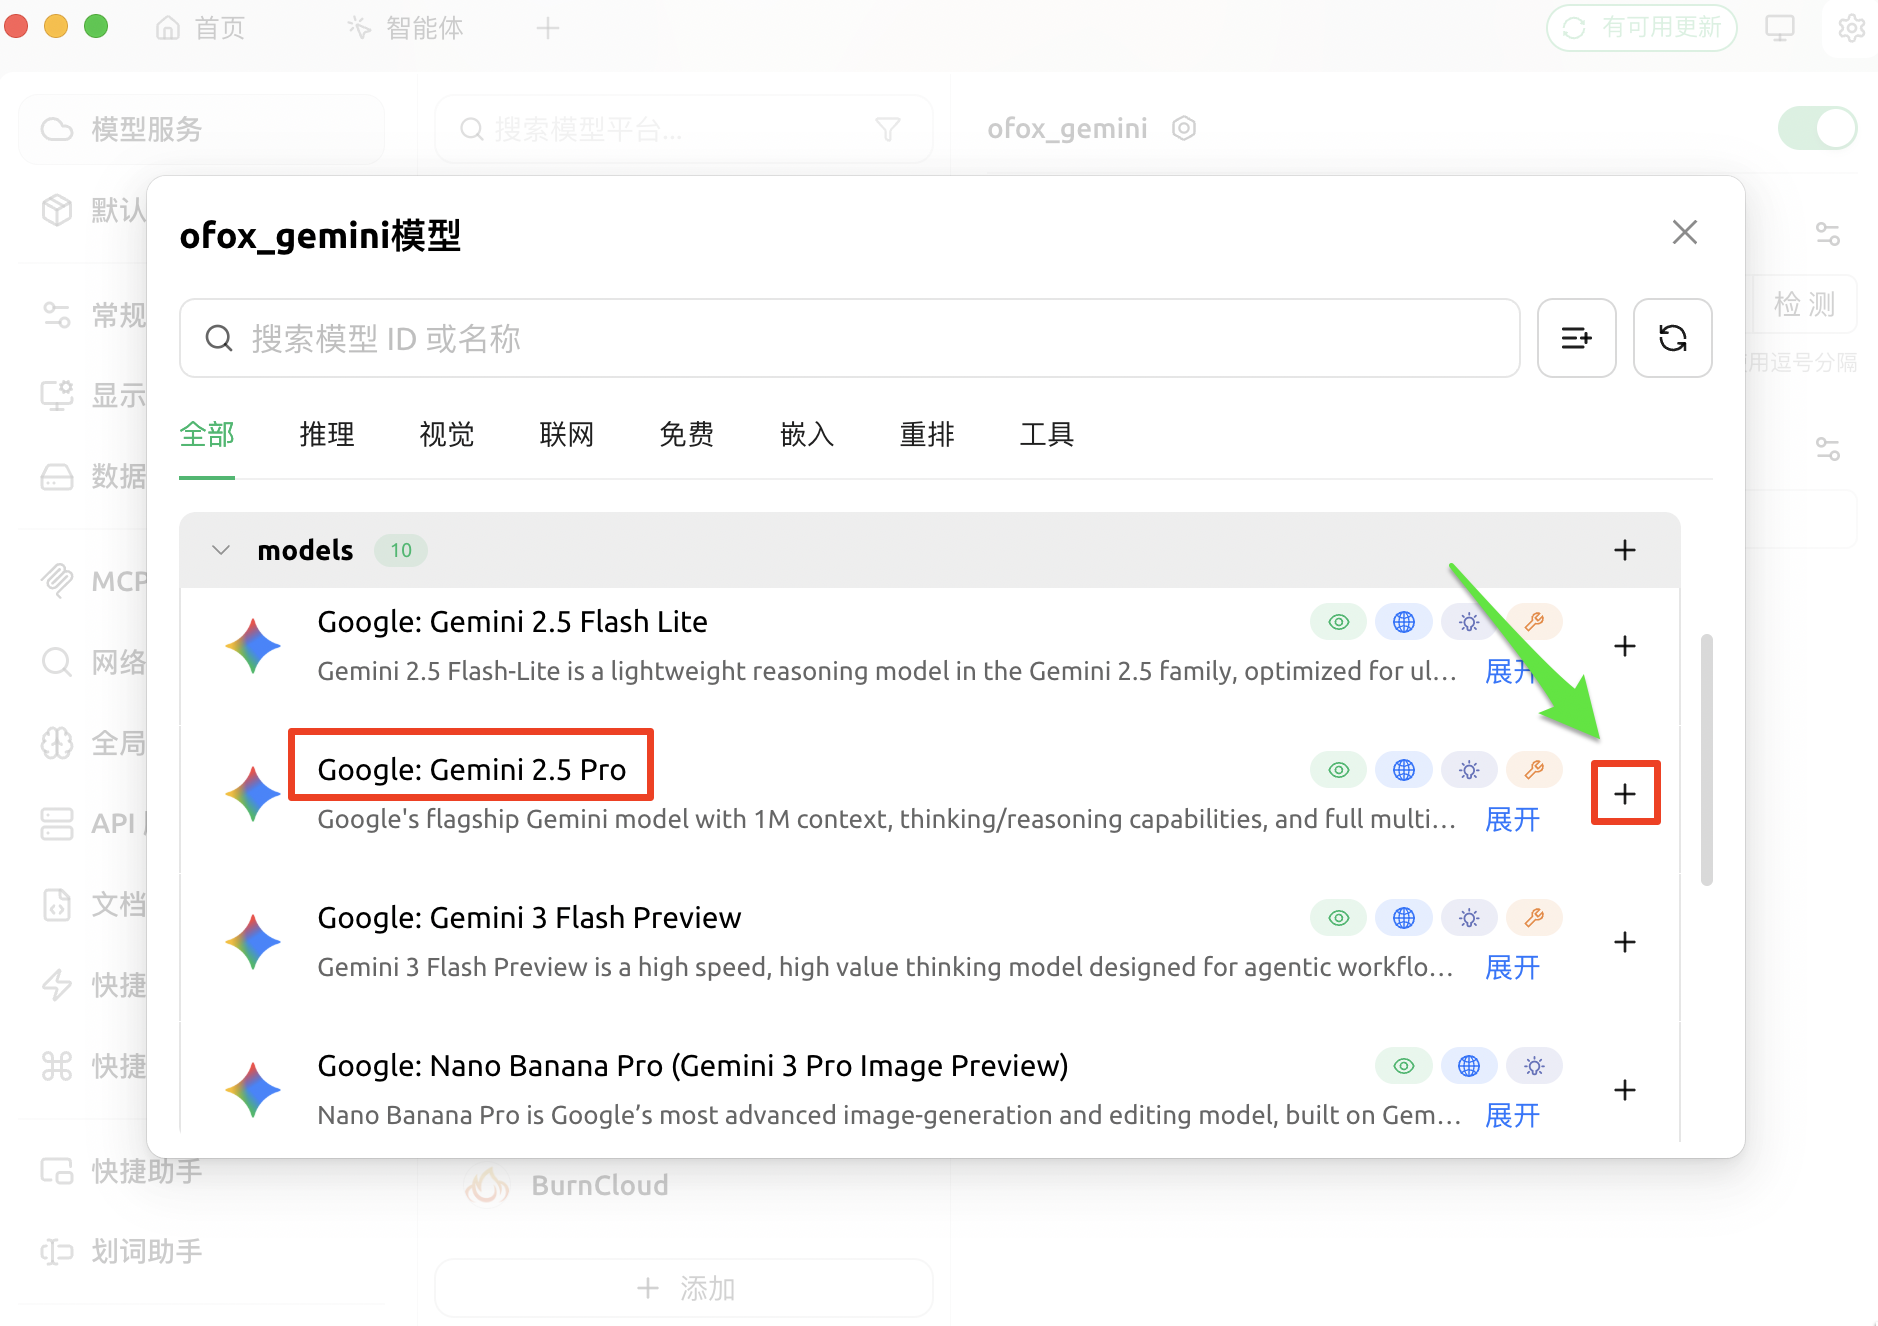
Step 4: Add Models
Click the Manage button in the model section to automatically fetch the model list, then click + next to a model to add it to the enabled list.
OpenAI Chat
OpenAI Response
Claude
Gemini
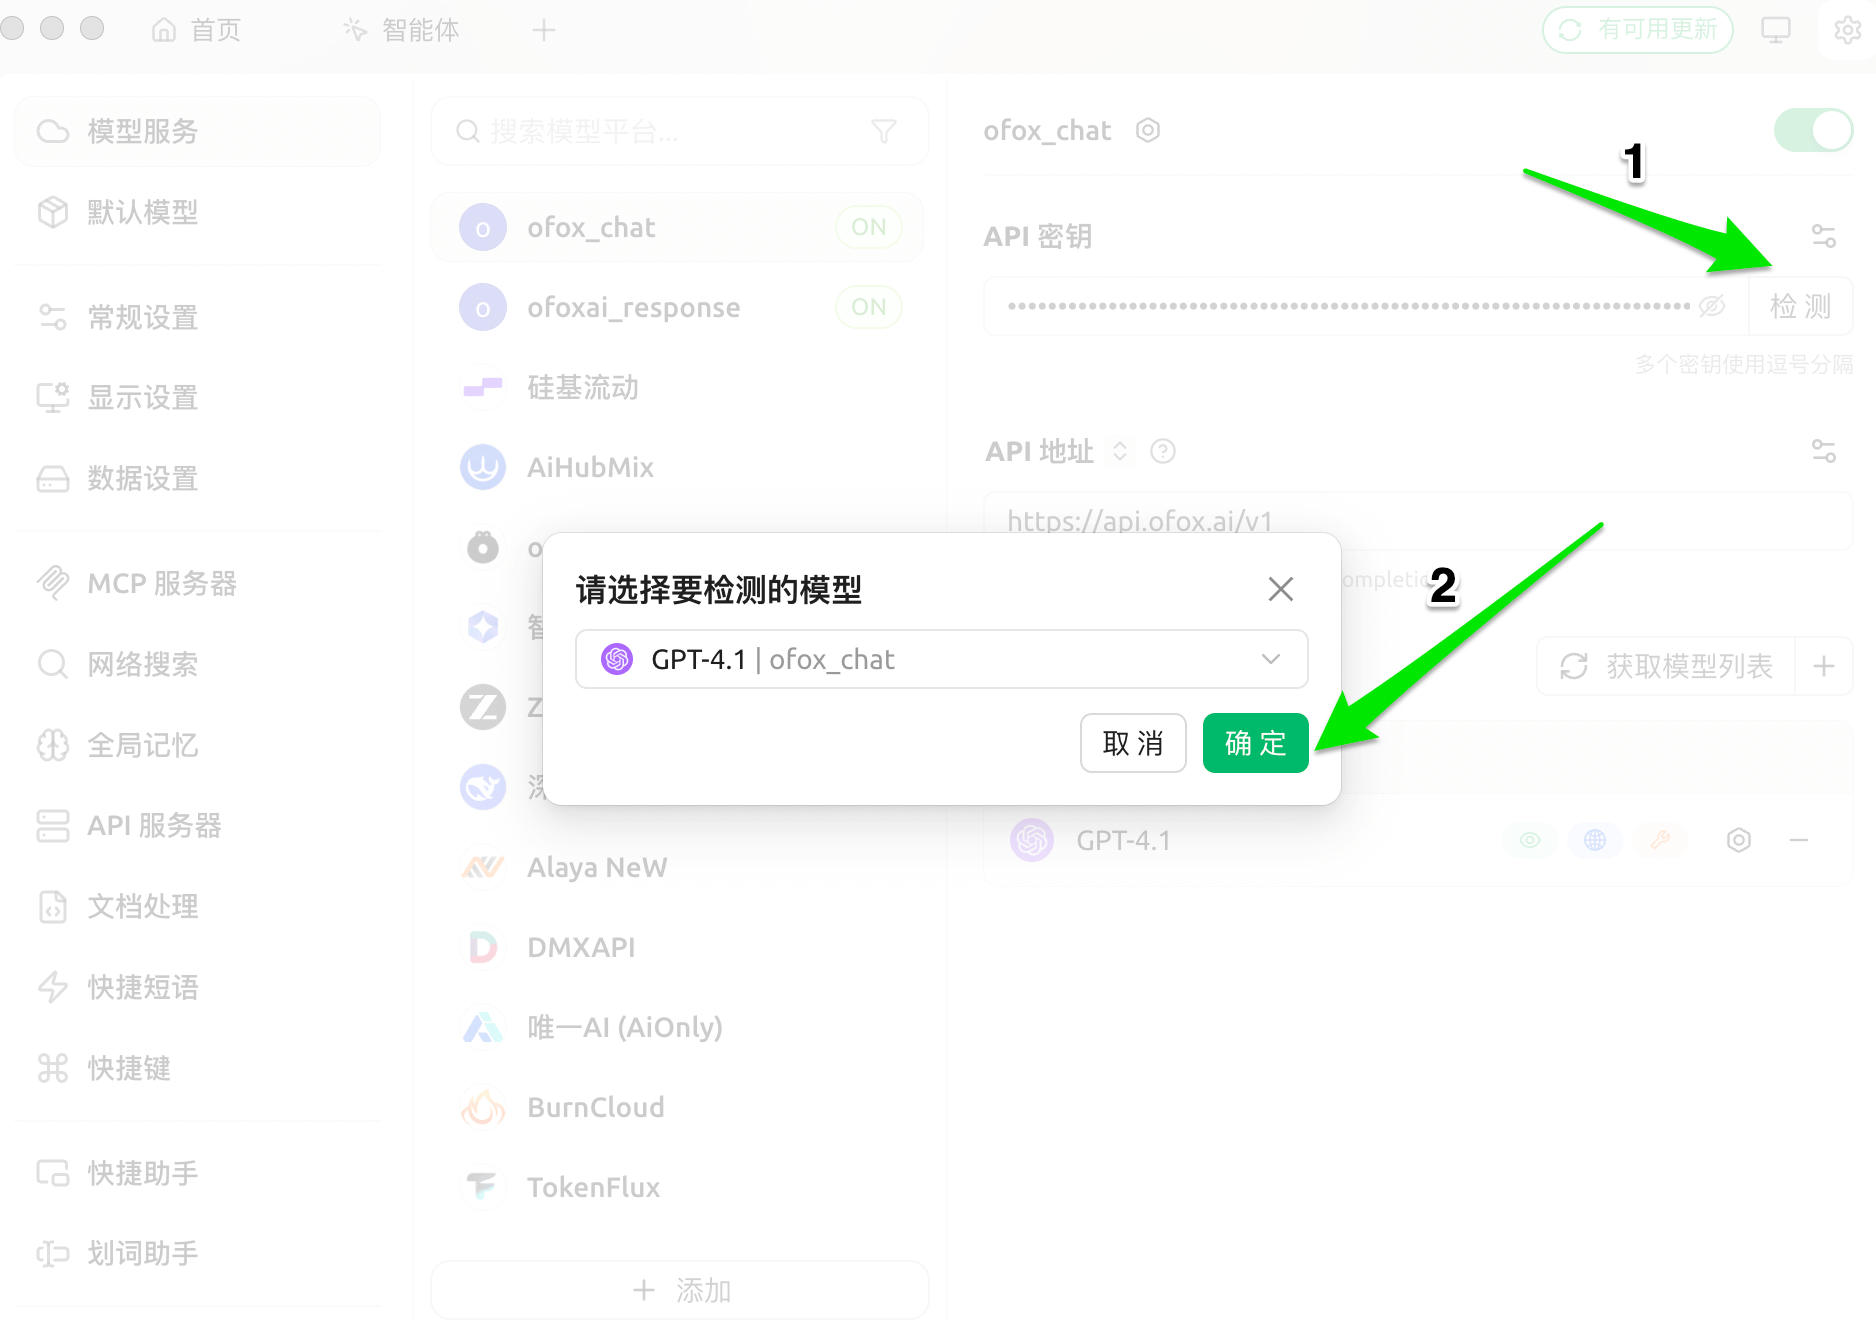
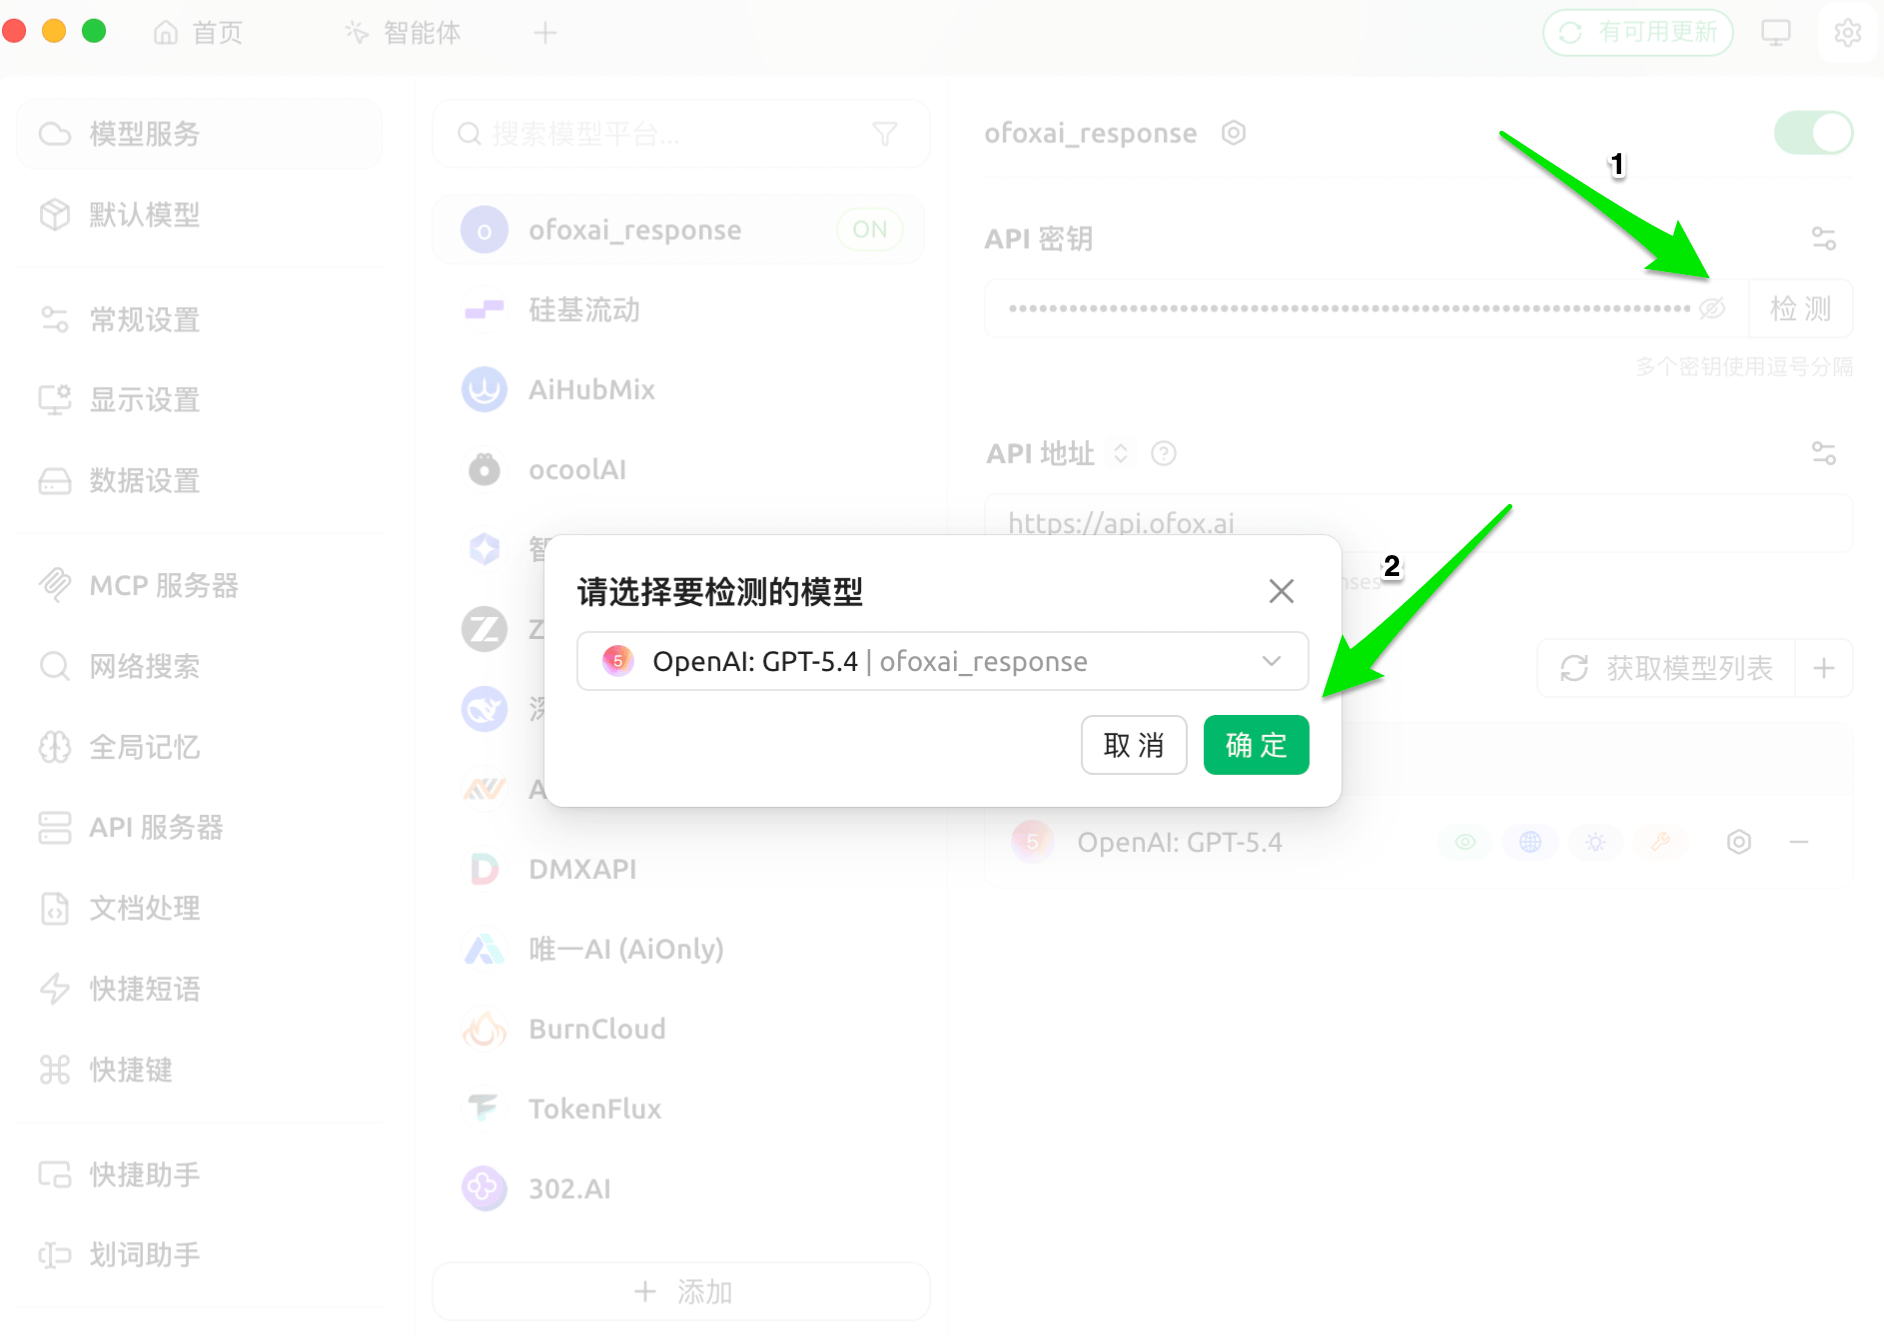
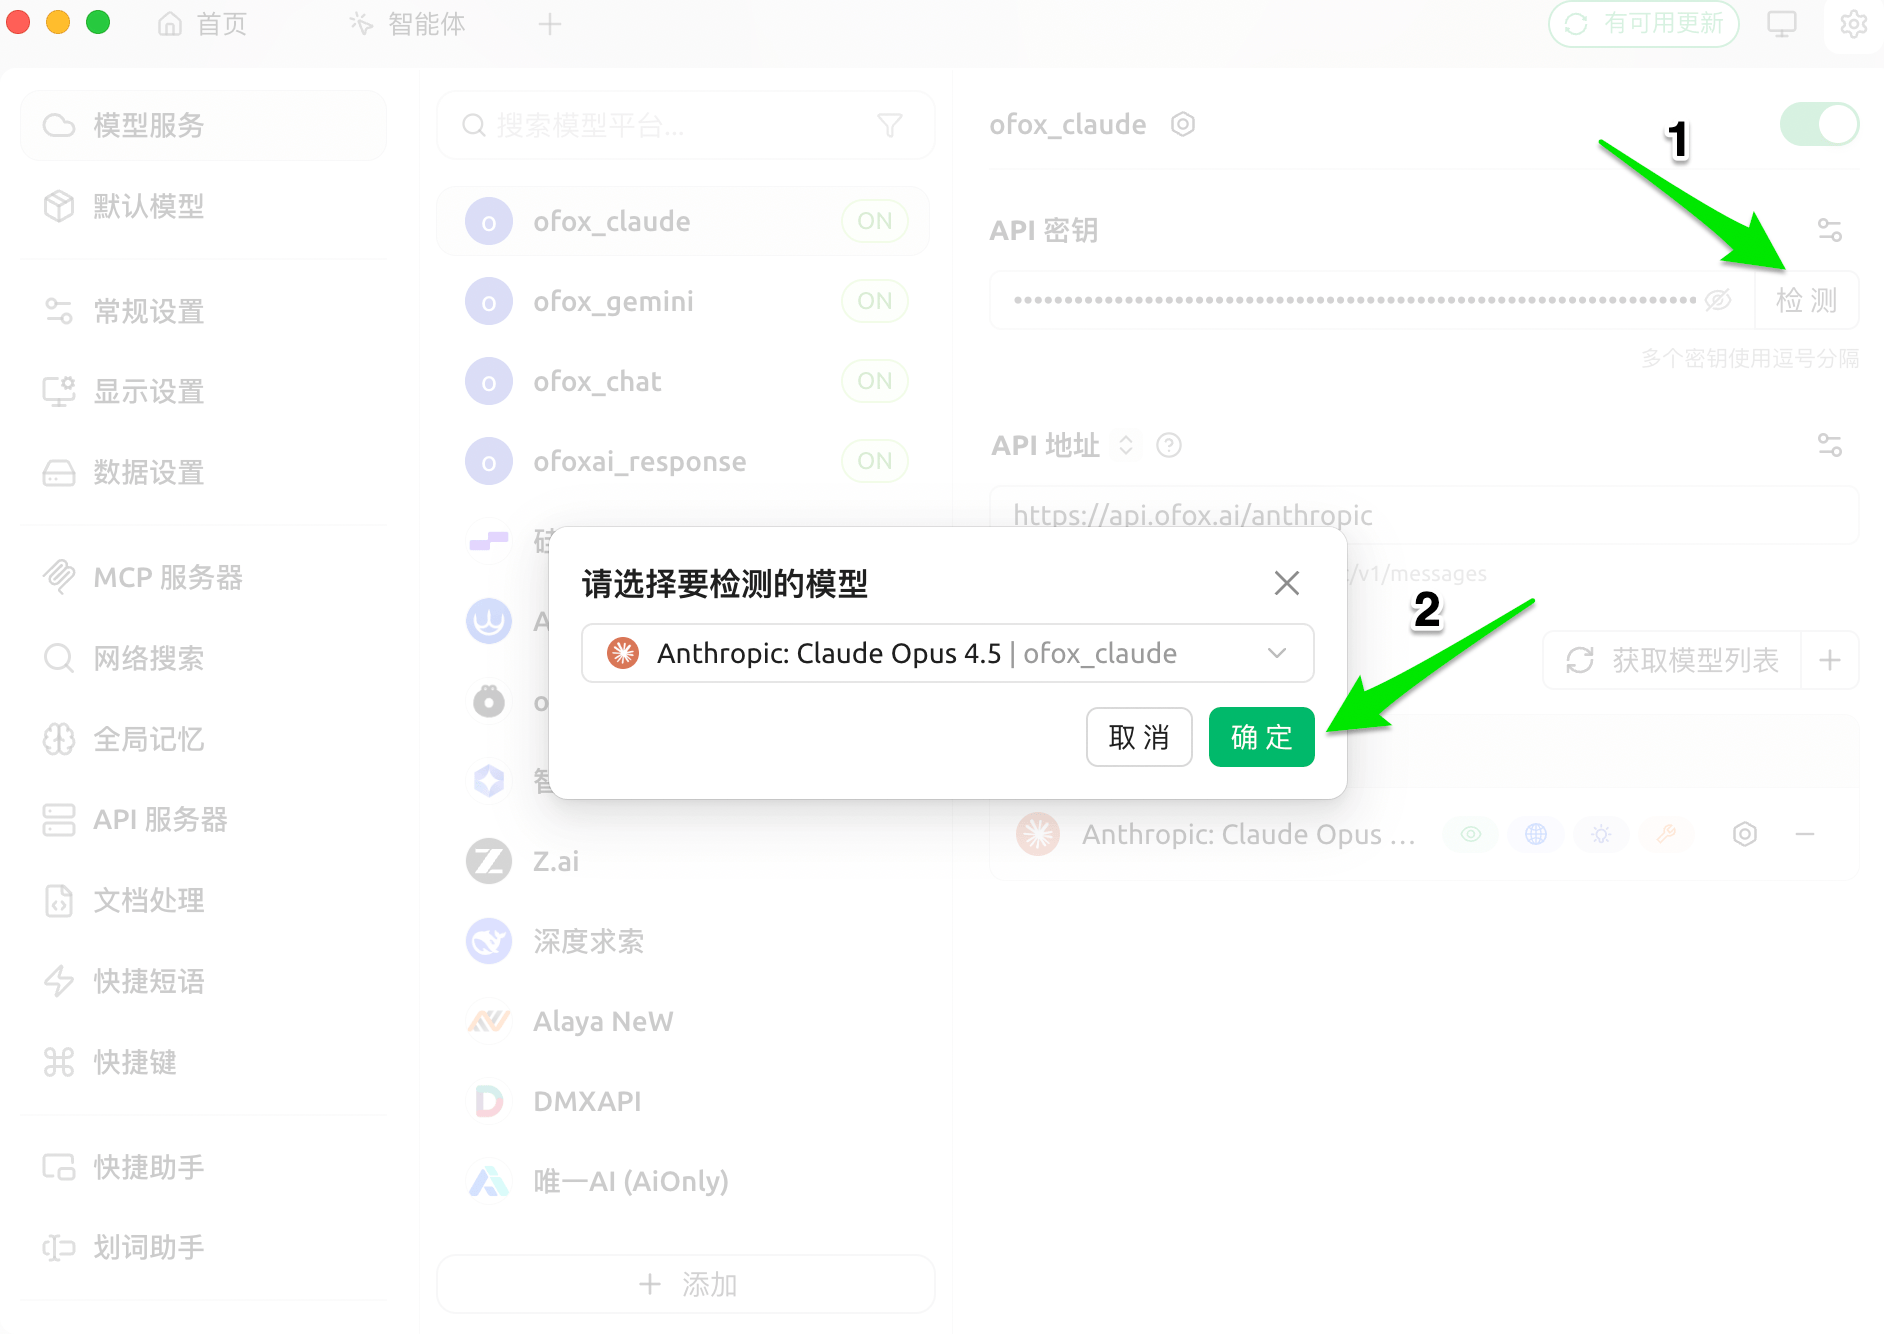
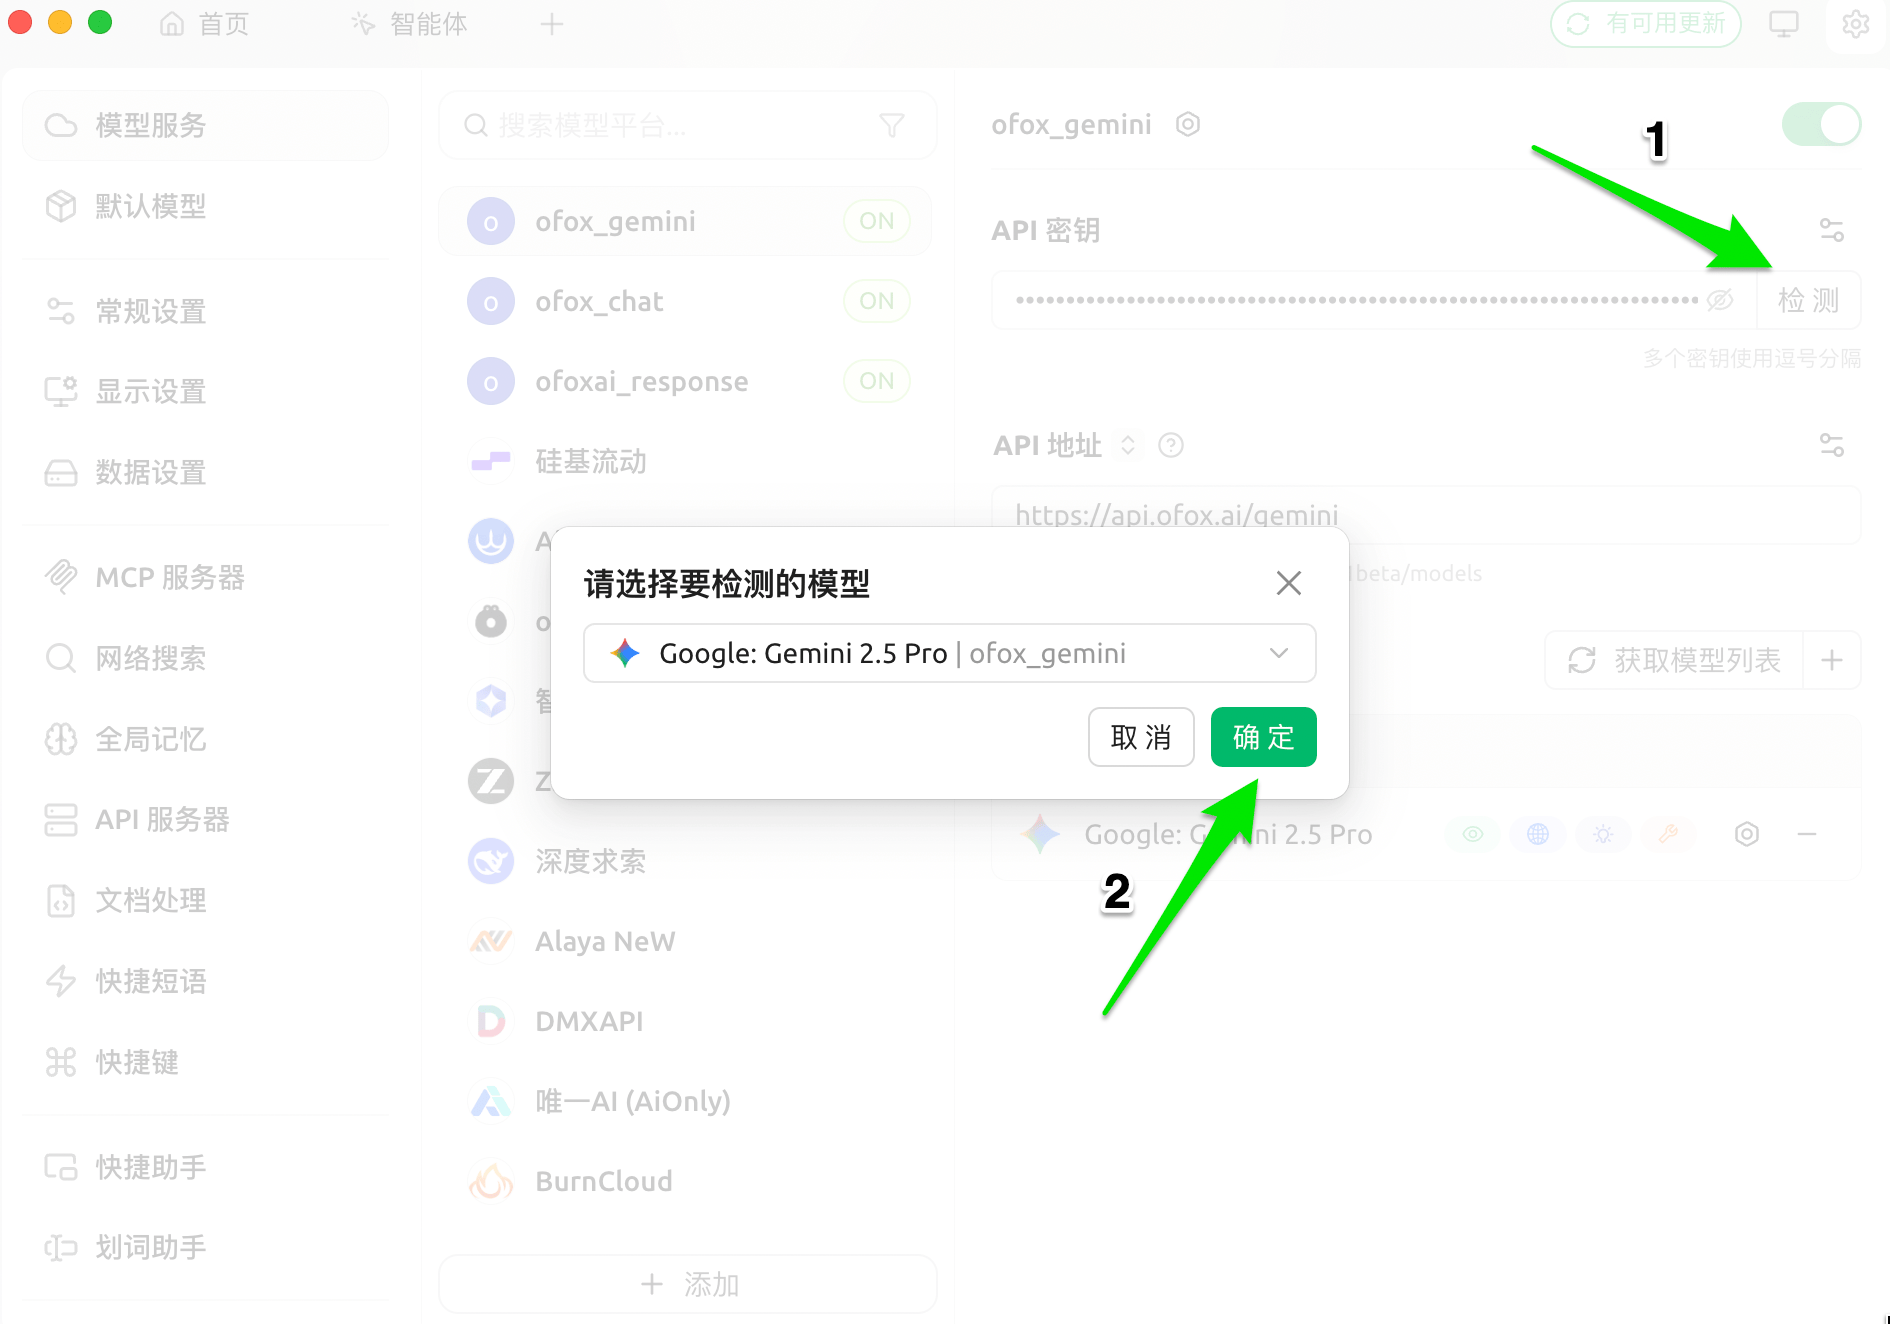
Step 5: Verify Configuration
Click the Test button, select any model to test. A passing result means the configuration is successful.
OpenAI Chat
OpenAI Response
Claude
Gemini
Start Using
Return to the main interface, click the model selector at the top of the chat, and choose a model under the corresponding provider group to start chatting.
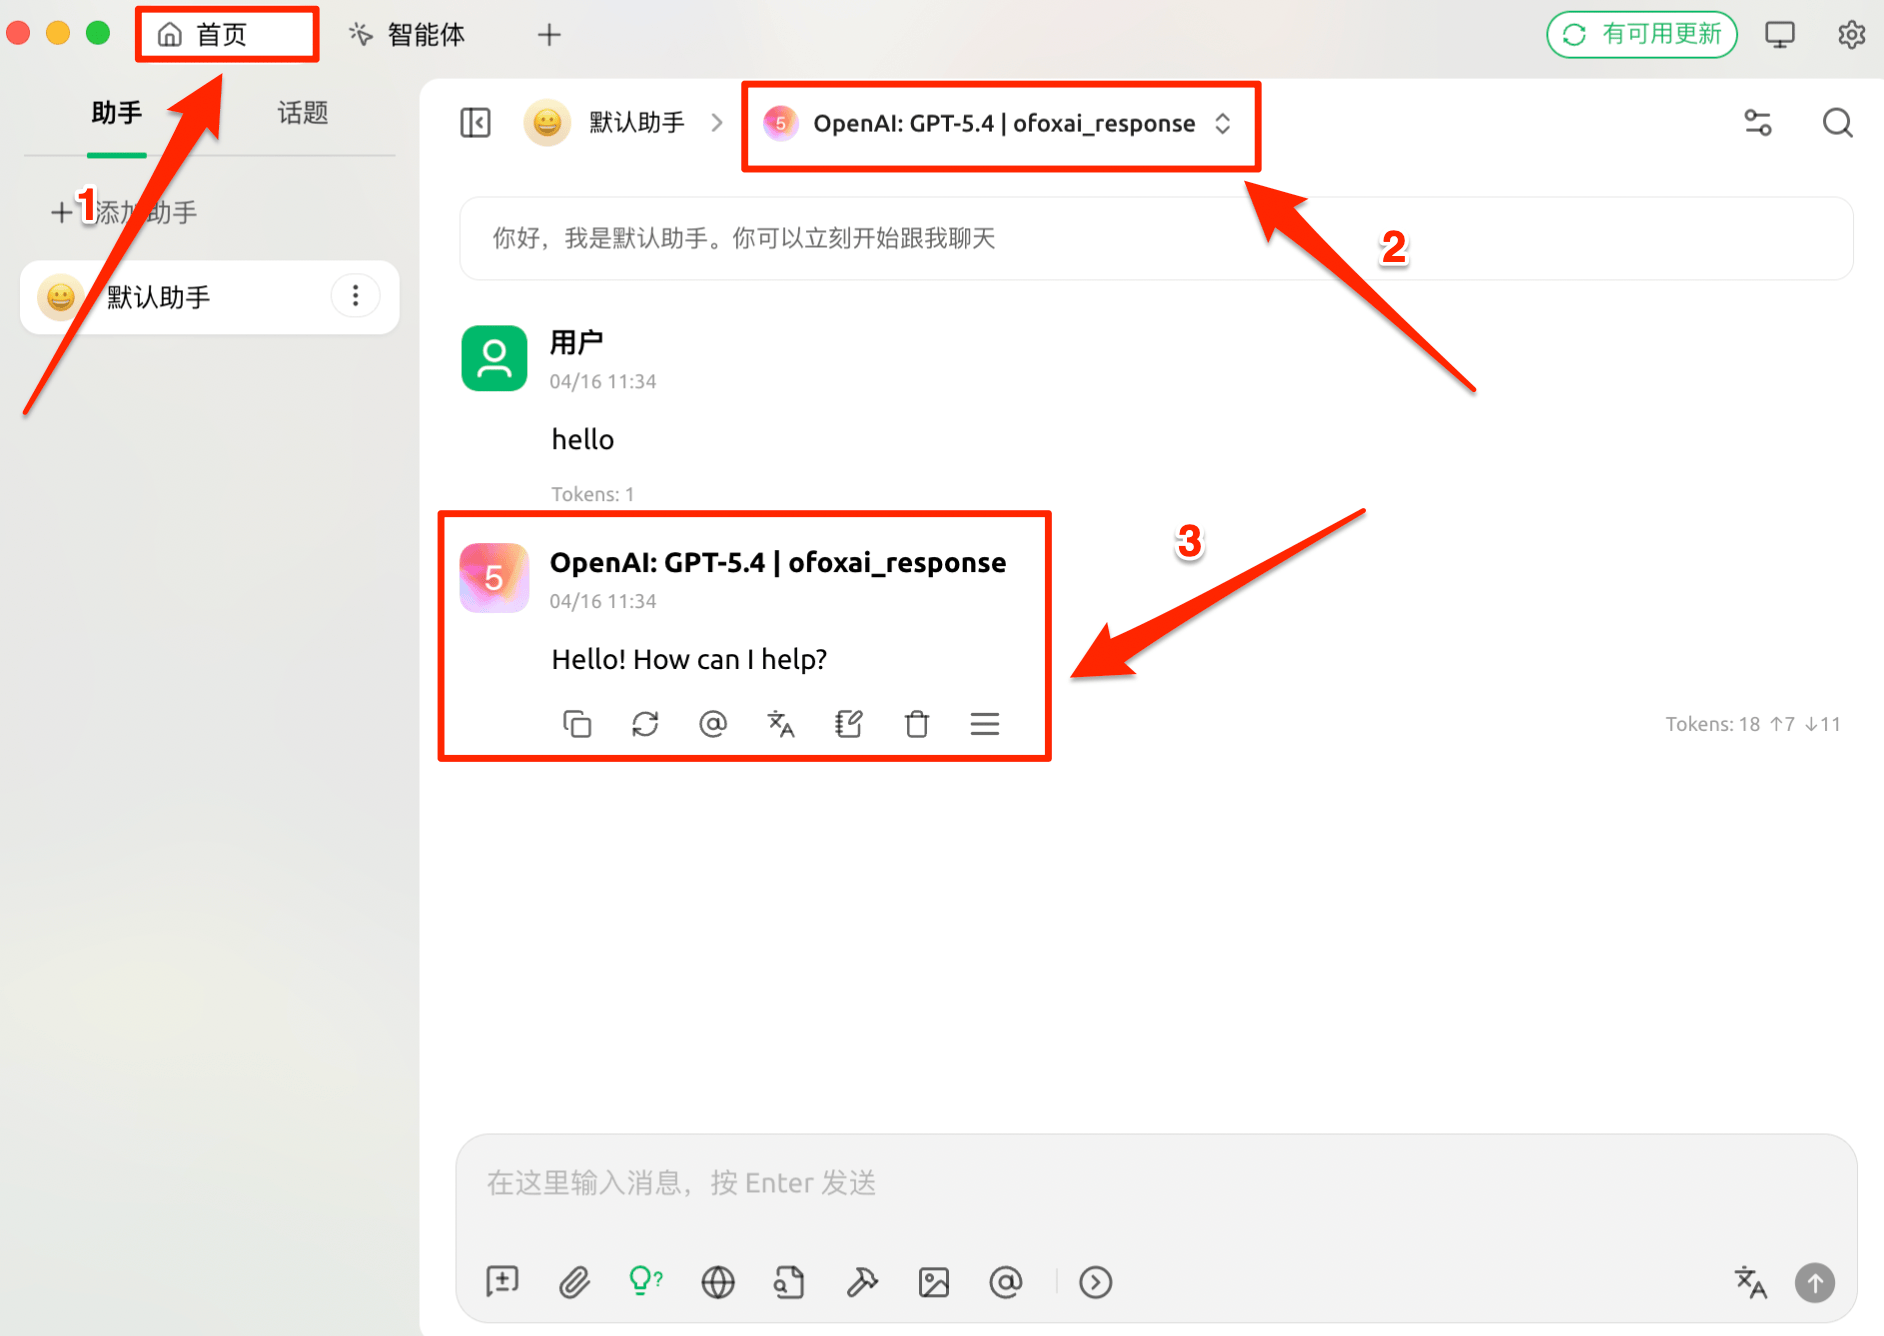
Image Generation
Cherry Studio supports generating images via the Gemini protocol using OfoxAI’s image generation models, directly within conversations.
Step 1: Add a Gemini Provider
Go to Model Services and click + Add at the bottom.
In the dialog, select Gemini as the provider type and click OK.
Step 2: Configure and Fetch Image Models
Set the API address to https://api.ofox.ai/gemini, then click Fetch Model List and add the following image generation models:
Google: Nano Banana Pro (Gemini 3 Pro Image Preview)Google: Nano Banana (Gemini 2.5 Flash Image)Google: Nano Banana 2 (Gemini 3.1 Flash Image Preview)

Step 3: Edit Assistant and Configure Image Parameters
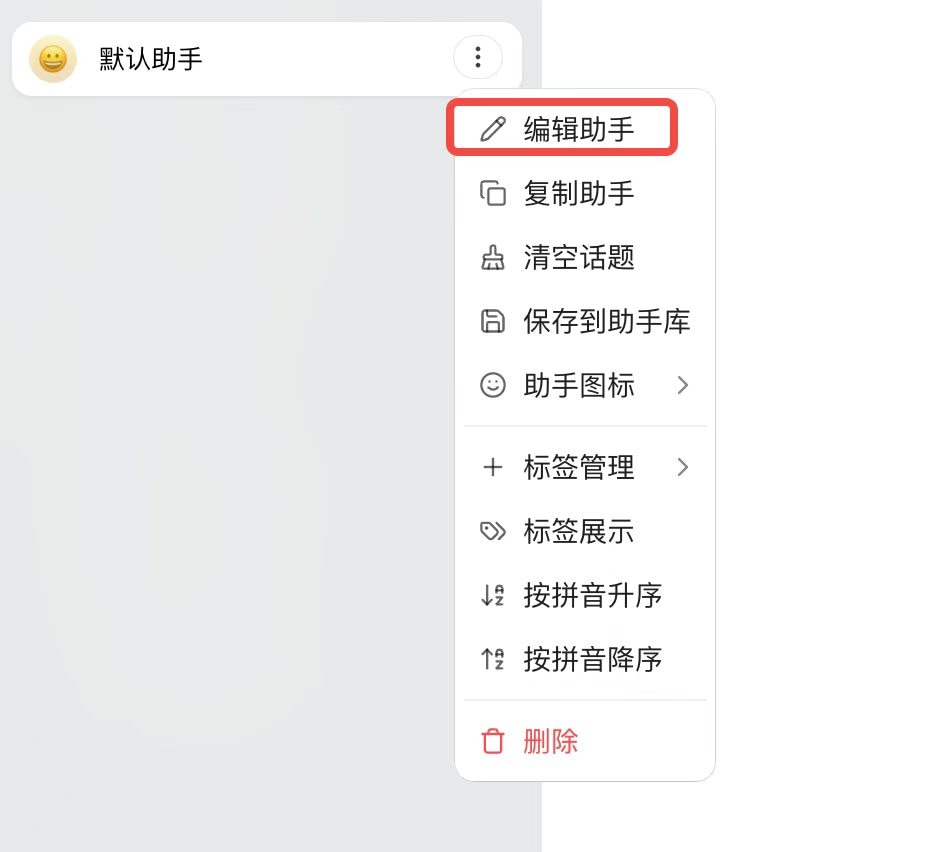
Right-click an assistant on the main interface and select Edit Assistant.
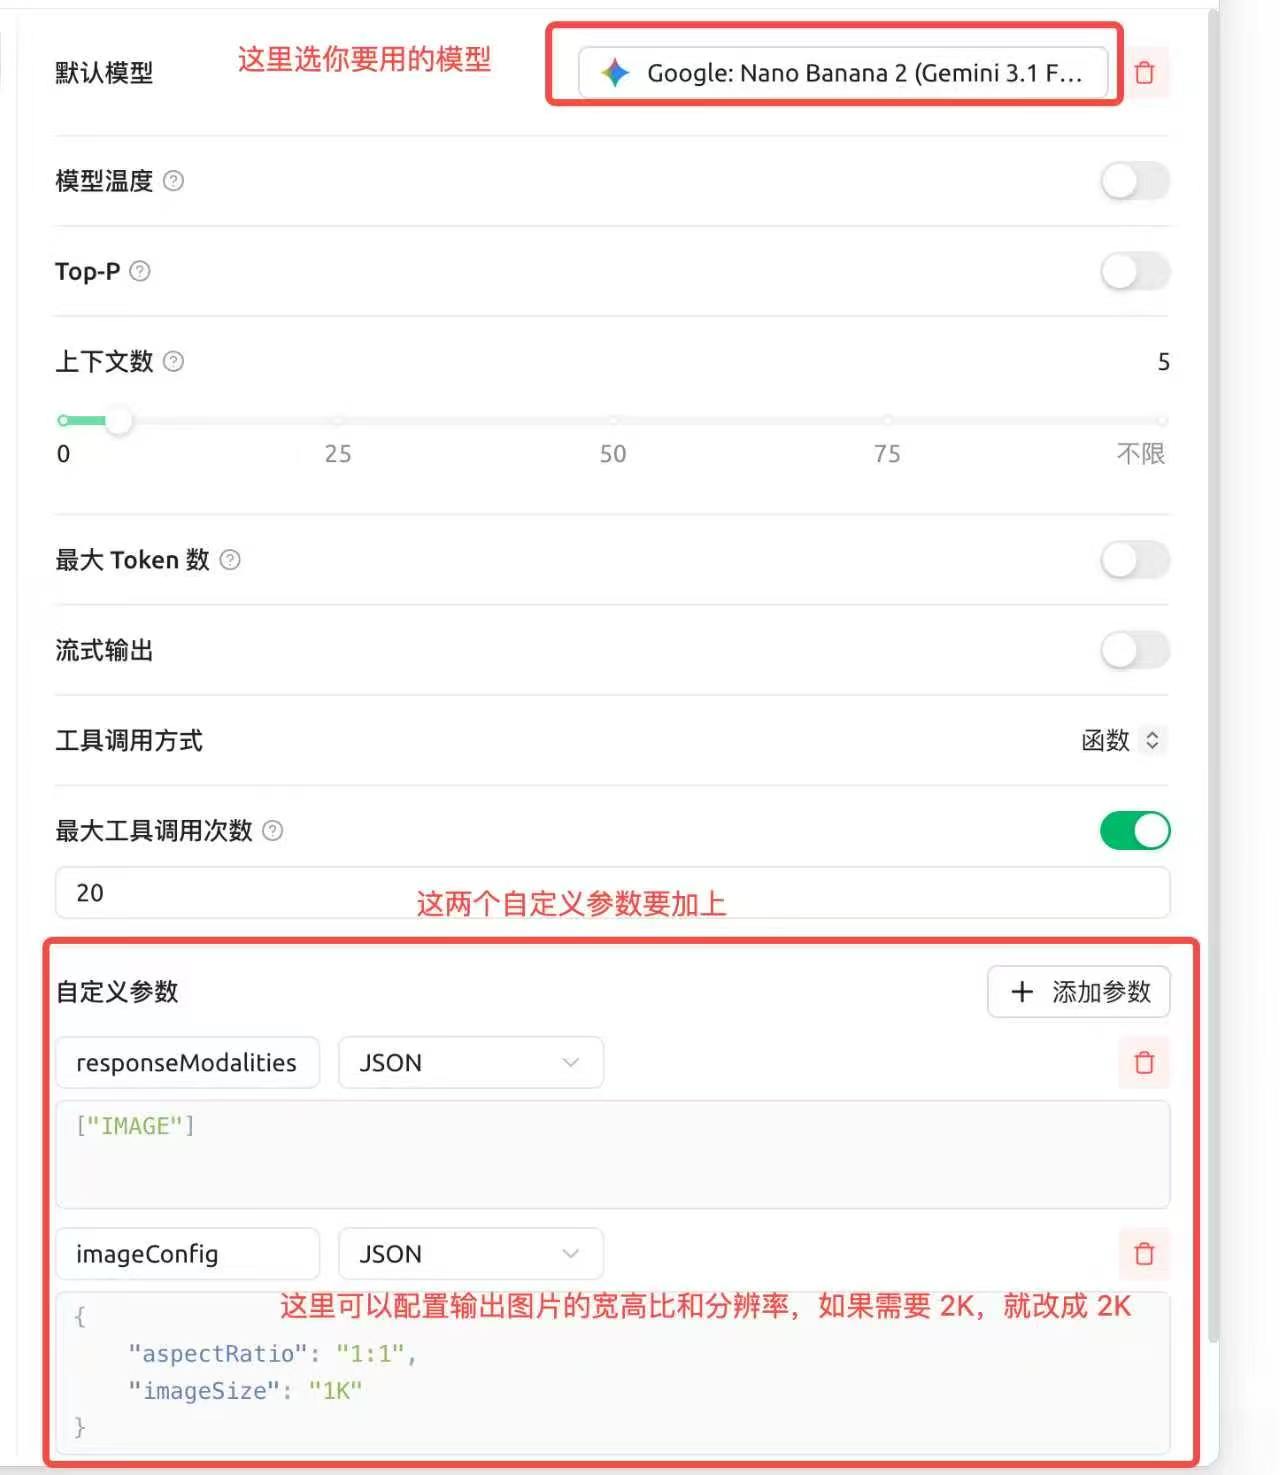
On the edit page:
- Set the Default Model to the image generation model you just added
- Click + Add Parameter and add the following two custom parameters:
| Parameter | Type | Value |
|---|---|---|
responseModalities | JSON | ["IMAGE"] |
imageConfig | JSON | {"aspectRatio": "1:1", "imageSize": "1K"} |
You can adjust the aspect ratio and resolution in imageConfig. For 2K images, change imageSize to "2K".
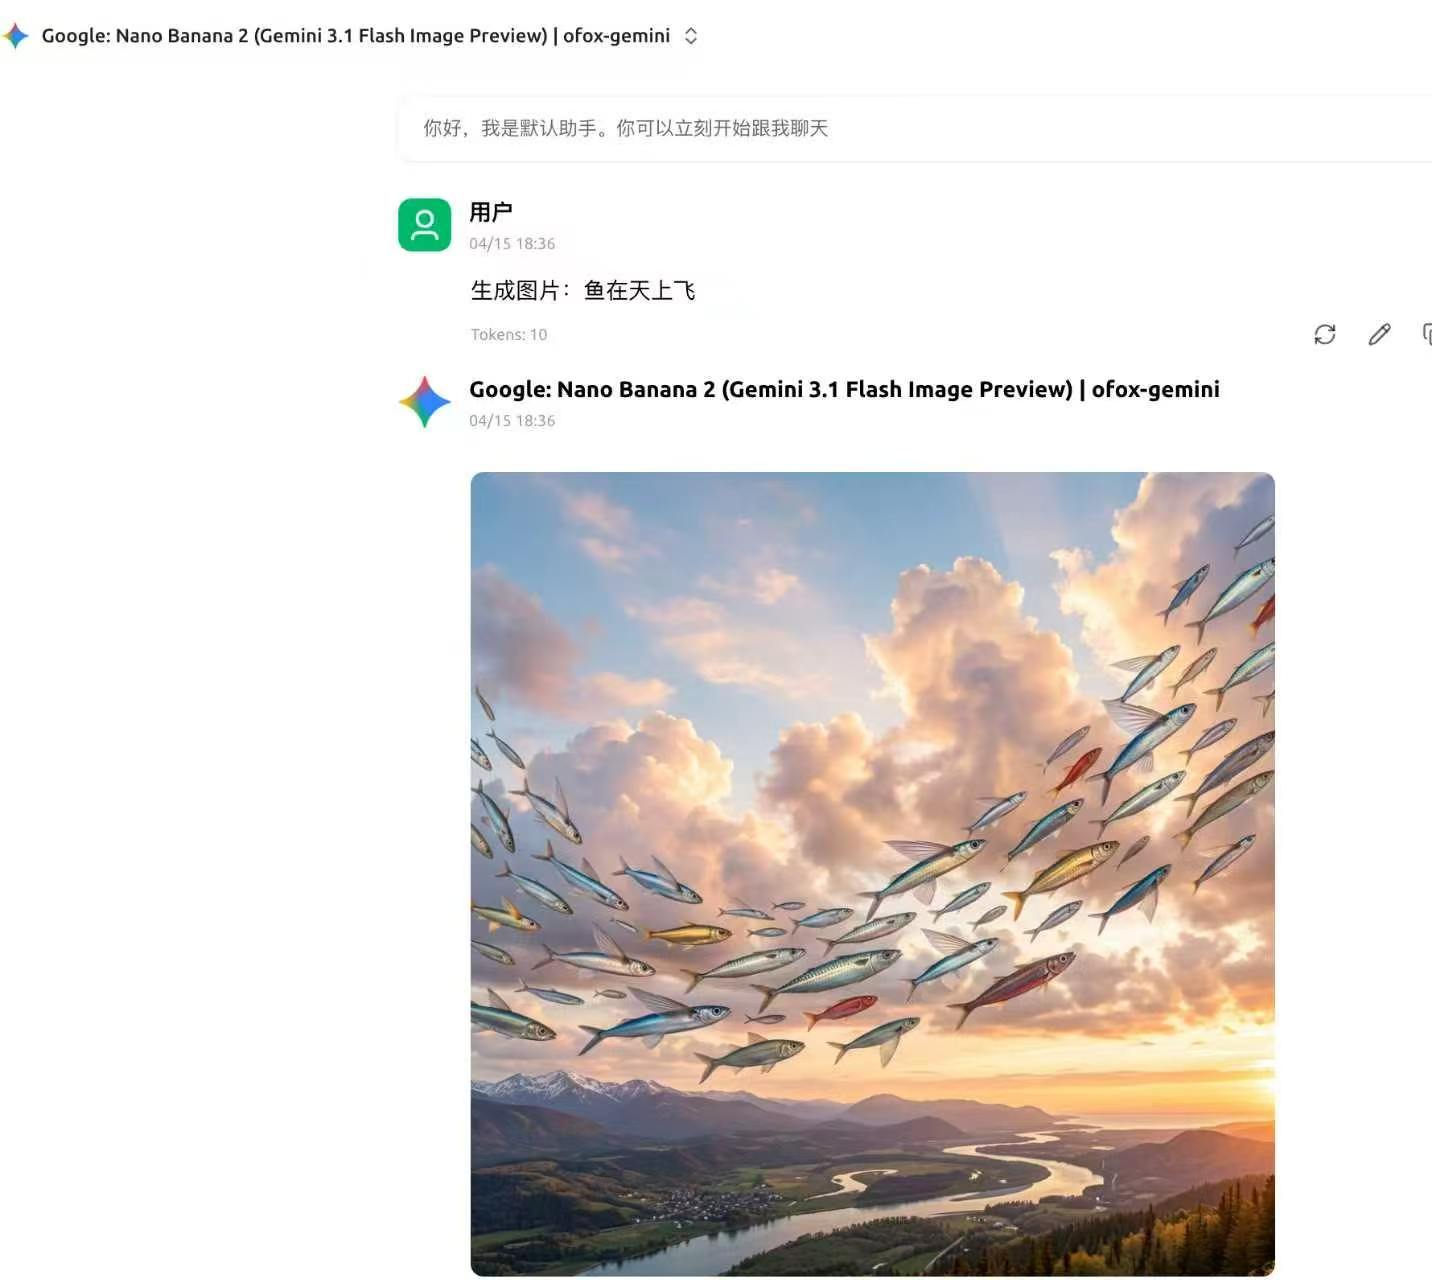
Step 4: Start Generating
After saving the configuration, enter an image description in the chat to generate images.
FAQ
Q: The model list is empty after clicking “Manage”
Check that the API address is correct (no trailing slash) and that the API key was copied completely without extra spaces.
Q: Connection failed during verification
- Confirm the API Key was copied completely from the OfoxAI Console without extra spaces
- Confirm the API address is correct
- Confirm your network connection is working
Q: The provider doesn’t appear in the model selector
Check that the toggle in the top-right corner of the configuration page is enabled.