GitHub Copilot Configuration
Using the VS Code extension OAI Compatible Provider for Copilot, you can integrate OfoxAI with GitHub Copilot Chat to use Claude, GPT-4o, Gemini, and 100+ models right in your familiar editor.
This extension requires a GitHub Copilot Individual subscription and does not support Copilot Business or Enterprise users. If you don’t have a Copilot subscription, consider using Cursor or Cherry Studio instead.
Prerequisites
- A registered OfoxAI account with an API Key (Get one here )
- VS Code installed
- A valid GitHub Copilot Individual subscription (Business / Enterprise not supported)
Configuration Steps
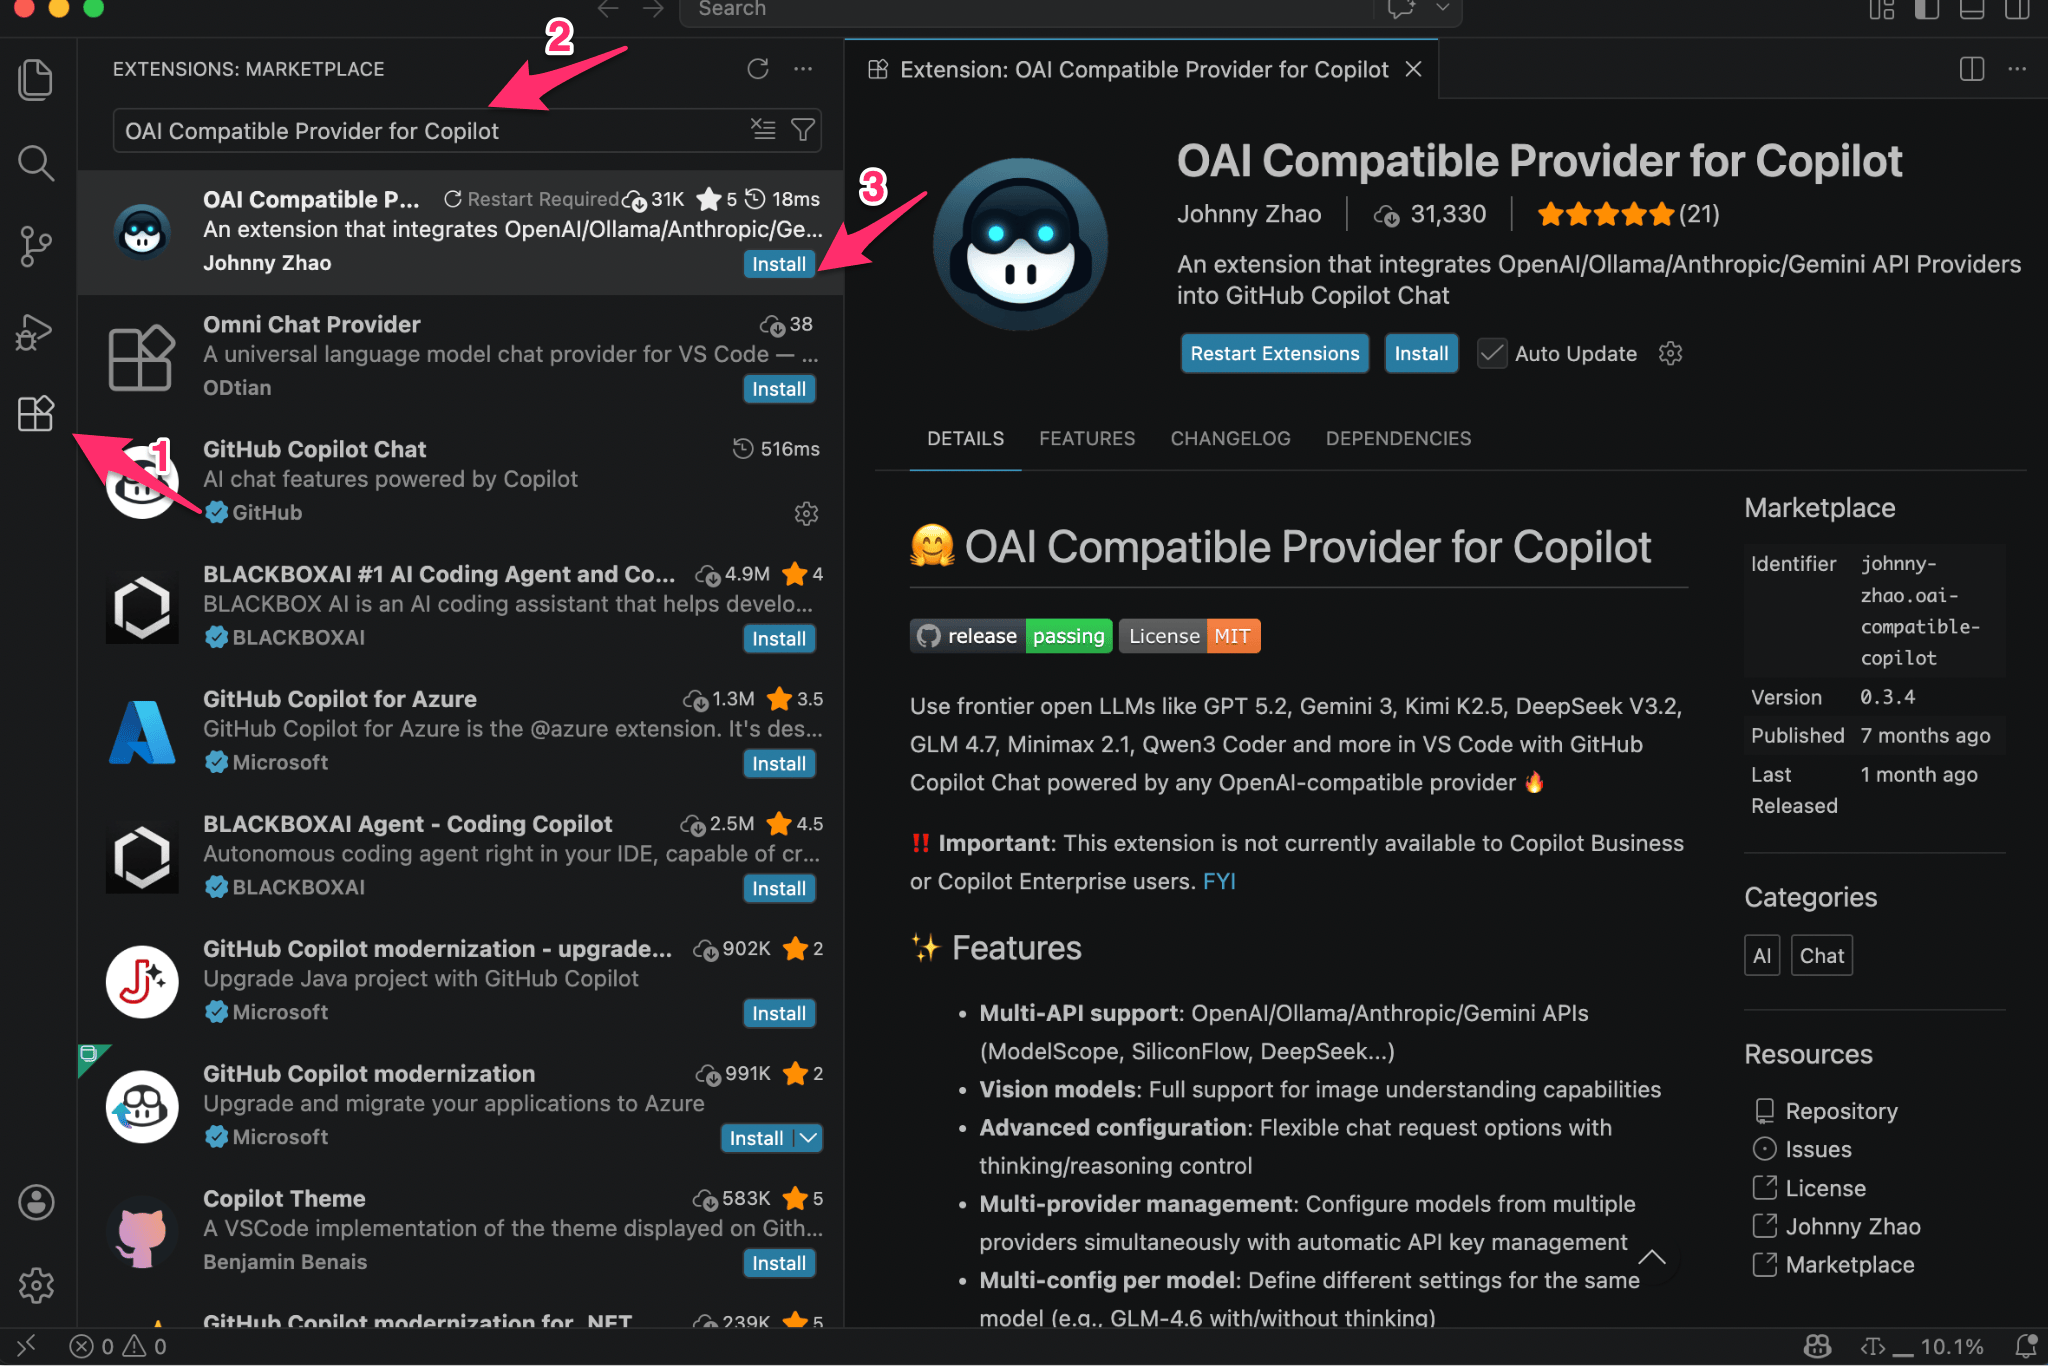
Step 1: Install the Extension
Search for OAI Compatible Provider for Copilot (by Johnny Zhao) in the VS Code Extension Marketplace and click Install.
Step 2: Open the Configuration UI
Press Cmd+Shift+P (macOS) / Ctrl+Shift+P (Windows/Linux) to open the Command Palette, then type and run:
OAICopilot: Open Configuration UI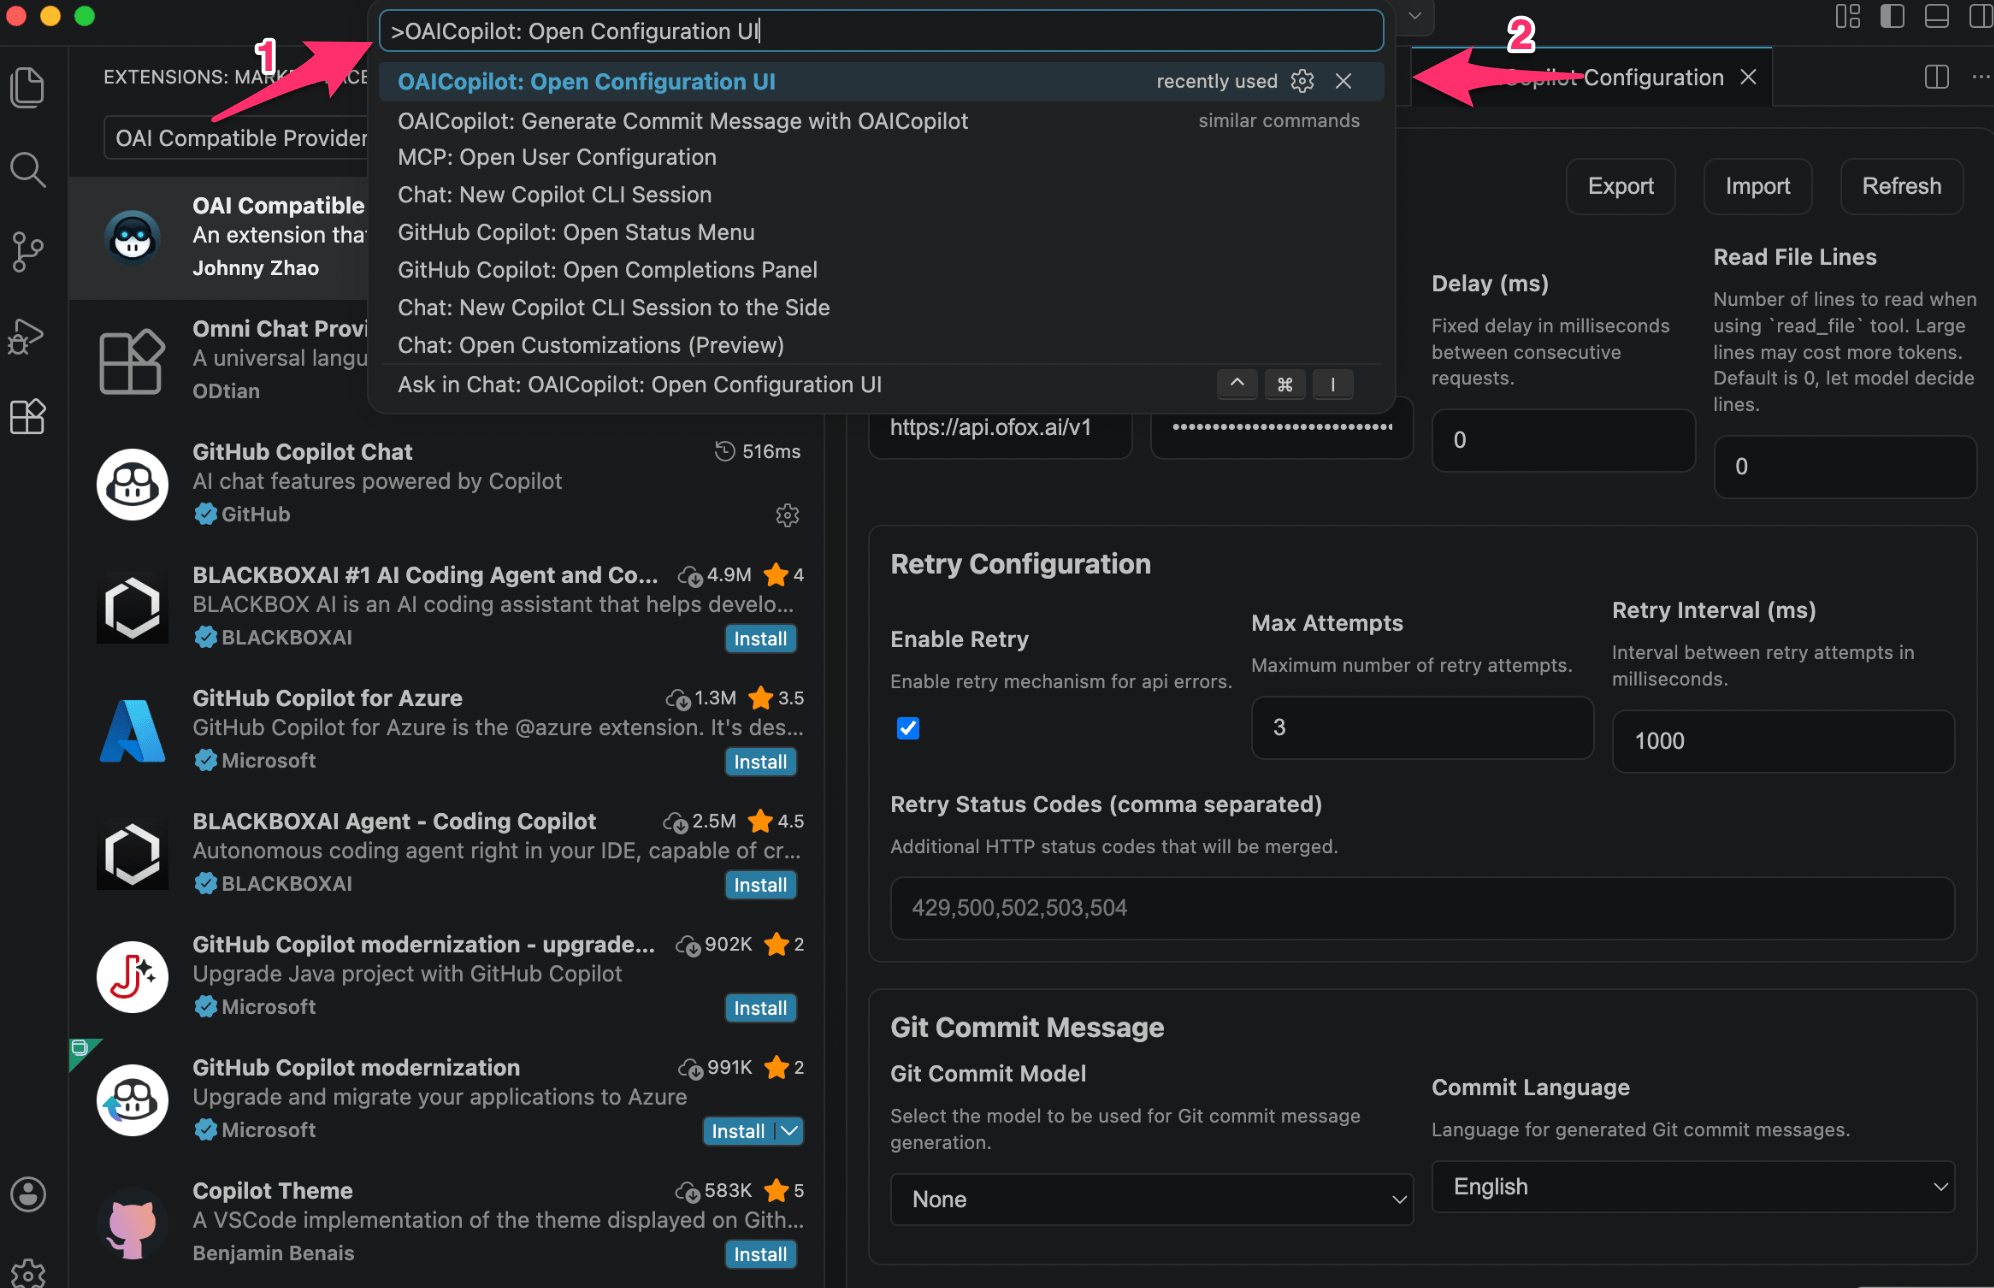
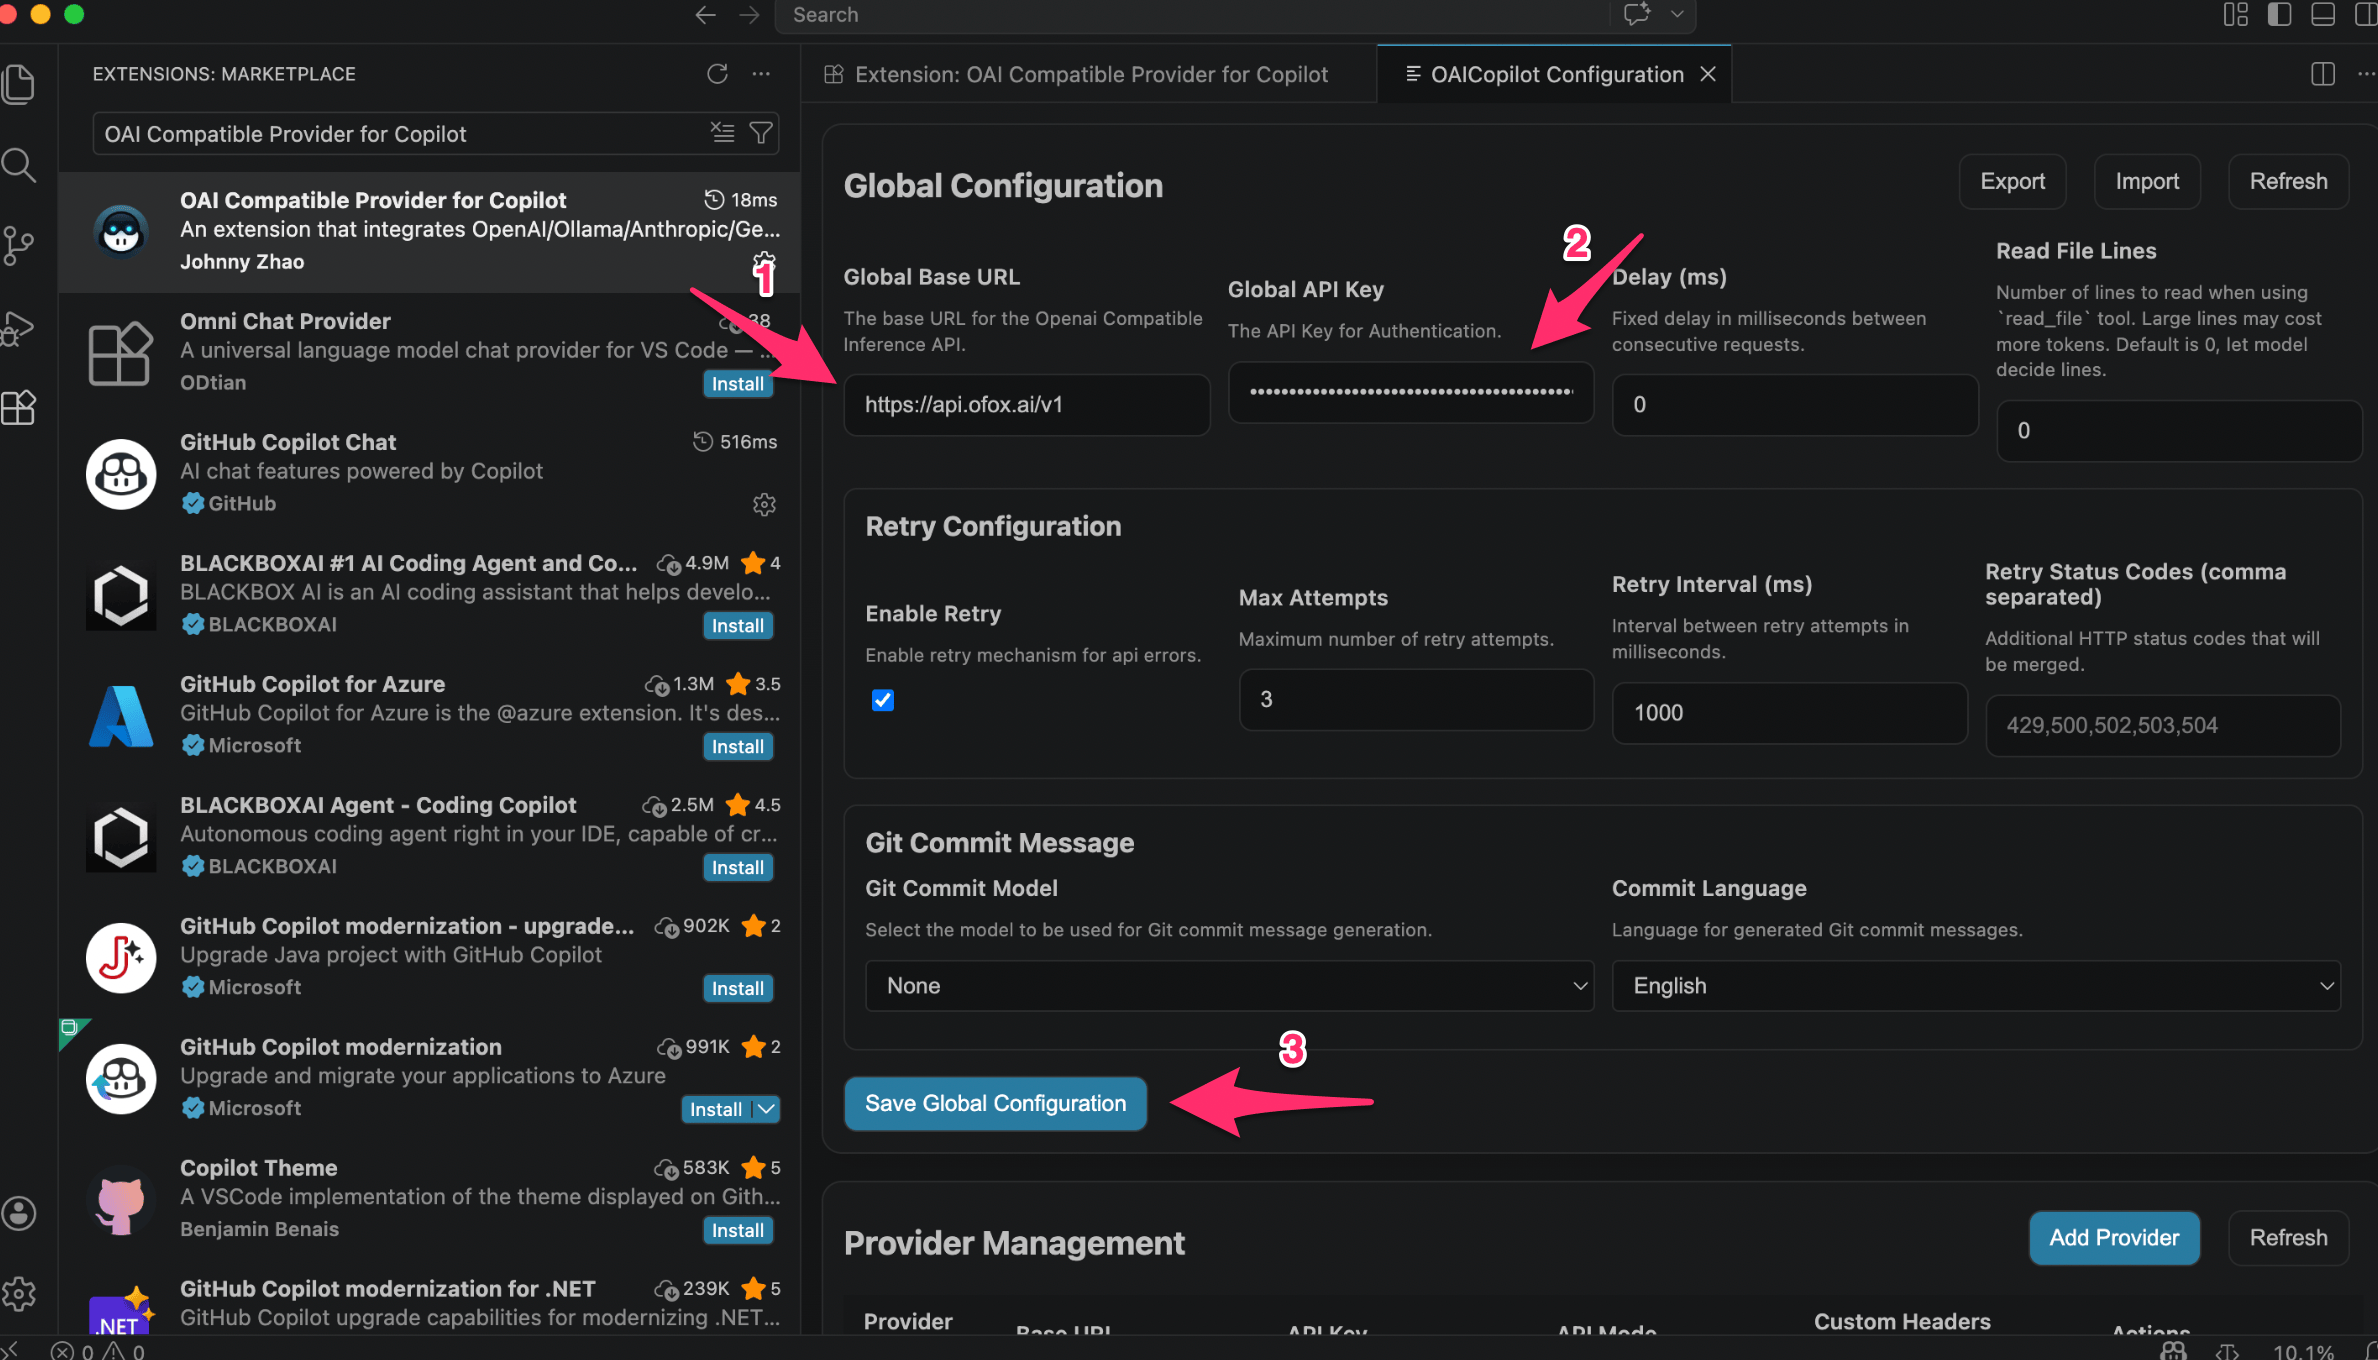
Step 3: Fill in the Global Configuration
In the Global Configuration section, fill in the following fields and click Save Global Configuration:
| Field | Value |
|---|---|
| Global Base URL | https://api.ofox.ai/v1 |
| Global API Key | Your OfoxAI API Key |
Step 4: Add a Provider
In the Provider Management section, click Add Provider (labeled ①), fill in the following fields in the new row, then click Save (labeled ⑥):
| Field | Value |
|---|---|
| Provider ID (labeled ②) | ofox |
| Base URL (labeled ③) | https://api.ofox.ai |
| API Key (labeled ④) | Your OfoxAI API Key |
| API Mode (labeled ⑤) | Anthropic |

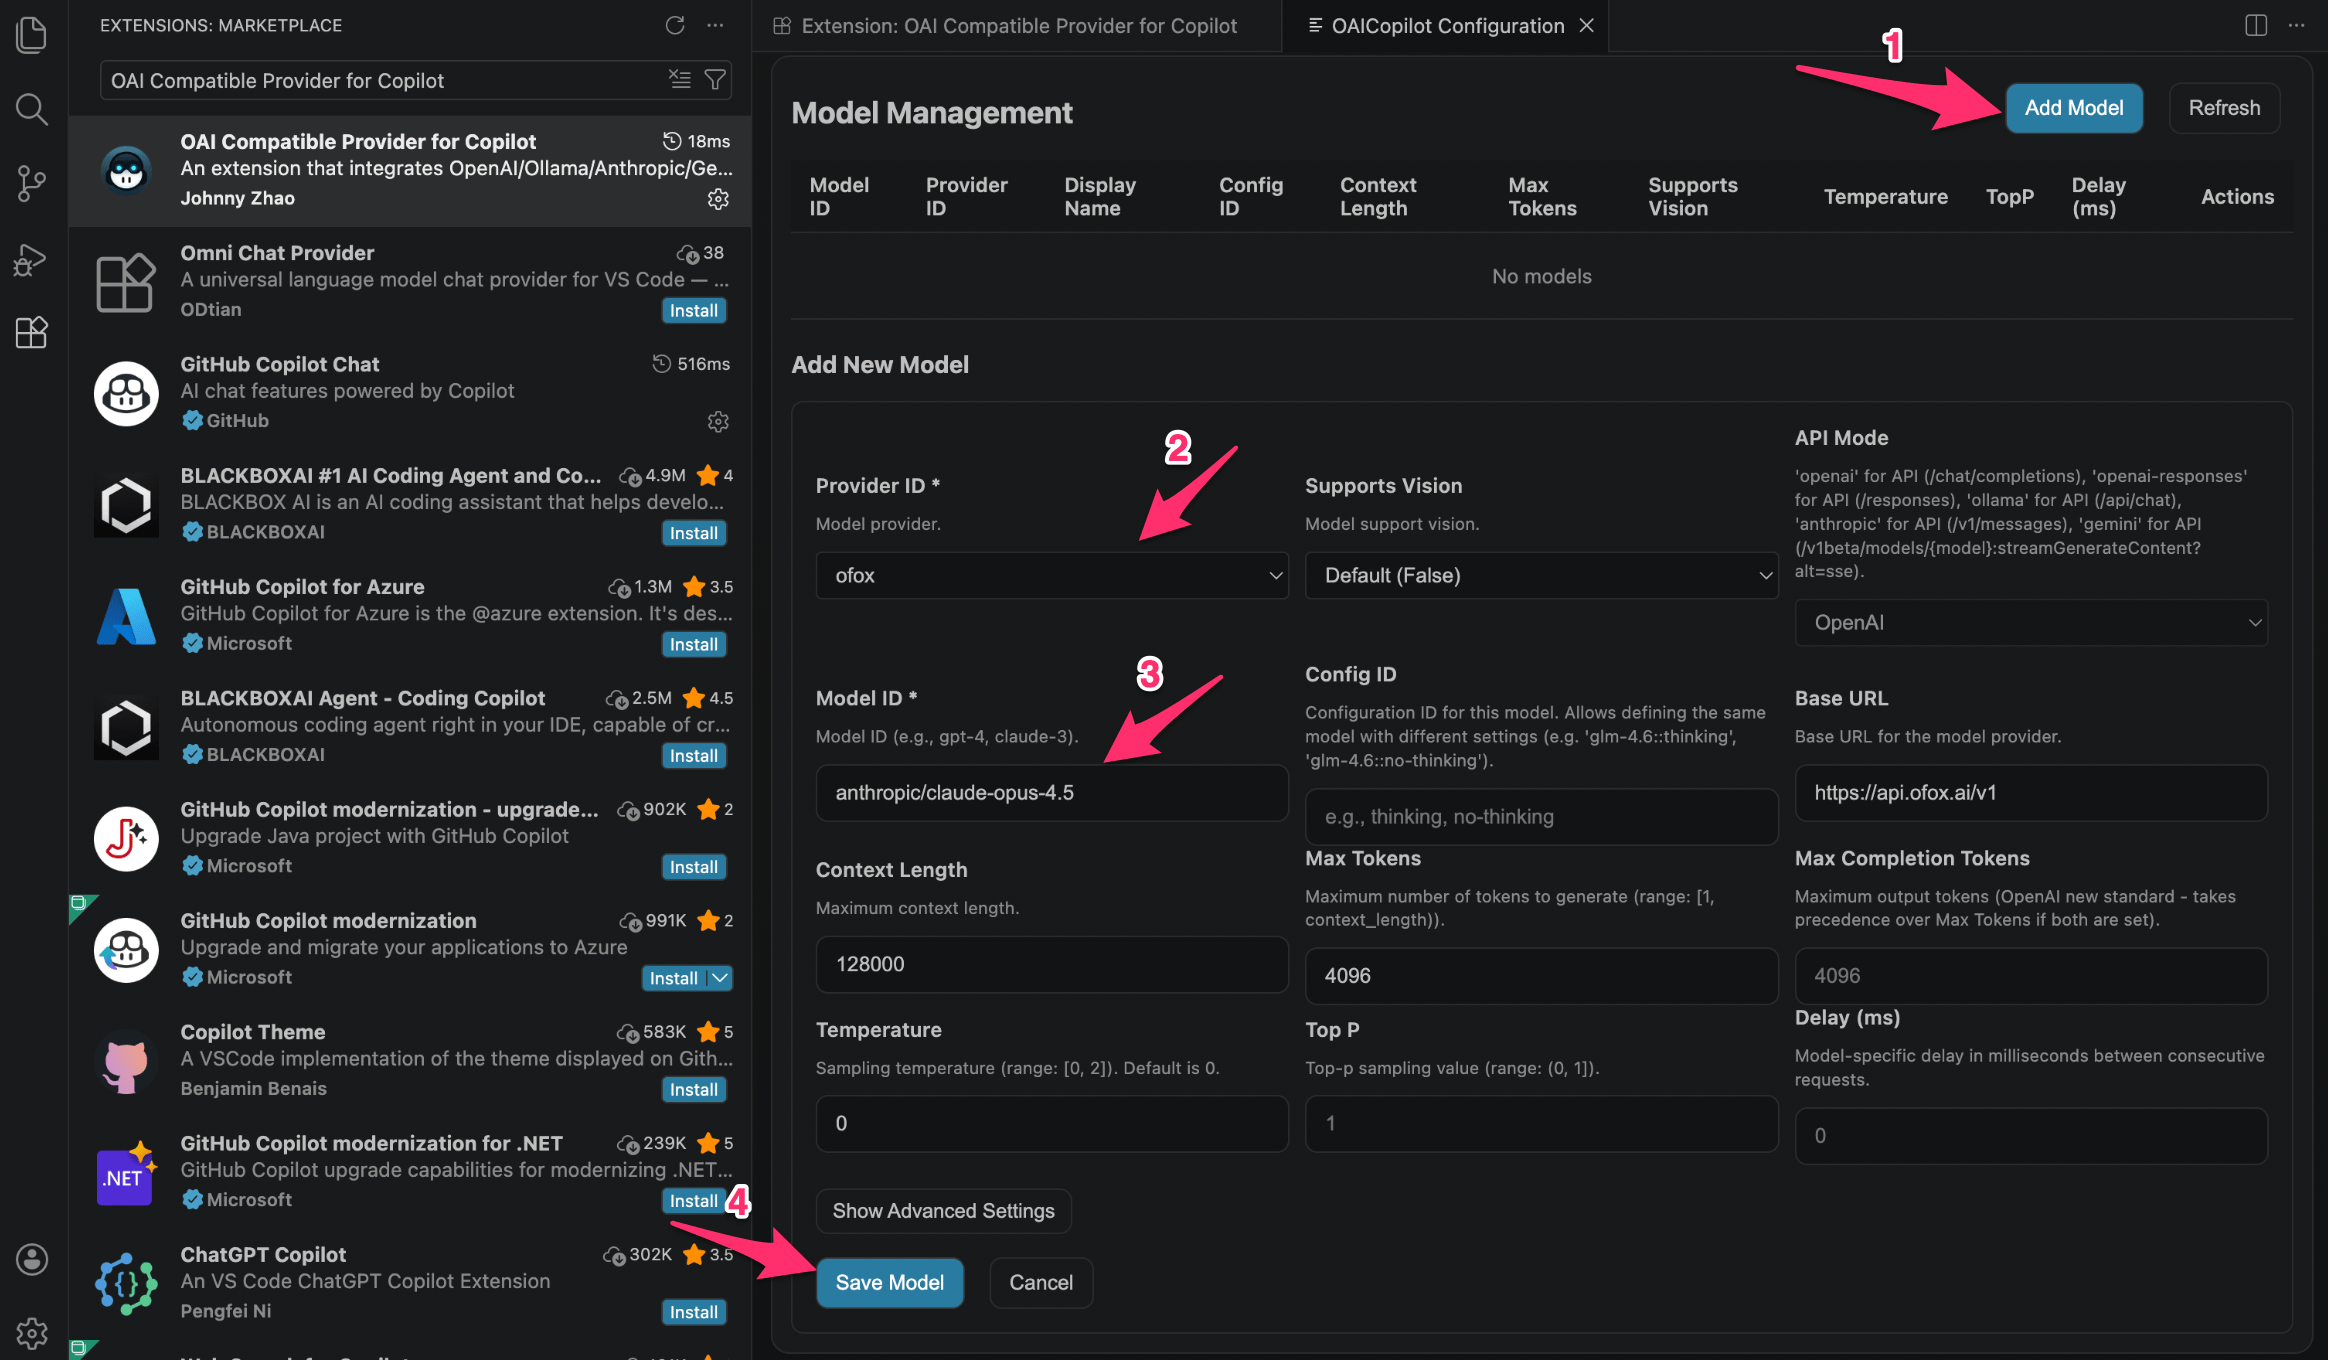
Step 5: Add a Model
In the Model Management section, click Add Model (labeled ①), fill in the following fields, then click Save Model (labeled ④):
| Field | Value |
|---|---|
| Provider ID (labeled ②) | ofox |
| Model ID (labeled ③) | Model name, e.g. anthropic/claude-opus-4.5 |
You can repeat this step to add multiple models:
anthropic/claude-sonnet-4.6
anthropic/claude-opus-4.6
openai/gpt-4o
openai/gpt-4o-mini
google/gemini-3.1-flash-lite-preview
Step 6: Select a Model in the Chat Panel
Open the Copilot Chat panel, click the model selector, disable Auto mode, and find the OfoxAI models you added under Other Models.
If you can’t see the models, click Manage Models… to go to the model list page.

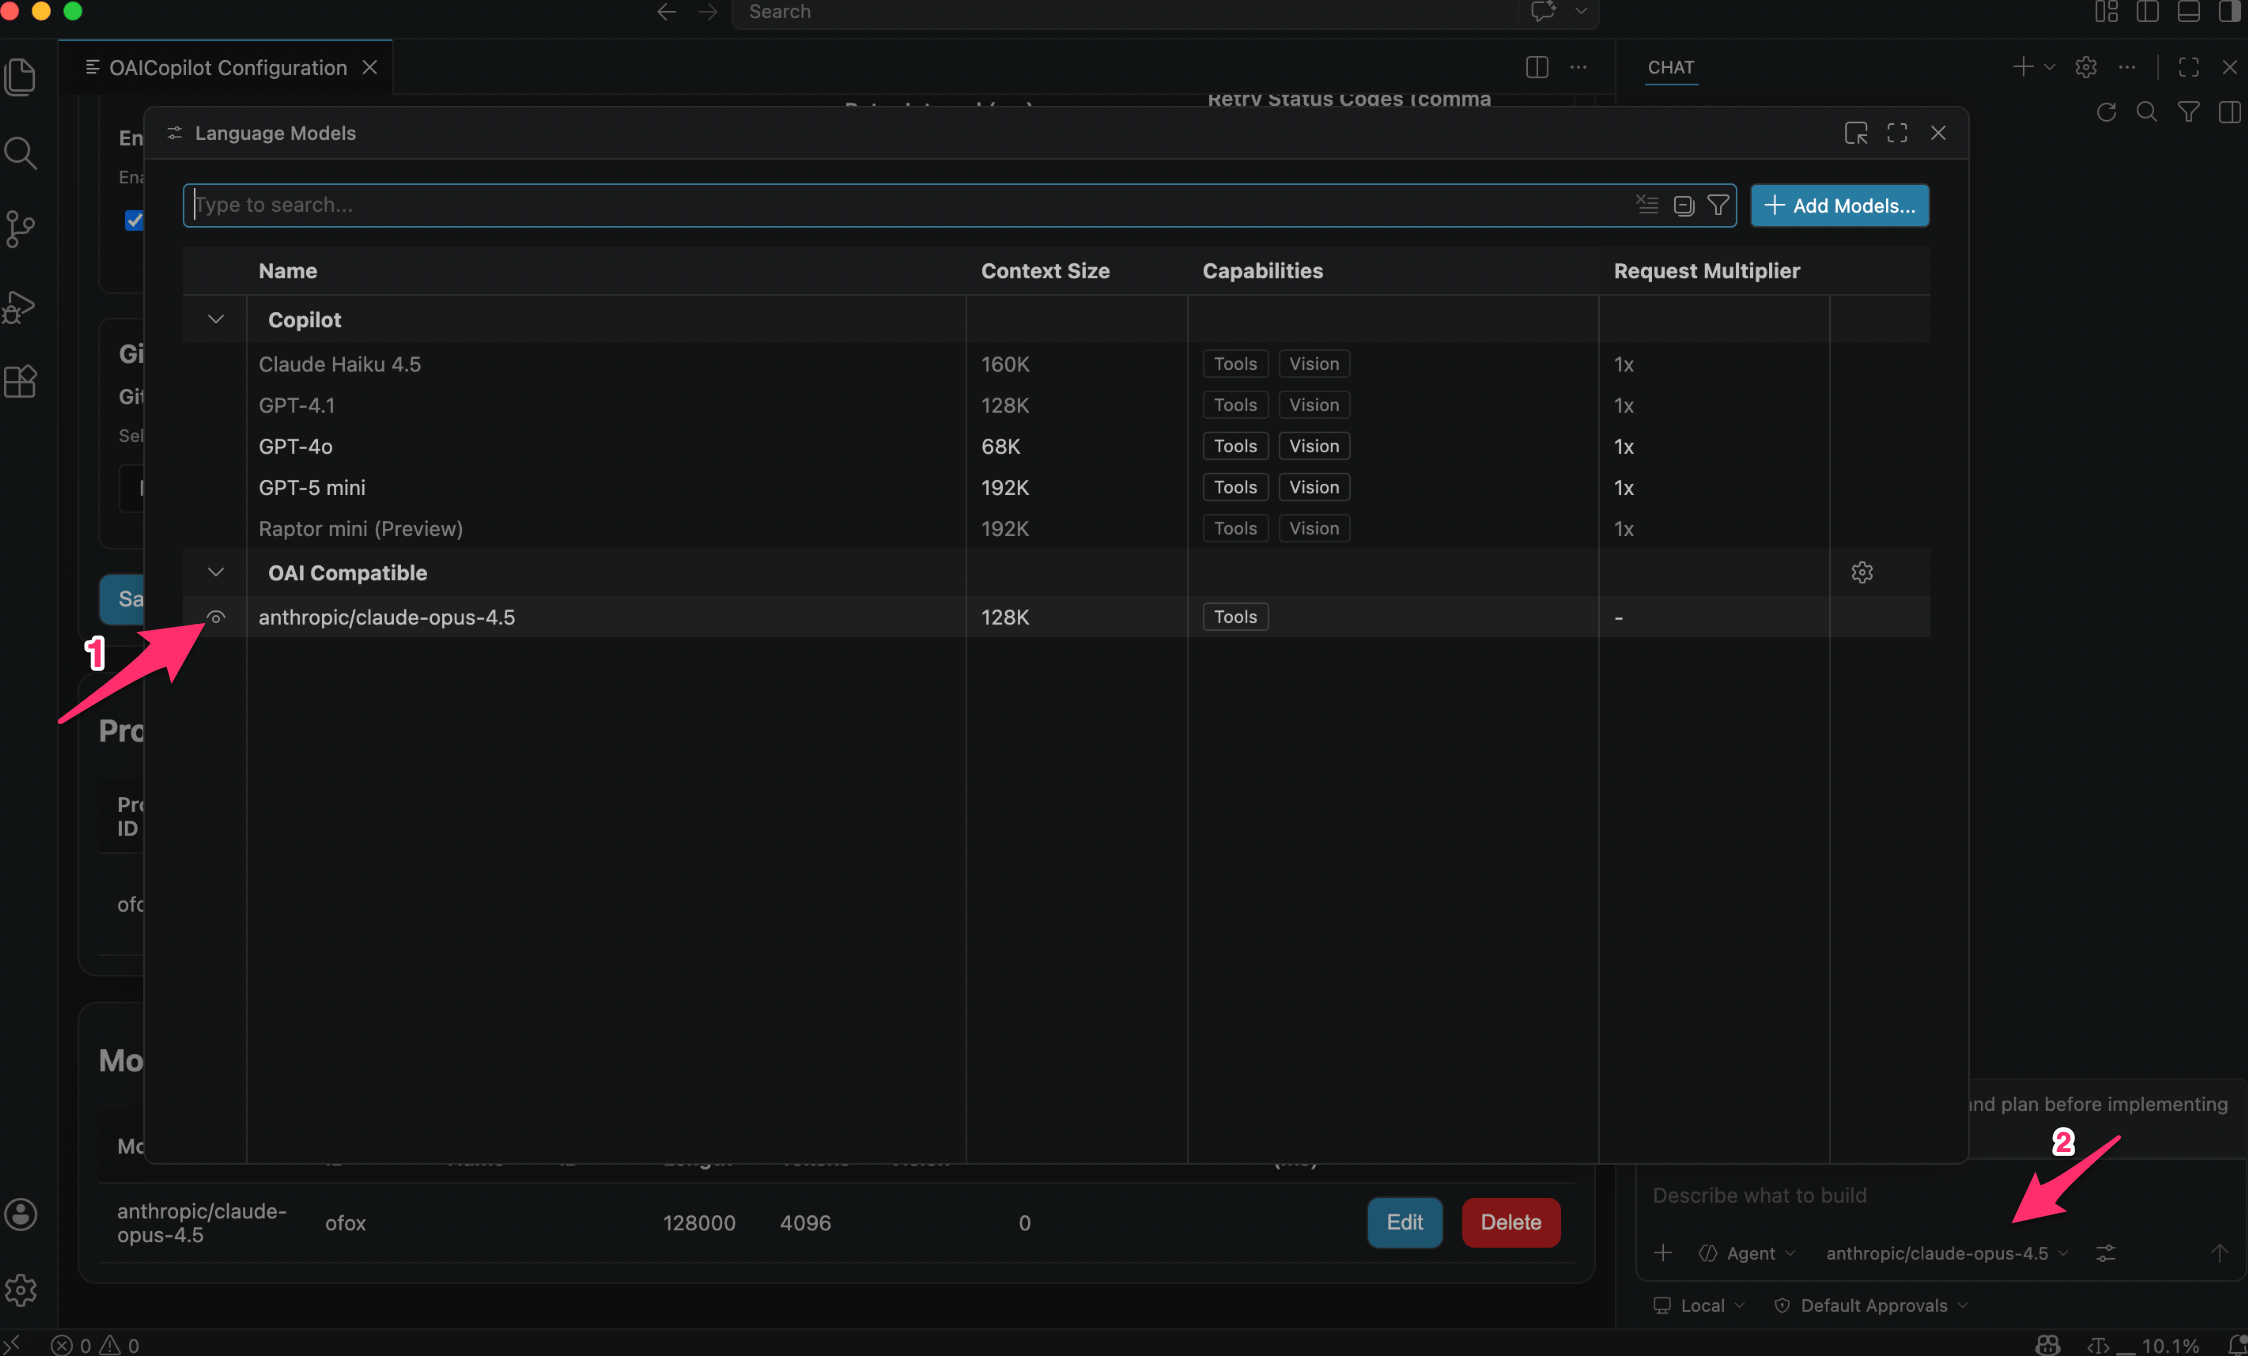
Step 7: Confirm Model and Start Using
In the Language Models panel, the OfoxAI models you added will appear under the OAI Compatible group. Select a model in the chat box in the bottom right to start chatting.
Recommended Models
For recommended models, see the Model Marketplace .
FAQ
Q: I can’t find the extension in the marketplace
Search the full name OAI Compatible Provider for Copilot, or search by the author name Johnny Zhao.
Q: I can’t find OAICopilot: Open Configuration UI in the Command Palette
Make sure the extension is installed and enabled. You may need to reload the VS Code window after installation (Cmd+Shift+P → Reload Window).
Q: The models I added don’t appear in the chat panel
In the model selector dropdown, disable Auto mode and look under the Other Models category, or click Manage Models… to check if the models were added correctly.
Q: “Invalid API Key” error or request failure
Check the following:
- Is the Global Base URL exactly
https://api.ofox.ai/v1(no trailing slash)? - Was the API Key copied in full from the OfoxAI Console (no leading/trailing spaces)?
- Is the Provider’s API Mode set to
Anthropic?
Q: Tab completion still uses the official Copilot model
This is expected behavior. OAI Compatible Provider currently only affects Copilot Chat conversations. Tab code completion is controlled by GitHub Copilot officially.
Q: I’m a Copilot Business / Enterprise user — can I use this?
Not currently. This extension only supports GitHub Copilot Individual users. Business and Enterprise users will need to wait for future version support.